Vue lecture

Il y a de nouveaux articles disponibles, cliquez pour rafraîchir la page.
✇MS Technology Talk

Managing Files Across Microsoft 365

Microsoft 365 is a powerful suite of productivity tools that includes a wide range of apps and services. One of the key features of Microsoft 365 is its ability to manage files across various apps and services. With Microsoft 365, you can store, share, and collaborate on files with ease. In this blog post, we’ll explore some best practices for managing files across Microsoft 365.

Use OneDrive for Business or SharePoint Online

One of the most important things you can do to manage your files effectively is to use OneDrive for Business or SharePoint Online. These cloud storage solutions are designed to help you manage and share files across Microsoft 365. They offer features such as version control, co-authoring, and access control to help you manage your files effectively.

With OneDrive for Business, you can store files in the cloud and access them from anywhere. You can also share files with others, and set up access controls to ensure that only authorized users can view or edit them. SharePoint Online, on the other hand, is a powerful collaboration platform that allows you to create team sites, share files, and collaborate with team members.

Use the Microsoft 365 Admin Center

The Microsoft 365 Admin Center provides a centralized location for managing your organization’s files across Microsoft 365. From here, you can manage user permissions, set up retention policies, and configure data loss prevention settings. You can also track user activity and audit logs to ensure that your files are being used appropriately.

One of the key benefits of the Microsoft 365 Admin Center is its ability to manage permissions. You can grant or revoke access to files and folders, and set up role-based access controls to ensure that only authorized users can access sensitive data.
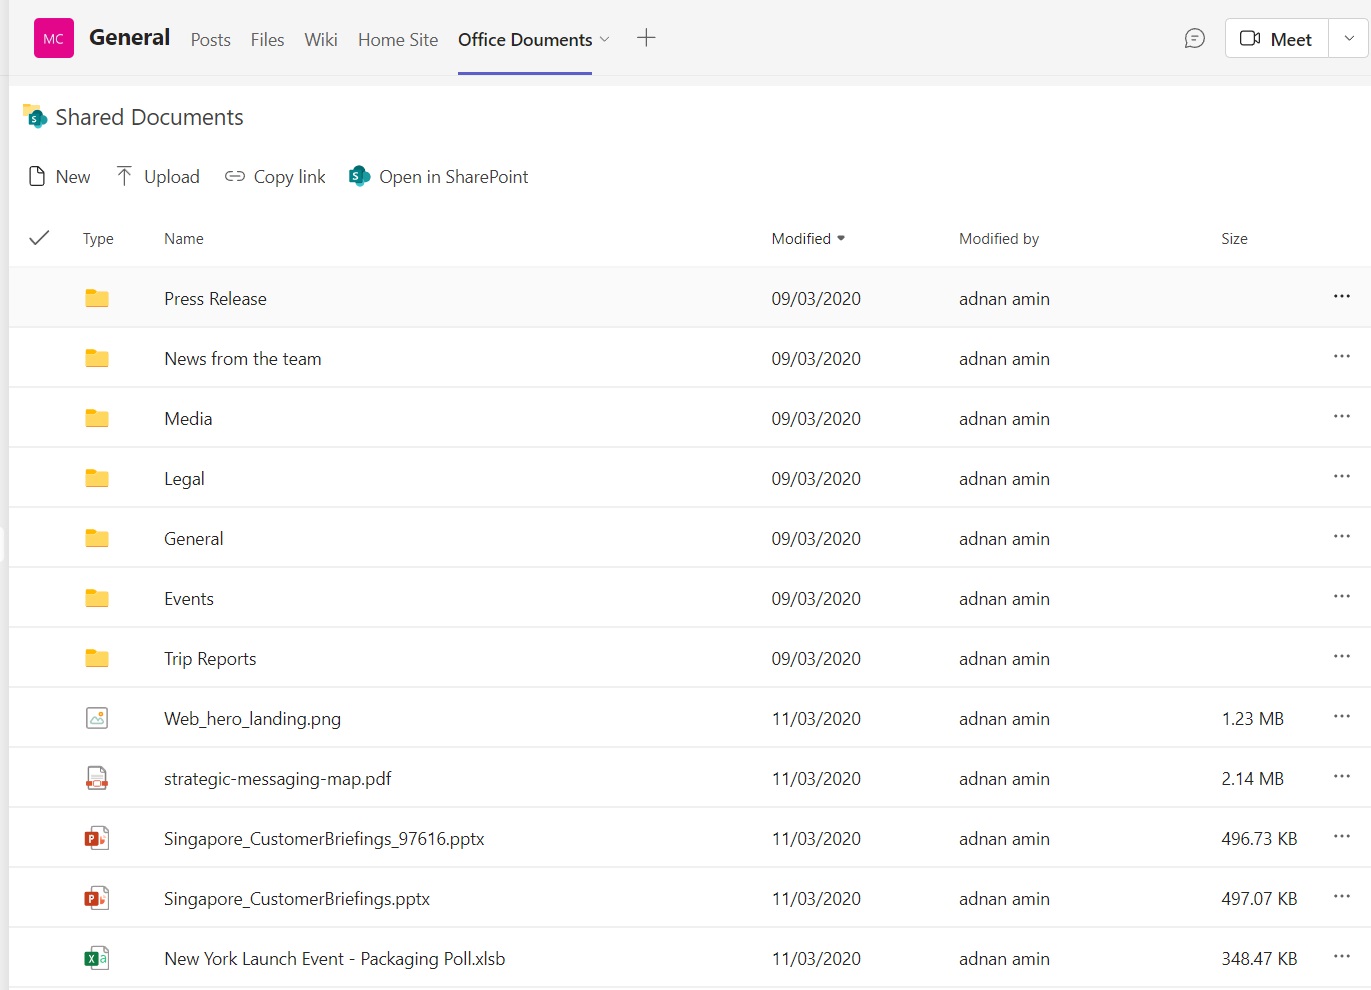
Use Microsoft Teams

Microsoft Teams is a collaboration platform that integrates with Microsoft 365. You can use Teams to store files, collaborate on documents, and chat with team members. Teams also integrates with other Microsoft 365 apps like OneNote, Planner, and Power BI.

One of the key benefits of using Teams is its ability to integrate with other apps. You can create channels for specific projects, and share files and information with team members. You can also use Teams to host virtual meetings and collaborate on documents in real-time.

Use Compliance Manager

Compliance Manager is a Microsoft 365 feature that helps you manage compliance-related tasks, such as GDPR, ISO 27001, and HIPAA. It provides a dashboard for tracking compliance tasks and provides guidance on how to meet compliance requirements.

With Compliance Manager, you can track compliance tasks across your organization, and get guidance on how to meet compliance requirements. You can also use Compliance Manager to create reports and dashboards that show your compliance status.
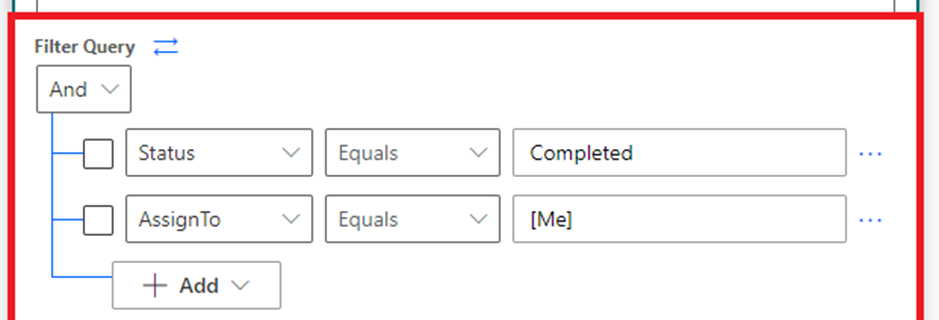
Use Power Automate

Power Automate is a Microsoft 365 tool that allows you to automate tasks across Microsoft 365. You can use Power Automate to create workflows that move files between apps, trigger actions based on certain events, and automate other repetitive tasks.

One of the key benefits of Power Automate is its ability to automate tasks. You can create workflows that move files between apps, and trigger actions based on certain events. This can help you save time and reduce manual errors.

Managing files across Microsoft 365 can be a complex process, but with the right tools and strategies, you can make it easier. By using OneDrive for Business or SharePoint Online, the Microsoft 365 Admin Center, Microsoft Teams, Compliance Manager, and Power Automate, you can manage your files effectively, ensure compliance, and collaborate with team members seamlessly.

The post Managing Files Across Microsoft 365 appeared first on MS Technology Talk.

✇MS Technology Talk

SharePoint Online and Power Platform: Creating Powerful Solutions

SharePoint Online is a powerful collaboration tool that enables organizations to store, share, and manage content and documents securely in the cloud. However, with the integration of Power Platform, SharePoint Online becomes a robust platform for creating powerful solutions that can automate business processes, build custom applications, and integrate with other services.

Power Platform is a suite of tools that includes PowerApps, Power Automate, and Power BI. These tools are designed to enable users to create custom applications, automate workflows, and gain insights from data. By combining the capabilities of SharePoint Online and Power Platform, organizations can create powerful solutions that address their unique business needs.

Here are some of the ways that SharePoint Online and Power Platform can be used to create powerful solutions:

Automating workflows

Power Automate, formerly known as Microsoft Flow, is a cloud-based service that enables users to create automated workflows between different applications and services. With SharePoint Online, users can create workflows that automate tasks such as document approval, notifications, and reminders. These workflows can be triggered automatically based on specific conditions, such as when a document is added or modified.

Building custom applications

PowerApps enables users to build custom applications without any coding knowledge. With SharePoint Online, users can create custom forms and applications that integrate with SharePoint lists and libraries. This enables users to create custom solutions that automate business processes, such as managing customer information or tracking inventory.

Integrating with other services

Power BI is a business analytics service that enables users to analyze data and share insights. With SharePoint Online, users can create dashboards and reports that integrate with Power BI. This enables users to gain insights from data stored in SharePoint Online and other services, such as Excel or Dynamics 365.

Creating chatbots

Power Virtual Agents is a service that enables users to create chatbots without any coding knowledge. With SharePoint Online, users can create chatbots that provide quick access to information stored in SharePoint lists and libraries. This enables users to create conversational interfaces that automate common tasks and provide answers to frequently asked questions.

In conclusion, SharePoint Online and Power Platform can be used to create powerful solutions that automate business processes, build custom applications, and integrate with other services. These tools enable organizations to work more efficiently, gain insights from data, and provide better service to customers. If you’re not already using SharePoint Online and Power Platform, it’s worth exploring how these tools can help you achieve your business goals.

The post SharePoint Online and Power Platform: Creating Powerful Solutions appeared first on MS Technology Talk.

✇MS Technology Talk

Streamlining Talent Management In SharePoint HR Portal

In today’s business world, effective talent management has become a critical aspect of organizational success. With the right talent management practices, businesses can attract, develop, and retain top talent to drive their growth and achieve their strategic objectives. One way to streamline talent management is through the use of a SharePoint HR portal. In this blog post, we will explore how SharePoint HR portals can help organizations streamline talent management and improve their overall HR processes.

What is a SharePoint HR Portal?

A SharePoint HR portal is a web-based platform that allows organizations to manage various HR processes, including recruitment, onboarding, performance management, learning and development, and employee engagement. SharePoint HR portals provide a centralized location for HR-related information and services, making it easier for employees to access and interact with HR processes.

Streamlining Talent Management in SharePoint HR Portal

Recruitment

SharePoint HR portals can help streamline the recruitment process by providing a platform for posting job vacancies, accepting applications, and conducting interviews. The portal can also automate certain tasks, such as sending automated responses to candidates and scheduling interviews, freeing up HR personnel’s time to focus on other tasks.

Onboarding

Onboarding new employees can be a time-consuming process. SharePoint HR portals can help by providing a platform for new employees to complete necessary paperwork, view training materials, and communicate with their managers and HR personnel. By providing a centralized location for all onboarding-related activities, organizations can ensure that the process is consistent and efficient.

Performance Management

Effective performance management is essential for retaining top talent and driving business success. SharePoint HR portals can help by providing a platform for setting performance goals, tracking progress, and conducting performance reviews. By automating certain tasks, such as scheduling review meetings and sending reminders, HR personnel can spend more time on coaching and developing employees.

Learning and Development

Continuous learning and development are critical for employee growth and development. SharePoint HR portals can provide a platform for delivering training materials, tracking progress, and providing feedback. By using a SharePoint HR portal for learning and development, organizations can ensure that their employees have access to the training they need to succeed.

Employee Engagement

Employee engagement is critical for retaining top talent and driving business success. SharePoint HR portals can help by providing a platform for employee feedback, communication, and collaboration. By providing a centralized location for employee engagement activities, organizations can ensure that they are consistently engaging with their employees and addressing their concerns.

SharePoint HR portals can help streamline talent management processes and improve overall HR efficiency. By providing a centralized location for HR-related activities, organizations can ensure that their HR processes are consistent, efficient, and effective. So, if you want to streamline your talent management practices, consider using a SharePoint HR portal today.

The post Streamlining Talent Management In SharePoint HR Portal appeared first on MS Technology Talk.

✇MS Technology Talk

Optimize SharePoint Online for Better Performance and User Experience

SharePoint Online is a cloud-based collaboration platform that offers a wide range of features and functionalities for businesses of all sizes. However, as your SharePoint Online deployment grows, it can become slower and less responsive, resulting in a poor user experience. In this blog post, we will explore some ways to optimize SharePoint Online for better performance and user experience.

Optimize Site Architecture

Site architecture is critical to the performance of SharePoint Online. A poorly designed site architecture can lead to slower page load times and decreased user productivity. To optimize site architecture, consider the following:

  • Keep the site structure simple and logical. Use a hierarchical structure with as few levels as possible.
  • Avoid using too many sub-sites or document libraries within a site. Each sub-site or library requires additional processing power and can slow down the site.
  • Use metadata to organize and categorize content. Metadata helps users find information quickly and reduces the need for nested folders.

Optimize Content

Content is one of the primary factors affecting SharePoint Online performance. Too much content can slow down the site and make it difficult for users to find what they need. To optimize content, consider the following:

  • Archive old or unused content. This reduces the amount of data that SharePoint Online needs to process, resulting in faster performance.
  • Use content approval workflows to ensure that only approved content is published. This helps keep the site organized and reduces clutter.
  • Use version control to track changes to content. This reduces the need for multiple copies of the same document, which can slow down the site.

Optimize Search

Search is a critical feature of SharePoint Online. Users rely on search to find information quickly and easily. To optimize search, consider the following:

  • Use metadata to improve search results. Metadata provides additional context about content and helps users find what they need more quickly.
  • Limit the number of search scopes to improve search performance. Each search scope requires additional processing power, which can slow down the site.
  • Use search result refiners to help users filter and refine search results.

Optimize Permissions

Permissions can also affect SharePoint Online performance. Too many permissions can slow down the site and make it difficult to manage. To optimize permissions, consider the following:

  • Use SharePoint groups to manage permissions. This makes it easier to manage permissions for multiple users and reduces the number of individual permissions.
  • Limit the number of unique permissions. Each unique permission requires additional processing power, which can slow down the site.
  • Regularly review and clean up permissions. This helps ensure that permissions are up-to-date and accurate.

Optimizing SharePoint Online for better performance and user experience requires a proactive approach to site design, content, search, and permissions. By following these best practices, businesses can ensure that their SharePoint Online deployment is fast, efficient, and responsive, resulting in a better user experience for all users. So, if you want to get the most out of your SharePoint Online deployment, start optimizing today.

The post Optimize SharePoint Online for Better Performance and User Experience appeared first on MS Technology Talk.

✇MS Technology Talk

Document Automation and Approval in SharePoint Online

SharePoint Online is a powerful platform that enables organizations to efficiently manage their documents and collaborate with colleagues in a secure manner. One of the most valuable features of SharePoint Online is its ability to automate document approval workflows, streamlining the document review process and ensuring that all documents are properly reviewed and approved before they are published or shared.

In this blog post, we will explore how to use SharePoint Online for document automation and approval, and how to leverage Power Automate to create a more streamlined approval process.

Create a Document Library

The first step in automating document approval workflows in SharePoint Online is to create a document library. A document library is a container that stores documents, and it provides features such as versioning, check-in and check-out, and document approval workflows.

Enable Document Approval

Once you have created your document library, the next step is to enable document approval. Document approval ensures that all documents are properly reviewed and approved before they are published or shared. To enable document approval in SharePoint Online, follow these steps:

  1. Go to your document library and click on the gear icon in the top right corner.
  2. Select “Library settings” from the drop-down menu.
  3. Click on “Versioning settings” under the “General Settings” section.
  4. Scroll down and select “Yes” under “Require content approval for submitted items?”.
  5. Click on “OK” to save your changes.

Create a Power Automate Flow

The final step in automating document approval workflows in SharePoint Online is to create a Power Automate flow. A flow is a sequence of actions that are triggered by a specific event, such as a document being uploaded to the document library. To create a Power Automate flow for document approval in SharePoint Online, follow these steps:

  1. Go to Power Automate and click on “Create” in the top navigation menu.
  2. Select “Automated cloud flow” and give your flow a name.
  3. Under “Choose your flow’s trigger”, select “When a file is created or modified (properties only)”.
  4. Select your SharePoint Online site and document library.
  5. Under “Choose an action”, search for “Start and wait for an approval”.
  6. Configure the approval settings, such as approver, due date, and approval outcome options.
  7. Save your flow.

Using SharePoint Online for document automation and approval can significantly improve your organization’s efficiency and productivity. By creating a document library, enabling document approval, and creating a Power Automate flow for approval, you can streamline the document review process and ensure that all documents are properly reviewed and approved before they are published or shared.

If you are new to SharePoint Online or Power Automate or are looking for more advanced automation capabilities, consider partnering with a SharePoint consulting firm. SharePoint consultants can help you maximize the potential of your SharePoint Online platform and ensure that you are leveraging all of the features and functionalities available to you.

The post Document Automation and Approval in SharePoint Online appeared first on MS Technology Talk.

✇MS Technology Talk

SharePoint filter query in Power Automate

SharePoint is a powerful tool for businesses to store and manage data. However, as data accumulates, it can become difficult to find and sort through information. That’s where filters come in. SharePoint filter queries allow users to narrow down their data to only what they need, making it easier to manage and analyze.

In this blog post, we’ll explore SharePoint filter queries in Power Automate, and how they can help streamline your business processes.

What are SharePoint filter queries?

SharePoint filter queries are a way to narrow down the data stored in SharePoint lists or libraries. Filters allow users to specify which data should be returned based on specific criteria. These criteria can include anything from dates and numbers to text strings and user names.

Filter queries in SharePoint are written in OData syntax, which is a standardized way of expressing queries across a range of data sources. This syntax can be a bit intimidating for those who are new to SharePoint, but once you get the hang of it, it can be a powerful tool for managing your data.

Using filters in Power Automate

Power Automate is a cloud-based tool that allows users to automate tasks and workflows. With Power Automate, you can easily connect SharePoint to other applications and automate tasks based on specific criteria.

To use filters in Power Automate, you’ll need to create a flow that connects to your SharePoint list or library. Once you’ve done that, you can add a “Get items” action to your flow. This action allows you to specify which items you want to retrieve from your SharePoint list or library.

To add a filter query to your “Get items” action, you’ll need to click on the “Show advanced options” link in the action’s configuration panel. From there, you can enter your filter query using the OData syntax.

Here’s an example of a filter query that retrieves all items from a SharePoint list where the “Status” column is set to “In Progress”:

Status eq 'In Progress'

In this example, “Status” is the name of the column we want to filter by, “eq” is the operator we’re using to compare values, and “In Progress” is the value we’re comparing against.

You can also use logical operators like “and” and “or” to combine multiple criteria in your filter query. Here’s an example of a filter query that retrieves all items from a SharePoint list where the “Status” column is set to “In Progress” and the “Assigned To” column is set to the current user:

Status eq 'In Progress' and AssignedTo eq '[Me]'

In this example, “[Me]” is a special keyword that represents the current user.

Once you’ve added your filter query, you can save your flow and test it to make sure it’s working correctly.

Benefits of using filters in Power Automate

Using filters in Power Automate can help streamline your business processes in a number of ways. Here are a few benefits:

  • Reduced workload: By automating tasks based on specific criteria, you can reduce the amount of manual work required to manage your data.
  • Improved accuracy: Filters help ensure that you’re only working with the data you need, which can improve the accuracy of your analyses and reports.
  • Faster decision-making: By quickly retrieving the data you need, you can make faster and more informed decisions.
  • Better collaboration: By sharing specific views of your data with others, you can improve collaboration and communication within your team.

SharePoint filter queries in Power Automate are a powerful tool for managing and analyzing data. By using filters, you can narrow down your data to only what you need, making it easier to manage and analyze. If you’re new to SharePoint filter queries, it may take some time to learn but at you will get the data what you need.

The post SharePoint filter query in Power Automate appeared first on MS Technology Talk.

✇MS Technology Talk

SharePoint Online for Compliance: Meeting Regulatory Requirements

As businesses rely more and more on digital platforms, regulatory compliance becomes an increasingly important concern. SharePoint Online is an excellent tool for meeting regulatory requirements because it offers powerful document management features, robust security options, and customizable workflows. In this post, we’ll explore how SharePoint Online can help businesses meet regulatory compliance requirements.

Identify Relevant Regulations

The first step in meeting regulatory compliance requirements is to identify which regulations are relevant to your organization. This can include industry-specific regulations, such as HIPAA or GDPR, or more general regulations, such as the Sarbanes-Oxley Act. By understanding the regulations that apply to your organization, you can identify the specific compliance requirements that you need to meet.

Use SharePoint Online for Document Management

Document management is a critical component of regulatory compliance. SharePoint Online offers robust document management features, including version control, metadata, and retention policies, that can help businesses manage documents and ensure compliance with regulations. By using SharePoint Online for document management, businesses can track changes to documents, enforce retention policies, and ensure that documents are stored securely.

Customize Workflows

Custom workflows can be designed and implemented in SharePoint Online to automate compliance-related tasks, such as document approval or notification of changes to regulations. Custom workflows can ensure that tasks are completed correctly and on time, reducing the risk of non-compliance.

Utilize Security Features

Security is a crucial aspect of regulatory compliance. SharePoint Online offers several security features, such as access controls, encryption, and multi-factor authentication, that can help businesses protect sensitive data and ensure compliance with regulations. By using these security features, businesses can ensure that only authorized users have access to sensitive information, reducing the risk of data breaches and non-compliance.

Conduct Audits and Assessments

Regular audits and assessments are essential for ensuring compliance with regulations. SharePoint Online can be used to store audit trails, conduct risk assessments, and track compliance activities. By using SharePoint Online to conduct audits and assessments, businesses can identify areas of non-compliance and take corrective actions to address them.

SharePoint Online is an excellent tool for meeting regulatory compliance requirements. By identifying relevant regulations, using SharePoint Online for document management, customizing workflows, utilizing security features, and conducting audits and assessments, businesses can ensure compliance with regulations and protect sensitive data. With the right tools and practices in place, SharePoint Online can become a valuable asset for regulatory compliance, helping businesses stay compliant and avoid costly penalties.

The post SharePoint Online for Compliance: Meeting Regulatory Requirements appeared first on MS Technology Talk.

✇MS Technology Talk

How to Check if a Microsoft Team Already Exists using Power Automate using Team Title

Power Automate (formerly known as Microsoft Flow) is a powerful tool that allows you to automate workflows between different applications and services. One common use case is to automate the creation of Microsoft Teams. However, before creating a new Microsoft Team, it’s important to check if a team with the same title already exists. In this blog post, we’ll show you how to use Power Automate to check if a Microsoft Team already exists using the team title.

Comparing a Microsoft Team’s existence based on its title is a simple process. You can add this activity to a new Flow by passing the team title as a parameter, or you can include it in an existing Flow. The result of this action will be a Boolean value.

Step 1: “List Teams” Action from the Microsoft Teams Connector

Next, you need to add the “List Teams” action from the Microsoft Teams connector. To do this, search for “List Teams” in the search bar and select the “Get teams” action.

Step 2: Add expression to “Compose” Action

Now, Add the “Compose” Action and can add a formula express on “List Teams” action verifying the Team Title to compare. Check the below example:

contains(string(outputs('List_teams')?['body']),triggerBody()['text'])

This will return a Boolean value which you can condition to condition and can add actions to your flow to perform additional actions based on this information.

In this blog post, we showed you how to use Power Automate to check if a Microsoft Team already exists using the team title. By following these steps, you can ensure that you don’t create duplicate Microsoft Teams and streamline your workflow. Power Automate is a powerful tool that can help you automate many repetitive tasks, saving you time and improving your productivity.

The post How to Check if a Microsoft Team Already Exists using Power Automate using Team Title appeared first on MS Technology Talk.

✇MS Technology Talk

Comparing Microsoft Lists and SharePoint Lists

If you’re looking for a way to organize and track data within your organization, Microsoft has two tools that may be of interest: Microsoft Lists and SharePoint Lists. While they share some similarities, there are also some key differences between the two tools. In this blog post, we’ll explore the differences and similarities between Microsoft Lists and SharePoint Lists.

Creating and Managing Lists

When it comes to creating and managing lists, both Microsoft Lists and SharePoint Lists provide similar functionality. Both tools allow you to create custom lists that can be used to track items such as tasks, issues, inventory, and contacts. You can also customize columns, apply formatting, and use templates to quickly create new lists.

However, Microsoft Lists has a few additional features that SharePoint Lists do not. For example, Microsoft Lists comes with a variety of pre-built templates that can be used to create lists quickly and easily. There are templates for things like issue tracking, event itineraries, and content schedules. Microsoft Lists also has a mobile app that allows you to access your lists from your smartphone or tablet.

Collaboration and Integration

Both Microsoft Lists and SharePoint Lists allow for collaboration among multiple people. Changes made by one person are immediately visible to others, making it easy to keep everyone up-to-date. However, Microsoft Lists takes collaboration a step further with its integration with other Microsoft 365 apps. For example, you can set up a flow that sends an email notification when a new item is added to a list, or use Power BI to create visualizations of your data.

SharePoint Lists also integrate with other SharePoint features, such as workflows and forms. This can be useful if you’re already using SharePoint and want to keep everything in one place.

Ease of Use

One of the biggest differences between Microsoft Lists and SharePoint Lists is ease of use. Microsoft Lists is designed to be a simple and user-friendly tool, with a modern and intuitive interface. It’s easy to create and customize lists, and the mobile app makes it easy to manage your data on-the-go.

SharePoint Lists, on the other hand, can be a bit more complex to use. While it has many of the same features as Microsoft Lists, it’s designed to be part of a larger SharePoint ecosystem. This means there are more options and customization settings available, but it can also be more difficult to navigate for new users. Both Microsoft Lists and SharePoint Lists are powerful tools for organizing and tracking data within your organization. While they share many similarities, there are also some key differences between the two. Microsoft Lists is designed to be simple and user-friendly, with pre-built templates and integration with other Microsoft 365 apps. SharePoint Lists, on the other hand, is part of a larger SharePoint ecosystem and offers more customization options. Which tool is right for you will depend on your specific needs and preferences.

The post Comparing Microsoft Lists and SharePoint Lists appeared first on MS Technology Talk.

✇MS Technology Talk

Disable OneDrive for Business Access for All licensed users

OneDrive for Business is a cloud-based storage solution that allows users to store, share, and collaborate on files from anywhere. However, in some cases, an organization may want to disable OneDrive for Business access for licensed users. In this blog post, we will look at how to disable OneDrive for Business access for licensed users.

Access the SharePoint admin center

To disable OneDrive for Business access for licensed users, you need to access the SharePoint admin center. You can access this center by signing in to your Microsoft 365 admin center and selecting “Admin centers” > “SharePoint.”

Go to the “User profiles” page

Once you are in the SharePoint admin center, go to the “User profiles” page. You can find this page by selecting “More Features” > > “User profiles” from the left-hand navigation menu.

Modify the Manage User Permissions

In the “User profiles” page, you can edit the user profile properties. Select the user profile you want to disable OneDrive for Business access for and click on the “Edit” button and disable the OneDrive access.  But to disable it for all users across tenant you can click on “Manage User Permissions”.

Select the Everyone except external users and uncheck “Create Personal Site (required for personal storage, newsfeed, and followed content)”

Click “Save” to apply the changes.

Verify the changes

To verify that the changes have been applied, go to the “OneDrive for Business” page in the SharePoint admin center. You can find this page by selecting “OneDrive” from the left-hand navigation menu. Select the user you disabled OneDrive for Business access for and verify that their access has been disabled.

Note: If a user already provisioned the OneDrive than above setting will disable the access for that user. You would need to revoke the access for that user.

Enable OneDrive for Business Access for all licensed users

Follow the same steps to enable the OneDrive for business access for licensed users,

And that’s it! You now know how to disable OneDrive for Business access for licensed users. This can be a useful feature for organizations that want to limit access to OneDrive for Business for some time.

The post Disable OneDrive for Business Access for All licensed users appeared first on MS Technology Talk.

✇MS Technology Talk

Manage Knowledge and Information in SharePoint Online

As organizations generate more and more data, managing knowledge and information becomes an increasingly important task. SharePoint Online is an excellent platform for managing knowledge and information because it offers powerful document management features, a robust search engine, and intuitive collaboration tools. In this post, we’ll explore how to manage knowledge and information in SharePoint Online and discuss best practices.

Create a Document Library

The first step in managing knowledge and information in SharePoint Online is to create a document library. A document library is a central repository for all types of files, including documents, spreadsheets, presentations, and images. A document library can be customized to suit the needs of a particular team or department, and it can be secured to ensure that only authorized users can access it.

Organize Content with Metadata

Once documents are added to a document library, it’s essential to organize them so that they can be easily found. Metadata is an excellent tool for organizing content in SharePoint Online. Metadata allows users to add descriptive information to documents, such as author, date, and keywords, making it easier to search and find content.

Use Version Control

Version control is a critical feature of SharePoint Online that allows teams to manage changes to documents effectively. When changes are made to a document, SharePoint Online automatically creates a new version, allowing team members to track changes, revert to earlier versions if necessary, and collaborate on documents without the risk of overwriting each other’s work.

Leverage the Power of Search

SharePoint Online offers a powerful search engine that allows users to find content quickly and easily. By using metadata and other search features, users can search for specific documents or content, making it easier to find the information they need.

Collaborate with Others

Collaboration is a critical aspect of managing knowledge and information. SharePoint Online offers several collaboration tools that make it easy for teams to work together, such as co-authoring, comments, and alerts. By using these tools, teams can work together in real-time, provide feedback on documents, and stay informed of updates and changes.

Enable Content Approval

Content approval is an essential feature of SharePoint Online that allows organizations to control the quality of content that is added to a document library. By enabling content approval, administrators can ensure that all content meets the organization’s standards and policies before it’s made available to users.

Train Users on Best Practices

Effective knowledge and information management require training and education. It’s essential to ensure that all users understand how to use SharePoint Online effectively and follow best practices. Training can be provided through online tutorials, webinars, or in-person training sessions.

Managing knowledge and information in SharePoint Online requires careful planning and execution. By creating a document library, organizing content with metadata, using version control, leveraging the power of search, collaborating with others, enabling content approval, and training users on best practices, organizations can effectively manage knowledge and information in SharePoint Online. With the right tools and practices in place, SharePoint Online can become a powerful platform for knowledge management, improving productivity, and driving business success.

The post Manage Knowledge and Information in SharePoint Online appeared first on MS Technology Talk.

✇MS Technology Talk

How to Leverage SharePoint Online to Manage Remote Teams

The COVID-19 pandemic has forced many organizations to shift to remote work, and this trend is expected to continue even after the pandemic subsides. While remote work offers many benefits, such as increased flexibility and reduced costs, it also presents unique challenges, such as how to effectively manage teams that are geographically dispersed. Fortunately, SharePoint Online can help organizations overcome these challenges and manage remote teams more effectively. In this post, we’ll explore how to leverage SharePoint Online to manage remote teams.

Set up a Team Site

The first step in managing remote teams in SharePoint Online is to create a Team Site. A Team Site is a dedicated workspace for a team where they can collaborate on projects, share files, and communicate. In SharePoint Online, a Team Site can be created using a template, which includes preconfigured lists, libraries, and web parts that are tailored to the needs of a particular team.

Use the Communication Tools

One of the biggest challenges of managing remote teams is communication. SharePoint Online offers several communication tools that can help teams stay connected and collaborate effectively. For example, Teams can use the News web part to share updates and announcements, the Discussion Board to have conversations, and the Yammer web part to engage in social networking.

Create and Manage Tasks

Managing tasks is another critical aspect of managing remote teams. SharePoint Online offers a built-in task management system that allows teams to create, assign, and track tasks. Tasks can be added to the Tasks list in a Team Site, and they can be assigned to specific team members, given deadlines, and marked as complete when finished.

Use OneDrive for Business

OneDrive for Business is a cloud-based storage service that is included with SharePoint Online. It allows team members to store, sync, and share files securely. By using OneDrive for Business, team members can access files from anywhere, collaborate on documents in real-time, and avoid the risks associated with sending files via email.

Monitor Team Performance

Monitoring team performance is critical for ensuring that remote teams are meeting their goals and objectives. SharePoint Online offers several tools that can help managers track team performance, such as the PerformancePoint Services, which allows managers to create dashboards and reports that provide real-time visibility into team performance.

Train Employees on How to Use SharePoint Online

Effective use of SharePoint Online requires training and education. It’s essential to ensure that all team members understand how to use SharePoint Online and its various features. Training can be provided through online tutorials, webinars, or in-person training sessions.

Ensure Data Security and Compliance

Remote work presents unique security and compliance challenges, particularly with respect to data. It’s essential to ensure that sensitive data is secure and that all team members are following the organization’s data security policies. SharePoint Online offers several security features, such as data encryption and multi-factor authentication, to ensure that data is secure and compliant with regulations. Managing remote teams requires a different set of skills and tools than managing teams in a traditional office setting. SharePoint Online offers many features and tools that can help organizations manage remote teams more effectively. By creating a Team Site, using communication tools, creating and managing tasks, using OneDrive for Business, monitoring team performance, training employees on how to use SharePoint Online, and ensuring data security and compliance, organizations can leverage SharePoint Online to manage remote teams more effectively.

The post How to Leverage SharePoint Online to Manage Remote Teams appeared first on MS Technology Talk.

✇MS Technology Talk

Streamlining Processes with SharePoint and Teams: How to Achieve Better Productivity and Efficiency

Collaboration is key to achieving productivity and efficiency in any organization. SharePoint and Teams are two powerful Microsoft tools that can help streamline processes and increase collaboration among team members. In this blog post, we’ll explore how to use SharePoint and Teams together to streamline your organization’s processes.

The Benefits of SharePoint and Teams

SharePoint and Teams offer several benefits for organizations looking to streamline their processes. These benefits include:

  • SharePoint offers a centralized location for storing and managing data, making it easier for team members to access the information they need.
  • Teams offers real-time collaboration features that allow team members to work together on projects in real-time, increasing productivity and efficiency.
  • SharePoint’s workflow automation features can help streamline processes by automating routine tasks and reducing manual work.
  • SharePoint and Teams integrate with other Microsoft tools, such as OneDrive and Outlook, to provide a comprehensive solution for managing data and collaborating with team members.

Streamlining Processes with SharePoint and Teams:

Here are the steps to streamline your organization’s processes with SharePoint and Teams:

  1. First, Identify the process that you want to streamline. This could be anything from managing customer requests to tracking inventory.
  2. After that, Create a SharePoint list to track the data associated with the process. Use columns to capture the relevant data points and customize the list to fit your needs.
  3. Create a Teams channel to collaborate on the process. Invite team members to the channel and add the SharePoint list as a tab.
  4. Use Power Automate to create automation for the business process. You can set up a flow automatically using an existing template or can create a flow based on your need.
  5. Now that you have set up the SharePoint list and Teams channel, team members can collaborate in real-time on the process. They can add, edit, and delete items from the list, and changes will be reflected in Teams as well.

Best Practices for Streamlining Processes with SharePoint and Teams

Here are some best practices for streamlining processes with SharePoint and Teams:

  • Keep your SharePoint list and Teams channel simple and easy to use. Too many columns or unnecessary features can make the process more complicated and difficult to manage.
  • Use SharePoint list templates to quickly set up new processes. This can help you save time and ensure consistency across different processes.
  • Set up alerts to receive notifications when changes are made to the list or channel. This can help you stay on top of important updates and changes.
  • Use SharePoint’s form features to make it easy for team members to add new items to the list. This can help ensure that all necessary data is captured and reduce the risk of errors.
  • Regularly monitor the process to identify areas for improvement. Use the data captured in the SharePoint list to track performance and identify opportunities for optimization.

By using SharePoint and Teams together, organizations can streamline their processes and achieve better productivity and efficiency. With proper setup and management, SharePoint and Teams can provide a powerful solution for managing data and collaborating with team members. By following these best practices, you can create a streamlined and efficient process for your team to work from.

The post Streamlining Processes with SharePoint and Teams: How to Achieve Better Productivity and Efficiency appeared first on MS Technology Talk.

✇MS Technology Talk

Using Teams to Collaborate on SharePoint Lists

SharePoint lists are a powerful tool for managing data and information, but they can be challenging to collaborate on. By using Microsoft Teams, you can collaborate on SharePoint lists in real-time and streamline your workflows. In this blog post, we’ll explore how to use Teams to collaborate on SharePoint lists.

Creating a SharePoint List

Before you can start collaborating on a SharePoint list in Teams, you need to create the list in SharePoint. Here are the steps to create a SharePoint list:

  1. Open your SharePoint site and navigate to the ‘Site Contents’ page.
  2. Click on the ‘New’ button in the upper-left corner of the page and select ‘List’ from the dropdown menu.
  3. Select a list template that fits your needs or choose ‘Custom List’ to create a list from scratch.
  4. Customize your list by adding columns, views, and other settings.

Collaborating on SharePoint Lists in Teams

Now that your SharePoint list is set up, you can start collaborating on it in Teams. Here are the steps to do so:

  1. Navigate to the channel where you want to collaborate on the SharePoint list and click on the ‘+’ button to add a tab.
  2. Select ‘SharePoint’ from the list of available apps.
  3. Choose the SharePoint list you want to collaborate on and click ‘Save’.

Now you can collaborate on the SharePoint list in real-time with your team members. You can add, edit, and delete items directly from Teams, and changes will be reflected in SharePoint as well.

Best Practices for Collaborating on SharePoint Lists in Teams

Here are some best practices for collaborating on SharePoint lists in Teams:

Use Views: Views are a powerful tool for organizing and filtering list data. Use views to create customized lists for different team members or purposes.

Set up Alerts: Set up alerts to receive notifications when changes are made to the list. This can help you stay on top of important updates and changes.

Use @mentions: Use @mentions to tag team members in comments and discussions related to the list. This can help ensure that everyone is aware of important updates and changes.

Customize Columns: Customize columns to fit your team’s specific needs. This can include adding calculated columns, dropdowns, and more.

Manage Permissions: Use SharePoint’s powerful security controls to manage permissions for your list. By setting permissions, you can ensure that only the right people have access to sensitive information.

By using Teams to collaborate on SharePoint lists, you can streamline your workflows and increase productivity. With proper setup and management, SharePoint lists can be a powerful tool for managing data and information. By following these best practices, you can create a powerful and efficient platform for your team to work from.

The post Using Teams to Collaborate on SharePoint Lists appeared first on MS Technology Talk.

✇MS Technology Talk

Creating and Managing SharePoint Sites from Teams: A Comprehensive Guide

Microsoft Teams and SharePoint are two powerful tools that can be used together to streamline collaboration and productivity. In this blog post, we’ll explore how to create and manage SharePoint sites from Teams, and discuss best practices for organizing and managing sites.

Creating SharePoint Sites from Teams:

Teams allows you to create SharePoint sites directly from within the application. Here are the steps to do so:

  1. Navigate to the Channel where you want to create the SharePoint site.
  2. Click on the ‘+’ button next to the tabs to add a new tab.
  3. Select ‘SharePoint’ from the list of available apps.
  4. Follow the prompts to create a new SharePoint site. You can choose to use an existing site as a template or create a new site from scratch.

Managing SharePoint Sites from Teams:

Once your SharePoint site is set up, you can manage it directly from within Teams. Here are some best practices for managing SharePoint sites:

  • Customize your site navigation to make it easier for team members to find what they need. This can be done by adding links to important pages, documents, and other resources.
  • You can add apps and tabs to your SharePoint site to extend its functionality. This can include tools like calendars, task lists, and more.
  • SharePoint provides a range of security controls that allow you to set permissions for your site. By setting permissions, you can ensure that only the right people have access to sensitive information.
  • Use document libraries to organize your files and documents in a logical manner. This can include setting up subfolders and using metadata to categorize files.
  • SharePoint provides powerful list and form capabilities that can be used to track information and data. Use these tools to manage workflows, requests, and more.

By creating and managing SharePoint sites from Teams, you can streamline collaboration and productivity for your team. With proper setup and management, SharePoint can be a valuable tool for organizing and managing information and resources. By following these best practices, you can create a powerful and efficient platform for your team to work from.

The post Creating and Managing SharePoint Sites from Teams: A Comprehensive Guide appeared first on MS Technology Talk.

✇MS Technology Talk

Using SharePoint as a Document Repository for Teams

Microsoft Teams has quickly become one of the most popular collaboration tools for businesses around the world. However, when it comes to managing documents and files, Teams has its limitations. In this blog post, we’ll explore how to use SharePoint as a document repository for Teams and discuss best practices for managing files and documents.

Understanding SharePoint as a Document Repository:

SharePoint is a powerful document management system that can be used to store, manage, and share documents and files. It provides a range of features and capabilities, including version control, co-authoring, and security controls. By using SharePoint as a document repository for Teams, you can take advantage of these features and provide a centralized location for all of your files and documents.

Setting Up SharePoint for Teams

Before you can use SharePoint as a document repository for Teams, you need to set it up properly. Here are the steps:

Create a SharePoint Site:

First, you need to create a SharePoint site where you’ll store your documents. This site should be configured with the appropriate permissions and security controls.

Create Document Libraries:

Next, you need to create document libraries within your SharePoint site. These libraries should be organized in a logical manner and should reflect the way your team works.

Connect SharePoint to Teams:

Once your SharePoint site and document libraries are set up, you can connect them to Teams. This can be done by adding the SharePoint site as a tab in a Teams channel.

Managing Documents in SharePoint

Now that your SharePoint site is set up and connected to Teams, you can start managing your documents. Here are some best practices for managing documents in SharePoint:

Use Version Control:

SharePoint provides version control, which allows you to keep track of changes made to a document over time. This is especially useful when multiple people are working on the same document.

Co-Author Documents:

SharePoint also provides co-authoring capabilities, which allow multiple people to work on a document at the same time. This is useful when collaborating on a document with your team.

Use Metadata:

Metadata can be used to categorize and organize documents within SharePoint. By using metadata, you can make it easier for team members to find the documents they need.

Set Permissions:

SharePoint provides a range of security controls that allow you to set permissions for your documents. By setting permissions, you can ensure that only the right people have access to sensitive documents.

By using SharePoint as a document repository for Teams, you can take advantage of its powerful document management capabilities and provide a centralized location for all of your files and documents. With proper setup and management, SharePoint can be a valuable tool for any team looking to collaborate on documents and files.

The post Using SharePoint as a Document Repository for Teams appeared first on MS Technology Talk.

✇MS Technology Talk

Integrating SharePoint and Teams for Better Collaboration: Best Practices

SharePoint and Teams are two powerful collaboration tools in the Microsoft suite. SharePoint is a content management and collaboration platform that provides organizations with document libraries, lists, workflows, and other features that make it easy to share and manage content. Teams is a chat-based collaboration platform that brings together people, conversations, and content in a virtual workspace. By integrating these two platforms, you can unlock even greater collaboration capabilities. In this blog post, we’ll explore how to integrate SharePoint and Teams and discuss best practices for using them together.

Understanding the Benefits of Integrating SharePoint and Teams:

The integration of SharePoint and Teams provides a seamless collaboration experience, allowing users to work together in one unified environment. Here are some of the benefits of integrating SharePoint and Teams:

Access SharePoint Content in Teams:

With the integration of SharePoint and Teams, you can easily access SharePoint content within Teams. This means that you can collaborate on documents, lists, and other content without having to leave Teams.

Collaborate on SharePoint Content:

You can collaborate on SharePoint content with your team members in real-time within Teams. This enables team members to work together more efficiently, and it ensures that everyone is on the same page.

Improved Communication:

With the integration of SharePoint and Teams, you can communicate with team members using Teams chat, voice, and video features. This makes it easier to collaborate on content and discuss ideas in real-time.

Setting up the Integration Between SharePoint and Teams:

To integrate SharePoint and Teams, you need to set up a few things. Here’s a step-by-step guide:

Set up a SharePoint site:

The first step is to set up a SharePoint site that you want to integrate with Teams. You can do this by going to SharePoint Online and creating a new site.

Create a Team:

Next, you need to create a new Team in Teams. This will be the virtual workspace where you and your team members will collaborate.

Add the SharePoint site to Teams:

Once you have created the Team, you need to add the SharePoint site to it. You can do this by selecting the “Add cloud storage” option within the Files tab of the Team.

Collaborate on SharePoint content in Teams:

Now that you have set up the integration between SharePoint and Teams, you can collaborate on SharePoint content within Teams. You can access SharePoint files and lists from the Files and Lists tabs of the Team. You can also create new documents and lists directly from within Teams.

Exploring the Capabilities of the SharePoint and Teams Integration

The integration of SharePoint and Teams provides a wide range of capabilities that can enhance collaboration in your organization. Here are some of the key capabilities of the integration:

Co-authoring:

With the integration of SharePoint and Teams, you can co-author documents in real-time with your team members. This means that multiple people can work on the same document at the same time, making collaboration more efficient.

Access control:

SharePoint provides powerful access control features that allow you to control who can access and edit content. With the integration of SharePoint and Teams, you can apply these access control features to the content that you collaborate on in Teams.

Mobile access:

With the integration of SharePoint and Teams, you can access SharePoint content from anywhere using the Teams mobile app. This means that you can collaborate on content with your team members even when you’re on the go.

Integrating SharePoint and Teams provides a powerful collaboration experience that can enhance productivity and improve communication in your organization. By following these best practices for integrating SharePoint and Teams, you can collaborate on content in real-time, improve communication, and achieve better results.

The post Integrating SharePoint and Teams for Better Collaboration: Best Practices appeared first on MS Technology Talk.

✇MS Technology Talk

Mastering SharePoint Modern Lists: Tips and Tricks for Efficient Usage and Formatting

SharePoint modern lists are one of the most powerful tools that allow you to create, manage, and share information with your team in a highly customizable manner. With the latest updates, it has become even easier to use SharePoint modern lists and customize them to suit your needs. In this blog post, we will take a look at some tips and tricks for using SharePoint modern lists efficiently and formatting them to your liking.

Tips for Using SharePoint Modern Lists Efficiently

Use Custom Views

One of the most efficient ways to use SharePoint modern lists is to create custom views. Custom views allow you to filter, sort, and group your data to suit your needs. For example, if you have a large list of sales data, you can create a custom view that only shows sales from a particular region or salesperson. This makes it easier for you to analyze your data and identify trends.

Use Quick Edit Mode

SharePoint modern lists come with a built-in Quick Edit mode that allows you to edit data directly in the list. This is a faster and more efficient way to update your data, especially if you need to make multiple changes at once. To use Quick Edit mode, simply click on the Quick Edit button on the toolbar.

Use Column Formatting

Column formatting allows you to customize the appearance of your list columns. You can use column formatting to change the font size, color, and background color of your data, as well as add icons and images. This makes it easier for you to visualize your data and identify important information at a glance.

Formatting SharePoint Modern Lists

Use the Column Settings Menu

To format your SharePoint modern list, you can use the Column Settings menu. The Column Settings menu allows you to modify the display settings of your list columns, such as the column name, data type, and default value. You can also use the Column Settings menu to create custom validation rules and set up calculated columns.

Use JSON Customization

JSON customization allows you to create highly customized SharePoint modern lists. With JSON customization, you can modify the appearance and behavior of your list, such as changing the background color, font size, and alignment of your data. To use JSON customization, you will need to have some programming knowledge, but there are many resources available online that can help you get started.

Use Power Apps

Power Apps is a powerful tool that allows you to create custom apps and forms for your SharePoint modern lists. With Power Apps, you can customize the appearance and behavior of your list to suit your needs. For example, you can create a custom form that only shows certain fields based on the user’s role, or create a custom app that allows users to view and edit data on their mobile devices.

SharePoint modern lists are a powerful tool that can help you manage and share information with your team. By using custom views, Quick Edit mode, and column formatting, you can use SharePoint modern lists more efficiently. And by using the Column Settings menu, JSON customization, and Power Apps, you can customize the appearance and behavior of your list to suit your needs. With these tips and tricks, you can become a master of SharePoint modern lists and take your team’s productivity to the next level.

The post Mastering SharePoint Modern Lists: Tips and Tricks for Efficient Usage and Formatting appeared first on MS Technology Talk.

✇MS Technology Talk

How to optimize SharePoint online Search for better for better results

SharePoint Online provides a powerful search engine that enables users to quickly find the information they need. However, the quality of search results depends largely on how well the site is optimized for search. In this blog post, we’ll explore some best practices for optimizing your SharePoint Online site for better search results and also discuss PowerShell scripts that can help you achieve this.

Use Managed Metadata:

Managed metadata is a hierarchical collection of centrally managed terms that can be used to tag content in SharePoint Online. By using managed metadata, you can ensure that your content is consistently labeled, which can improve the accuracy of search results. PowerShell script can be used to create and manage term sets and terms.

Customize Search Refiners:

Search refiners are used to filter search results based on specific criteria such as file type, author, or date. By customizing search refiners, you can make it easier for users to find the information they need. PowerShell script can be used to create custom refiners based on managed metadata.

Optimize Page Titles and Descriptions:

The page titles and descriptions are used by the search engine to index the content of the page. By optimizing these elements with relevant keywords, you can improve the visibility of your pages in search results. PowerShell script can be used to update page titles and descriptions.

Use Friendly URLs:

Friendly URLs are human-readable web addresses that are easy to remember and type. By using friendly URLs, you can make it easier for users to find your content and improve the visibility of your site in search results. PowerShell script can be used to set friendly URLs for pages and sites.

Enable Searchable PDFs:

PDF files are a common format for documents, but they are not always searchable by default. By enabling the searchability of PDF files, you can ensure that their content is included in search results. PowerShell script can be used to enable PDF search in SharePoint Online.

By following these best practices and using PowerShell scripts, you can optimize your SharePoint Online site for better search results. PowerShell scripts can help you automate the process of managing and optimizing your site for search, making it easier and more efficient to achieve your search optimization goals.

The post How to optimize SharePoint online Search for better for better results appeared first on MS Technology Talk.

❌