Vue lecture

Il y a de nouveaux articles disponibles, cliquez pour rafraîchir la page.
✇mountainss Cloud and Datacenter Management Blog

Docker Sandbox for Testing

Docker Sandbox project.

A Docker sandbox gives you a safe, disposable environment to experiment, build, or let automated tools run without risking your real system. It’s becoming an essential part of modern development workflows, especially as coding agents and cloud‑based tooling evolve. Docker

What a Docker sandbox actually is

A Docker sandbox is an isolated execution environment that behaves like a lightweight, temporary machine. It lets you run containers, install packages, modify configurations, and test ideas freely—while keeping your host system untouched. Modern implementations often use microVMs to provide stronger isolation than traditional containers, giving you the flexibility of a full system with the safety of a sealed box.

Key characteristics include:

  • Isolation — Your experiments can’t affect your host OS.
  • Disposability — You can reset or destroy the environment instantly.
  • Reproducibility — Every sandbox starts from a known, clean state.
  • Autonomy — Tools and agents can run unattended without permission prompts.

Why Docker sandboxes matter now

The rise of coding agents and automated development tools has created new demands. These agents need to run commands, install dependencies, and even use Docker themselves. Traditional approaches—like OS‑level sandboxing or full virtual machines—either interrupt workflows or are too heavy. Docker sandboxes solve this by offering:

  • A real system for agents to work in
  • The ability to run Docker inside the sandbox
  • A consistent environment across platforms
  • Fast resets for iterative development

This makes them ideal for AI‑assisted coding, CI/CD experimentation, and secure testing.

Where you can use Docker sandboxes today

Several platforms now offer browser‑based or cloud‑hosted Docker sandboxes, making it easy to experiment without installing anything locally.

  • Docker Sandboxes (Docker Inc.) — Purpose‑built for coding agents, using microVM isolation.
  • CodeSandbox Docker environments — Interactive online playgrounds where you can fork, edit, and run Docker‑based projects directly in the browser. CodeSandbox
  • LabEx Online Docker Playground — A full Docker terminal running on Ubuntu 22.04, ideal for learning and hands‑on practice, especially as Play with Docker winds down. LabEx

These platforms remove setup friction and let you focus on learning, testing, or building.

How developers typically use Docker sandboxes

A Docker sandbox fits naturally into several workflows:

  • Learning Docker — Practice commands, build images, and explore networking without installing anything.
  • Testing risky changes — Try new packages, configs, or scripts without fear of breaking your machine.
  • Running coding agents — Give AI tools a safe environment to operate autonomously.
  • Prototyping microservices — Spin up isolated services quickly and tear them down just as fast.
  • Teaching and workshops — Provide a consistent environment for all participants.

A non‑obvious advantage

Docker sandboxes aren’t just about safety—they’re about speed of iteration. Because they reset instantly and start from a known state, they eliminate the “works on my machine” problem and make experimentation frictionless. This is especially powerful when combined with automated tools or when onboarding new team members.

Closing thought

Docker sandboxes are becoming a foundational tool for modern development—combining safety, speed, and autonomy in a way that traditional containers or VMs alone can’t match. They’re especially valuable if you’re experimenting with AI‑driven coding tools or want a clean, reproducible environment for testing.
Important: Use Docker Sandboxes for testing.

Claude Code sandbox

It works great with VSCode and with Copilot.

More information about Docker Sandbox


✇Tutos-Informatique

Avis My Seedbox 2023 : Télécharger des Torrent et sauvegarder vos données

Dans cet article je vais vous parler de My Seedbox , il s'agit d'une solution "low cost" vous permettant de disposer d'une Seedbox. Je suis client chez eux depuis plus de 7 ans et j'en ai un usage régulier notamment pour les sauvegardes de données. Vous y découvrirez les différents services proposés par My SeedBox […]

Cet article Avis My Seedbox 2023 : Télécharger des Torrent et sauvegarder vos données est apparu en premier sur Tutos-Informatique.

✇Windows Experience Blog

Say it in a video: Dropbox Capture makes it easy to show rather than tell

How often do you share a screenshot to help others understand a problem or issue versus spelling it out in a lengthy email? If you’re like a lot of people, you may find sharing images an easier way of conveying a message and collaboratively finding solutions. With Dropbox Capture, an app available in the Microsoft Store to download onto Windows 10 and 11 PCs, you can record screenshots and videos, mark them up, and invite others to comment and markup through a shareable link that doesn’t require a sign-in. Users save time by consolidating feedback in one location. Aside from being a time saver, it’s also a tool that organizations can use as part of their onboarding or training, as a powerful way to show – rather than tell – answers to frequently asked questions or common processes. Designers, editors, project managers and many others can use Capture as a more visually friendly means of sharing progress, troubleshooting and discussing feedback. https://youtu.be/wsy0rD58iTc “This is a creative industry, so using Dropbox Capture gives us an opportunity to lay out our thought processes,” says Adam Nielson, creative director of branded content at Kaleidoscope Pictures, a film and television production company based in Utah. He and his team create content to attract, engage and retain audiences for clients. “The written word doesn't work for everybody and I’m no writer, so Capture helps me get information to my teammates quickly. Being able to show multiple apps and walk a team member through feedback that needs to be more than a comment, with visual and verbal cues to help round out messages, has been huge. And it also gives people time to react on their own schedule.” His team has been using Dropbox Capture for the past six months and finds it helpful for collaboration across time zones, as his crew works remotely all over the world. “I've tried a lot of different things. Dropbox has always just been the most seamless to use,” says Nielson, who also likes how people he sends files to don’t need to sign in to see them. “Capture has helped keep personality and clarity that we can lose in the feedback process.” [caption id="attachment_178122" align="alignnone" width="1024"]Screenshot of Dropbox Capture share by link 
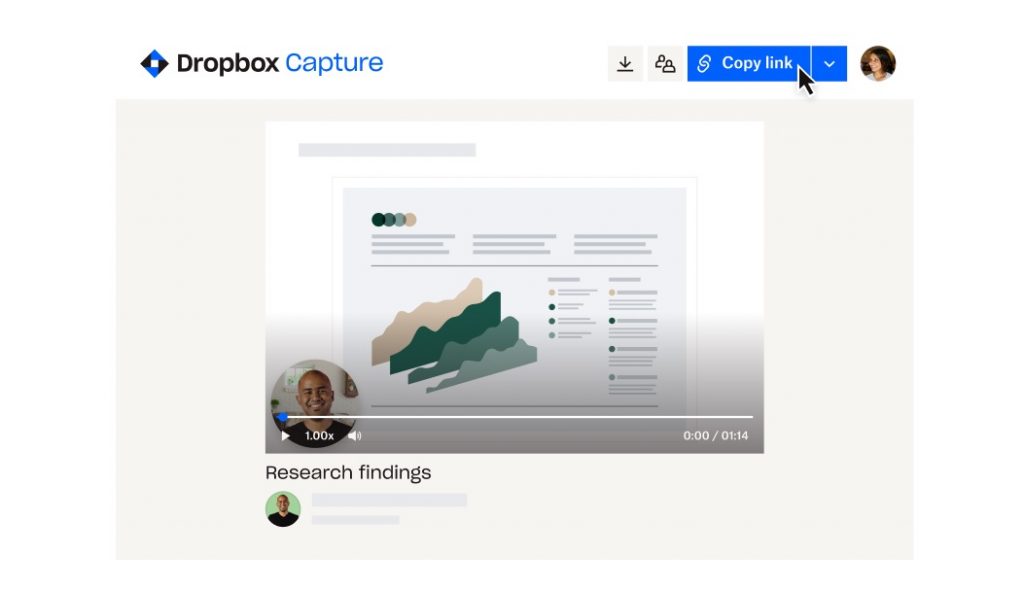
Screenshot showing how Dropbox Capture shares links for collaboration.[/caption] He also feels Capture works well in terms of accessibility, in that users can personalize the kinds of messages they want to send, in the way that they communicate best. For Nielson, who grew up learning sign language with deaf siblings, it gives him another way to communicate in a visual language. The idea for Capture came through observing customer feedback on Twitter about storing screenshots in Dropbox, which led to a deeper dive into customers’ needs. That led to developing Capture to include storing and sharing screen, video and audio recordings. “Since day one, we wanted Capture to serve as an all-in-one visual communication tool and saw the huge potential for it to change the way people collaborate, especially remotely,” said Youcef Es-skouri, head of product management for Dropbox Capture. https://youtu.be/mSw7aUnphjs The initial concept for Capture came from Dropbox’s annual Hackathon in summer of 2020. After the idea was born, Es-skouri took the lead on the project, seeing it through from its initial announcement to wide availability last year. He and engineers on his team worked specifically with Windows because that’s where most of their customers work. “We all have PCs, we all try to use them as much as possible and we really try to put ourselves in the shoes of our customers,” he says. “We've always tried to be Windows first because we know that this is where our customers are. Windows is super critical for us and honestly it has been quite a smooth ride for us with all the documentation and libraries that are available.” Es-skouri also says the variety of devices in the Windows ecosystem is an advantage with Capture, which they’ve designed to work well with touchscreens/tablets and other inputs in addition to standard keyboards. [caption id="attachment_178123" align="alignnone" width="1024"]Screenshot of screen recording with video Screenshot of a screen recording with video in Dropbox Capture.[/caption] Es-skouri says that the inclusion of screen recordings came naturally as a behavior that aligns with the ubiquity of screenshots. And acknowledging that not everyone is comfortable being on-camera, Capture makes it easy to record voiceovers – a natural extension to how people have become used to recording voice memos on phone texts. That flexibility in composing content is one of many reasons managers like Tyler Carey have embraced Capture. The chief revenue officer for the employee-owned Westchester Publishing Services based in Connecticut has been working at the company for eight years. Once a publisher’s manuscript is ready for copy editing or typesetting, Westchester will pick it up in Microsoft Word and create files for both printers and digital editions using Adobe InDesign. They create over 10,000 publications every year. Carey oversees all sales and collaborates regularly with the company’s marketing team. Business partnerships also fall under his purview, as well as other revenue generating initiatives. His typical day includes working directly with key accounts, strategizing with Westchester’s sales team and forecasting revenue. “We've been expanding our team during the pandemic. We went from an already somewhat distributed workforce to a very distributed workforce where we now have people in several different time zones on different teams collaborating,” he says. “So using Dropbox Capture lets us do kind of the things you might want to normally accomplish in meeting: get people together, look at a project, share a screen and try to solve a problem or collaborate on something.” [caption id="attachment_178124" align="alignnone" width="1024"]Screenshot showing video trimming Screenshot in Dropbox Capture showing video trimming of a screen recording.[/caption] Training is another area where Capture is proving to be useful, as Westchester is testing its use with sales documentation, so new hires can view 60-second videos rather than having to wade through hundreds of pages. “We've already had some big wins, just making lives easier for the sales reps like that,” Carey says. “What's elegant about Dropbox Capture versus other tools is that it’s very lightweight. There's a lot less clicks and steps. When we had done training videos before, we would record them using an application, download them, trim out any errors and then we'd have to host them somewhere and send the link. Now it's all under one hood.” Find out more about Dropbox Capture and try it out by downloading it from the Microsoft Store.
✇EnjoySharePoint

Create a Power Apps dialog box or Popup message box

This Power Apps tutorial will go over how to create a dialog box or a pop-up message within the Power Apps.

We recently received a request to create a dialog box in PowerApps while working on the Power Apps canvas app.

There is a Power Apps employee registration form with a save icon. When the icon is clicked a dialog box will appear.

For this, we need to build a dialog box within the Power Apps. To fulfill this requirement, the following steps are:

Create a dialog box in Power Apps

Let us understand the requirement. There is an employee registration form where the user will insert the data for the employee registration. Also, there is a Save icon to save the data.

Requirement:

As per the requirement, when the user clicks on the Save icon, a dialog box will appear with two buttons such as Save and Cancel. As per the user’s selection, the form will proceed forward to save the data or cancel the process.

PowerApps dialog box
  • Here, we have a SharePoint list named Employee Details having different types of columns such as:
    1. Employee ID: Single line of text
    2. Employee Name: Person or Group
    3. Department: Choice
    4. Join Date: Date and Time
    5. Contact: Number
    6. Date of Birth: Date and Time
    7. Address: Multiline text
Create a dialog box within the Power Apps
  • Build a blank canvas app within the Power Apps and add the above SharePoint list i.e., Employee Details as data.
  • Add a Power Apps edit form to the canvas app and connect the SharePoint list as the data source. We can see all the SharePoint list columns will be retrieved to the Power Apps edit form.
  • Also, add a save icon to the edit form and place it top of the form as shown below:
Create dialog box in Power Apps
Create a dialog box in Power Apps
  • As there is no specific control available to create a dialog box, we will add the below components to the app to create it such as:
    1. A Rectangle (Navigate Inserts > Popular > Rectangle)
    2. A label control (Navigate Inserts > Popualr > Text label). Give a text to the label. Ex: Select Save to submit or Cancel the process
    3. Two buttons (Navigate Inserts > Popular > Buttons). Rename the buttons such as Save and Cancel.
  • Once you added all the components, let’s group them. For this, Ctrl+ Select the above-mentioned components > right-click > Group.
  • Give a name to the group i.e., Group_DialogBox.
Create a dialog box in PowerApps
  • Select the Save icon and insert the below expression to create a variable.
OnSelect = Set(VarVisible, true)

Where VarVisible is the name of the variable and true is the variable’s value.

Create a popup message in Power Apps
  • Set the variable name VarVisible on the visible property of the Grouped_DialogBox.
Visible = VarVisible 
Power Apps create a dialog box
  • Select the Save button and insert the below expression on the button’s OnSelect property.
OnSelect = Notify("Registration Submitted Successfully!!!", NotificationType.Success, 5000); Set(VarVisible, false); SubmitForm(Form1); NewForm(Form1);

Where Form1 is the name of the Power Apps edit form.

Build a Power Apps dialog box
  • Similarly, select the Cancel button and enter the following expression into the OnSelect property of the button to cancel the process and return to the edit form with the fields reset.
OnSelect = Notify("Registration canceled Successfully!!!",NotificationType.Information,5000); Set(VarVisible,false); ResetForm(Form1) 
How to create a dialog in Power Apps Canvas apps

That’s it! Let’s save the app and publish it. Preview the app and fill in the employee registration field. While clicking on the Save icon, it will display the dialog box.

Note: Make sure to set the default mode of the edit form as New.

Create a dialog box within the Power Apps

If we click on the Save button, it will save the inserted data to the specified SharePoint list.

Creating a dialog in PowerApps

Similarly, if we click on the Cancel button, it will redirect to the form with an informative notification as shown below:

PowerApps Popup message Box
PowerApps Popup Message Box

This is how to create a dialog in Power Apps Canvas apps.

Conclusion

From this Power Apps tutorial, we learned how to create a dialog box within the Power Apps canvas apps.

You may also like the following Power Apps tutorials:

✇DomoPi

Configurer un routeur UniFi et une Freebox pour disposer d'un réseau IPv6

Configurer un routeur UniFi et une Freebox pour disposer d'un réseau IPv6

Suite à plusieurs mises à jour de l'application MyCanal sur notre téléviseur tournant sous Android TV, foireuse pour la première, changeant le mode de connexion et étant incomplète pour la seconde, je me suis mis en tête de trouver une alternative pour regarder les chaines de la TNT en direct.

Molotov me plaisait moyennement, je trouve son interface austère et n'ai jamais été convaincu.
Il y a bien les applications de chaque chaîne, MyTF1, 6Play, ArteTV, Pluto, ... mais ce n'est pas pratique du tout, devoir changer d'application en fonction de ce qu'on regarde, en plus de devoir créer un compte pour chacune d'entre elles.

Etant chez Free en tant que fournisseur d'accès à Internet, j'ai regardé si je ne pourrais pas configurer le flux m3u qu'ils mettent à disposition des abonnés, mais la qualité est moindre et l'intégration dans une application sur la tv n'était pas optimale. Finalement, en naviguant sur le site de Free, un nom m'a attiré, l'oeil, OQEE. Après vérification de ce qui était proposé, et notamment que c'était bien disponible pour mon abonnement (Freebox Révolution), je l'ai installée et ai tenté de regarder la TV par ce biais.

Et là, c'est le drame !

Configurer un routeur UniFi et une Freebox pour disposer d'un réseau IPv6

Et oui, vu que je n'utilise pas le player tv de Free, et qu'en plus j'ai un routeur UniFi Dream Machine pour gérer mon réseau domestique, je n'avais pas configuré l'IPv6, n'en ayant pas le besoin. Nous allons voir ensemble comment configurer la Freebox et l'UDM pour disposer d'une connectivité IPv6 sur votre réseau.


Dans mon cas, le routeur UniFi est un UDM (UniFi Dream Machine) mais la configuration que je vais décrire s'applique également à l'UDM Pro ou à l'USG / USG Pro.

Nous allons en premier lieu récupérer l'adresse IPv6 de l'interface WAN de l'UDM. Pour cela, connectez-vous en SSH à votre routeur et utilisez la commande ip addr | grep "global dynamic" -B2 -A3.

Configurer un routeur UniFi et une Freebox pour disposer d'un réseau IPv6

Nous allons renseigner cette adresse dans la page de configuration de la Freebox. Connectez-vous sur http://mafreebox.freebox.fr, lancez les "Paramètres de la Freebox" et choisissez "Configuration IPV6". Il faut coller l'adresse IPv6 de l'UDM dans le second Next Hop uniquement pour déléguer un préfixe. Notez également le préfixe associé, nous allons en avoir besoin pour la suite de la configuration sur l'UDM.

Configurer un routeur UniFi et une Freebox pour disposer d'un réseau IPv6
Attention ! Il est important de ne pas modifier le Next Hop du premier subnet.

Sur votre contrôleur UniFi, rendez-vous dans "Settings", "Internet" et choisissez de configurer l'accès WAN.
Basculez les réglages avancés en manuel, activez le DHCPv6 pour la connection IPv6, et configurez une taille de délégation de préfixe de 64. Appliquez les changements.

Configurer un routeur UniFi et une Freebox pour disposer d'un réseau IPv6

Passons maintenant à la configuration de l'IPv6 pour le réseau local. Toujours dans l'interface du contrôleur UniFi, rendez-vous cette fois dans la partie "Networks" et choisissez de configurer le réseau local.
Si les réglages avancés ne sont pas déjà activées en manuel, c'est le moment de le faire ! Descendez en bas pour configurer l'IPv6, et choisissez de configurer le type d'interface sur "Static". Renseignez en tant que "IPv6 Gateway" le préfixe IPv6 du second  "Next Hop" de la Freebox.
Activez le RA (Router Advertisement), qui permet aux périphériques sur le réseau de configurer leur route par défaut automatiquement.
Activez également le DHCPv6, la plage d'adresses se renseignera en se basant sur le préfixe du sous-réseau.

Configurer un routeur UniFi et une Freebox pour disposer d'un réseau IPv6

A partir de ce moment, votre réseau est configuré pour fonctionner en IPv6 aussi bien qu'en IPv4, dépendant si les périphériques en sont capables ou non.

Pour vérifier que c'est bien le cas, vous pouvez exécuter un ping en IPv6 ou un nslookup pour résoudre un nom de domaine en IPv6.

guillaume ~ % ping6 google.fr
PING6(56=40+8+8 bytes) 2a01:e0a:99e:ec1:e01e:2d:d5ef:60a1 --> 2a00:1450:4007:809::2003
16 bytes from 2a00:1450:4007:809::2003, icmp_seq=0 hlim=116 time=4.214 ms
16 bytes from 2a00:1450:4007:809::2003, icmp_seq=1 hlim=116 time=4.979 ms
16 bytes from 2a00:1450:4007:809::2003, icmp_seq=2 hlim=116 time=5.454 ms
16 bytes from 2a00:1450:4007:809::2003, icmp_seq=3 hlim=116 time=5.165 ms
--- google.fr ping6 statistics ---
4 packets transmitted, 4 packets received, 0.0% packet loss
round-trip min/avg/max/std-dev = 4.214/4.953/5.454/0.459 ms
guillaume ~ % nslookup -query=AAAA google.fr
Server:		2a01:e0a:99e:ec1::
Address:	2a01:e0a:99e:ec1::#53

Non-authoritative answer:
google.fr	has AAAA address 2a00:1450:4007:81a::2003

Bon très bien, la connectivité IPv6 fonctionne bien depuis un ordinateur, il reste à tester à nouveau l'application OQEE depuis la TV sous Android TV.

Mince, ça ne fonctionne toujours pas !! Après quelques recherches, et en discutant de ce problème avec un ami, il me dit qu'il a déjà eu le même besoin et avait rencontré le même problème, et qu'il y a un bug dans le firmware UniFi qui fait que le RA n'est pas bien activé, et qu'il faut le forcer à l'aide d'un script.

Attention ! Les étapes suivantes sont nécessaires au moment de l'écriture de cet article.
Un correctif devrait être déployé par Ubiquiti dans le futur pour corriger ce bug. (Le changelog de la mise à jour 1.12.22 de l'UDM pouvait le laisser penser, mais il n'en est rien.)

Le prérequis pour  mettre en place ce script est d'avoir installé les scripts udm-utilities de bootschiken, et configuré les "On-Boot-Script".
Si ce n'est pas déjà fait, il vous faudra suivre le tutoriel suivant :

Libérez votre Ubiquiti Unifi Dream Machine
L’Unifi Dream Machine est un équipement réseau tout-en-un (routeur, switch, point d’accès wifi) puissant et sur lequel on peut ajouter d’autres services.
Configurer un routeur UniFi et une Freebox pour disposer d'un réseau IPv6DomoPiHexamus
Configurer un routeur UniFi et une Freebox pour disposer d'un réseau IPv6

Pour configurer ce nouveau script dans le but d'activer le RA correctement sur votre réseau local, accédez en SSH à l'UDM et rendez-vous à l'emplacement habituel des scripts personnalisés avec la commande cd /mnt/data/on_boot.d.

Créez un premier fichier de configuration avec la commande vi ipv6-ra.conf et éditez-le afin d'y coller le contenu suivant :

#
# Generated automatically by ubios-udapi-server
#

# Configuration of DHCP Server 'net_LAN_br0_192-168-1-0-24_IPV6'
no-dhcp-interface=lo
interface=br0
enable-ra
ra-param=br0,high,0
domain=local
dhcp-range=set:net_LAN_br0_192-168-1-0-24_IPV6,IPV6:IPV6::IP,IPV6:IPV6::IP,ra-only,64,86400
dhcp-option=tag:net_LAN_br0_192-168-1-0-24_IPV6,option6:dns-server,[::]
Attention ! Il faut bien entendu adapter le nom de l'interface, le domaine, ainsi que la plage d'adresse IPv6 en fonction des valeurs de votre réseau.

Vous pouvez vérifier le contenu du fichier créé par UniFi avec la commande cat /run/dnsmasq.conf.d/dhcp*IPV6.conf. Nous avons seulement rajoutés l'option ra-only dans la configuration DHCPv6.

Le deuxième fichier à créer est le script qui sera exécuté au démarrage de l'UDM. Créez-le avec la commande vi ipv6-ra.sh et collez-y le contenu suivant :

#!/bin/sh
cp /mnt/data/on_boot.d/ipv6-ra.conf /run/dnsmasq.conf.d/dhcp.dhcpServers-net_LAN_br0_192-168-1-0-24_IPV6.conf
start-stop-daemon -K -q -x /usr/sbin/dnsmasq

Rendez le script exécutable avec la commande chmod +x ipv6-ra.sh et exécutez-le tout de suite avec la commande ./ipv6-ra.sh pour appliquer la configuration.

On redémarre la TV pour forcer une reconnexion au réseau, et on se rend dans les paramètres réseaux pour vérifier qu'elle a bien récupérée une adresse IPv6.

Oui ! C'est bon cette fois !

Configurer un routeur UniFi et une Freebox pour disposer d'un réseau IPv6

Lançons OQEE et surtout tentons de visionner une chaîne en direct pour valider le bon fonctionnement :

Configurer un routeur UniFi et une Freebox pour disposer d'un réseau IPv6

C'est bon, on peut confirmer que ça fonctionne correctement !


Conclusion

Merci d'avoir lu cet article jusqu'au bout, j'espère qu'il vous aura servi pour configurer votre réseau local en IPv6, et potentiellement pour ceux qui pourraient être concernés, à vous permettre de regarder les chaînes de télévision avec l'application OQEE de Free.

Si vous avez des questions ou simplement souhaitez échanger avec nous, n'hésitez pas à laisser des commentaires ou à venir sur notre groupe Telegram.

✇Windows Experience Blog

Gaming creators with disabilities connect and learn through Xbox pilot program

Bee Poshek found community as a full-time streamer and content creator after the pandemic disrupted a completely different career path.

“As an educator, one of my favorite aspects of teaching was kind of stripped out from under me – not getting to see students in person,” says Poshek, who was working at a university in Wisconsin. “I didn’t get to connect with them in that way or have deeper conversations. I also felt like students were going through some of the hardest things that I’d ever seen them go through and the systems in place were not giving me the tools I needed to really be able to help them.”

Poshek, who uses they/them pronouns, burned out. Their disabilities – chronic pain and polycystic ovarian syndrome – got worse. They also have autism. All those combined are a “triple whammy” that make traditional work challenging, says Poshek, who moved back in with their parents.

“Being an openly queer and disabled person in rural Wisconsin during the middle of a pandemic was an experience, to say the least, so I started seeking that community that I missed,” says Poshek, who found Twitch via some of their favorite Sims creators on YouTube. “I started finding niche communities that I really felt comfortable in, and eventually I worked up the courage to try it for myself. It’s been more than I ever expected it to be.”

Poshek, pictured above, was one of five people who joined the first Xbox Next Level (XNL) Creator Program, a six-week accelerator designed to help gaming streamers from underrepresented communities. Free virtual sessions focused on tools and resources to help them succeed in making creation a full-time job, and they received guidance on potential partnerships, creating a hosting reel, camera presentation, social media best practices and more. Read more about Poshek and the other program creators on Source, which also has a shortform version of their experiences.
✇Jeedom – Le Blog

Destination : Jeedom Luna !

Le décollage est imminent, l’équipe Jeedom est fière et heureuse de vous annoncer la future mise sur orbite de notre nouvelle box domotique : Jeedom Luna !

Jeedom Luna est évolutive, multi-protocoles et autonome. En effet, de par ses spécificités techniques hors normes, elle est aussi bien en mesure de gérer les petites à moyennes installations domotiques que de servir d’antenne déportée pour les projets de plus grande envergure, ce qui en fait par essence, le satellite naturel de la box Jeedom Atlas..

Une vraie fusée…

Taillée pour l’efficacité à moindre coût, Jeedom Luna n’en demeure pas moins solide et véloce avec des caractéristiques techniques de base comparables à celles d’une Jeedom Smart (4 cœurs 64 bits : Quad Cortex-A53 (1,5GHz) / 2Go DDR3) couplées à de nombreuses fonctionnalités complémentaires telles que les protocoles domotiques Z-Wave et Zigbee intégrés par défaut ainsi que la batterie de secours pour ne citer qu’elles.

Le mieux, pour bien s’en rendre compte, est de compléter notre comparatif des boxs Jeedom avec les données techniques de cette nouvelle venue :

MiniMini+SmartAtlasLuna
LancementAoût 2014Février 2015Mars 2017Septembre 2021Novembre 2022
ProcesseurARM1176JZFS (700MHz)Cortex-A9 (1GHz)4 cœurs 64 bits :
Quad Cortex-A53 (1,5GHz)
6 cœurs 64 bits :
Dual Cortex-A72 (2.0GHz)
Quad Cortex-A53 (1.5GHz)
4 cœurs 64 bits :
Quad Cortex-A53 (1,5GHz)
Mémoire vive 512Mo512Mo DDR32Go DDR34Go DDR4 2Go DDR3
Stockage4Go (SD)4Go (SD)8Go (eMMC)32Go (eMMC)16Go (eMMC)
Alimentation5V – 700mA5V – 2A5V – 2A9V – 2A5V – 3A
Horloge RTCNonNonNonOuiOui
Ports USB2x USB 2.02x USB 2.04x USB 2.02x USB 2.0 et 2x USB 3.01x USB 2.0
Protocoles intégrésZ-Wave+Z-Wave+Z-Wave+
ou EnOcean
Z-Wave+
ou EnOcean
ou Zigbee
+ Wi-Fi 2.4GHz/5GHz
+ Bluetooth 5.0
Z-Wave+ 700
+ Zigbee
+ Wi-Fi 2.4GHz/5GHz
BatterieLithium 6000mAh
Dimensions (cm)10 * 7,3 * 2,5 10 * 7,3 * 2,5 10,5 * 8 * 39 * 6,8 * 3,512 * 12 * 3

Les professionnels agréés Jeedom ont la possibilité de demander l’intégration d’une connectivité 4G LTE (en option sur commande) afin d’être en mesure de répondre aux moindres contraintes de leurs projets ou en quête de toujours plus d’autonomie.

Un tiroir pouvant accueillir une carte micro-SD est directement accessible à l’arrière du boitier permettant ainsi d’augmenter le stockage jusqu’à 128 Go supplémentaires. Le support de fixation murale est fourni pour optimiser l’espace au maximum, et, pour encore plus de connectivité (comme si ce n’était pas suffisant), un emplacement Mini PCI-Express LoraWAN est disponible sur le dessus de la carte mère mais inutilisé pour le moment.

On peut le constater, la box Jeedom Luna n’a pas à rougir de la comparaison avec ses aînées, loin de là même, tant elle démontre de capacités primordiales pour la viabilité d’une installation domotique. De plus, elle sait rester fluette et discrète en optant pour des protocoles sans fils avec des antennes directement intégrées à l’intérieur du boitier en lieu et place des habituelles antennes externes.

…à la conquête des étoiles !

Une fois démarrée, rien ne sera en mesure d’arrêter votre Jeedom Luna notamment grâce à sa batterie Lithium de 6000mAh qui lui permet de faire face aux coupures d’alimentation électrique sans faiblir. Bien entendu, l’autonomie sera variable en fonction de chaque typologie d’installation mais permettra, dans tous les cas et avec certitude, de pallier à des coupures de courant ponctuelles. Il faut savoir que la box a tenu 7 jours d’affilés sur batterie avec un Jeedom « nu » lors de nos différents essais ce qui laisse entrevoir de très bonnes perspectives.

L’autonomie pourra encore être poussée à son paroxysme par l’ajout d’une connectivité 4G LTE (professionnels agréés uniquement) pouvant faire office de connexion de secours en cas d’accès internet défaillant ou même d’unique accès vers l’extérieur le cas échéant.

La connectivité n’est d’ailleurs pas en reste avec l’intégration du Wi-Fi, d’une puce Z-Wave+ série 700 à la pointe de la technologie et d’une puce Zigbee 3.0 d’ores et déjà compatible Matter et Thread ! Cet aspect progressiste et multi-protocolaire offre une véritable liberté dans le déploiement de toute installation domotique, tout en garantissant la prise en charge des modules et technologies à venir.

Enfin, autres nouveautés non des moindres, la présence d’un bouton d’alimentation ainsi qu’un orifice de réinitialisation qui, en cas d’appui durant 10 secondes, restaurera automatiquement la box comme si elle venait d’être réceptionnée. Notons également les diodes électroluminescentes sur le dessus, vertes fixes en fonctionnement ou vertes clignotantes lorsque la box est en cours de restauration.

Un plugin dédié

Jeedom Luna c’est aussi, comme à chaque fois maintenant, un plugin dédié qui assure les tâches habituelles de gérer les connexions Wi-Fi et contrôler le bon déroulement des phases de restauration… Mais ce n’est pas tout ! En effet, cette box bénéficiant de plus de fonctions que ses prédécesseurs, il est normal que le plugin permette davantage d’interactions avec celle-ci.

En premier lieu desquelles nous retrouvons des statistiques sur la batterie telle que l’autonomie restante, ainsi que des optimisations logicielles des cycles de charge qui viennent en complément du traitement matériel déjà appliqué à ce niveau.

Le plugin permet également d’éteindre, de faire clignoter ou de modifier la couleur des diodes présentes sur le dessus de la box pour satisfaire toutes les envies de personnalisation. Il peut fournir des outils aux autres plugins pour interagir avec ces diodes afin de transmettre des indications visuelles aux utilisateurs par exemple.

Tarif et disponibilité

Comme mentionné plus haut, la volonté affichée est de vous offrir un maximum de technologies et de puissance au tarif le plus abordable possible, en limitant notamment l’emballage carton au strict nécessaire sans superflu.

C’est ainsi que vous pouvez vous procurer cette box domotique hors du commun au prix de 199€ TTC (hors option) exclusivement auprès de notre partenaire, spécialiste de la vente en ligne de matériel domotique, la boutique domadoo.fr :

On ne change pas les bonnes habitudes, le Service Pack Power Jeedom est, comme à l’accoutumée, offert avec la box. L’accès externe est donc aisé grâce au « DNS Jeedom », les plugins ZWave JS, Zigbee et Alarme sont inclus et le support est à disposition en cas de besoin.

Atlas & Luna : l’alliance parfaite

Également rapidement abordée jusqu’à maintenant, on ne peut que souligner la parfaite complémentarité de la Jeedom Luna avec sa grande sœur, la box Jeedom Atlas. Elle sait, sans jamais montrer le moindre signe de faiblesse, jouer à la fois le rôle d’antenne multi-protocoles déportée mais aussi de solution de secours en cas de défaillance électrique (et/ou internet) en complète adéquation avec la puissance « brute » de la Jeedom Atlas.

L’équipe a désiré permettre à tout un chacun de profiter d’une combinaison d’équipements éprouvée en environnement professionnel avec toutes les attentes et obligations qui en découlent afin de pouvoir mettre en place, facilement et n’importe où, une infrastructure domotique efficace et résiliente à la hauteur des possibilités offertes par Jeedom !

L’équipe Jeedom


Bonus : Galerie photo Jeedom Luna

La box Jeedom Luna se dévoile sous tous les angles dans cette série de photos :

✇DomoPi

Configurer un routeur UniFi et une Freebox pour disposer d'un réseau IPv6

Configurer un routeur UniFi et une Freebox pour disposer d'un réseau IPv6

Suite à plusieurs mises à jour de l'application MyCanal sur notre téléviseur tournant sous Android TV, foireuse pour la première, changeant le mode de connexion et étant incomplète pour la seconde, je me suis mis en tête de trouver une alternative pour regarder les chaines de la TNT en direct.

Molotov me plaisait moyennement, je trouve son interface austère et n'ai jamais été convaincu.
Il y a bien les applications de chaque chaîne, MyTF1, 6Play, ArteTV, Pluto, ... mais ce n'est pas pratique du tout, devoir changer d'application en fonction de ce qu'on regarde, en plus de devoir créer un compte pour chacune d'entre elles.

Etant chez Free en tant que fournisseur d'accès à Internet, j'ai regardé si je ne pourrais pas configurer le flux m3u qu'ils mettent à disposition des abonnés, mais la qualité est moindre et l'intégration dans une application sur la tv n'était pas optimale. Finalement, en naviguant sur le site de Free, un nom m'a attiré, l'oeil, OQEE. Après vérification de ce qui était proposé, et notamment que c'était bien disponible pour mon abonnement (Freebox Révolution), je l'ai installée et ai tenté de regarder la TV par ce biais.

Et là, c'est le drame !

Configurer un routeur UniFi et une Freebox pour disposer d'un réseau IPv6

Et oui, vu que je n'utilise pas le player tv de Free, et qu'en plus j'ai un routeur UniFi Dream Machine pour gérer mon réseau domestique, je n'avais pas configuré l'IPv6, n'en ayant pas le besoin. Nous allons voir ensemble comment configurer la Freebox et l'UDM pour disposer d'une connectivité IPv6 sur votre réseau.


Dans mon cas, le routeur UniFi est un UDM (UniFi Dream Machine) mais la configuration que je vais décrire s'applique également à l'UDM Pro ou à l'USG / USG Pro.

Nous allons en premier lieu récupérer l'adresse IPv6 de l'interface WAN de l'UDM. Pour cela, connectez-vous en SSH à votre routeur et utilisez la commande ip addr | grep "global dynamic" -B2 -A3.

Configurer un routeur UniFi et une Freebox pour disposer d'un réseau IPv6

Nous allons renseigner cette adresse dans la page de configuration de la Freebox. Connectez-vous sur http://mafreebox.freebox.fr, lancez les "Paramètres de la Freebox" et choisissez "Configuration IPV6". Il faut coller l'adresse IPv6 de l'UDM dans le second Next Hop uniquement pour déléguer un préfixe. Notez également le préfixe associé, nous allons en avoir besoin pour la suite de la configuration sur l'UDM.

Configurer un routeur UniFi et une Freebox pour disposer d'un réseau IPv6
Attention ! Il est important de ne pas modifier le Next Hop du premier subnet.

Sur votre contrôleur UniFi, rendez-vous dans "Settings", "Internet" et choisissez de configurer l'accès WAN.
Basculez les réglages avancés en manuel, activez le DHCPv6 pour la connection IPv6, et configurez une taille de délégation de préfixe de 64. Appliquez les changements.

Configurer un routeur UniFi et une Freebox pour disposer d'un réseau IPv6

Passons maintenant à la configuration de l'IPv6 pour le réseau local. Toujours dans l'interface du contrôleur UniFi, rendez-vous cette fois dans la partie "Networks" et choisissez de configurer le réseau local.
Si les réglages avancés ne sont pas déjà activées en manuel, c'est le moment de le faire ! Descendez en bas pour configurer l'IPv6, et choisissez de configurer le type d'interface sur "Static". Renseignez en tant que "IPv6 Gateway" le préfixe IPv6 du second  "Next Hop" de la Freebox.
Activez le RA (Router Advertisement), qui permet aux périphériques sur le réseau de configurer leur route par défaut automatiquement.
Activez également le DHCPv6, la plage d'adresses se renseignera en se basant sur le préfixe du sous-réseau.

Configurer un routeur UniFi et une Freebox pour disposer d'un réseau IPv6

A partir de ce moment, votre réseau est configuré pour fonctionner en IPv6 aussi bien qu'en IPv4, dépendant si les périphériques en sont capables ou non.

Pour vérifier que c'est bien le cas, vous pouvez exécuter un ping en IPv6 ou un nslookup pour résoudre un nom de domaine en IPv6.

guillaume ~ % ping6 google.fr
PING6(56=40+8+8 bytes) 2a01:e0a:99e:ec1:e01e:2d:d5ef:60a1 --> 2a00:1450:4007:809::2003
16 bytes from 2a00:1450:4007:809::2003, icmp_seq=0 hlim=116 time=4.214 ms
16 bytes from 2a00:1450:4007:809::2003, icmp_seq=1 hlim=116 time=4.979 ms
16 bytes from 2a00:1450:4007:809::2003, icmp_seq=2 hlim=116 time=5.454 ms
16 bytes from 2a00:1450:4007:809::2003, icmp_seq=3 hlim=116 time=5.165 ms
--- google.fr ping6 statistics ---
4 packets transmitted, 4 packets received, 0.0% packet loss
round-trip min/avg/max/std-dev = 4.214/4.953/5.454/0.459 ms
guillaume ~ % nslookup -query=AAAA google.fr
Server:		2a01:e0a:99e:ec1::
Address:	2a01:e0a:99e:ec1::#53

Non-authoritative answer:
google.fr	has AAAA address 2a00:1450:4007:81a::2003

Bon très bien, la connectivité IPv6 fonctionne bien depuis un ordinateur, il reste à tester à nouveau l'application OQEE depuis la TV sous Android TV.

Mince, ça ne fonctionne toujours pas !! Après quelques recherches, et en discutant de ce problème avec un ami, il me dit qu'il a déjà eu le même besoin et avait rencontré le même problème, et qu'il y a un bug dans le firmware UniFi qui fait que le RA n'est pas bien activé, et qu'il faut le forcer à l'aide d'un script.

Attention ! Les étapes suivantes sont nécessaires au moment de l'écriture de cet article.
Un correctif devrait être déployé par Ubiquiti dans le futur pour corriger ce bug. (Le changelog de la mise à jour 1.12.22 de l'UDM pouvait le laisser penser, mais il n'en est rien.)

Le prérequis pour  mettre en place ce script est d'avoir installé les scripts udm-utilities de bootschiken, et configuré les "On-Boot-Script".
Si ce n'est pas déjà fait, il vous faudra suivre le tutoriel suivant :

Libérez votre Ubiquiti Unifi Dream Machine
L’Unifi Dream Machine est un équipement réseau tout-en-un (routeur, switch, point d’accès wifi) puissant et sur lequel on peut ajouter d’autres services.
Configurer un routeur UniFi et une Freebox pour disposer d'un réseau IPv6DomoPiHexamus
Configurer un routeur UniFi et une Freebox pour disposer d'un réseau IPv6

Pour configurer ce nouveau script dans le but d'activer le RA correctement sur votre réseau local, accédez en SSH à l'UDM et rendez-vous à l'emplacement habituel des scripts personnalisés avec la commande cd /mnt/data/on_boot.d.

Créez un premier fichier de configuration avec la commande vi ipv6-ra.conf et éditez-le afin d'y coller le contenu suivant :

#
# Generated automatically by ubios-udapi-server
#

# Configuration of DHCP Server 'net_LAN_br0_192-168-1-0-24_IPV6'
no-dhcp-interface=lo
interface=br0
enable-ra
ra-param=br0,high,0
domain=local
dhcp-range=set:net_LAN_br0_192-168-1-0-24_IPV6,IPV6:IPV6::IP,IPV6:IPV6::IP,ra-only,64,86400
dhcp-option=tag:net_LAN_br0_192-168-1-0-24_IPV6,option6:dns-server,[::]
Attention ! Il faut bien entendu adapter le nom de l'interface, le domaine, ainsi que la plage d'adresse IPv6 en fonction des valeurs de votre réseau.

Vous pouvez vérifier le contenu du fichier créé par UniFi avec la commande cat /run/dnsmasq.conf.d/dhcp*IPV6.conf. Nous avons seulement rajoutés l'option ra-only dans la configuration DHCPv6.

Le deuxième fichier à créer est le script qui sera exécuté au démarrage de l'UDM. Créez-le avec la commande vi ipv6-ra.sh et collez-y le contenu suivant :

#!/bin/sh
cp /mnt/data/on_boot.d/ipv6-ra.conf /run/dnsmasq.conf.d/dhcp.dhcpServers-net_LAN_br0_192-168-1-0-24_IPV6.conf
start-stop-daemon -K -q -x /usr/sbin/dnsmasq

Rendez le script exécutable avec la commande chmod +x ipv6-ra.sh et exécutez-le tout de suite avec la commande ./ipv6-ra.sh pour appliquer la configuration.

On redémarre la TV pour forcer une reconnexion au réseau, et on se rend dans les paramètres réseaux pour vérifier qu'elle a bien récupérée une adresse IPv6.

Oui ! C'est bon cette fois !

Configurer un routeur UniFi et une Freebox pour disposer d'un réseau IPv6

Lançons OQEE et surtout tentons de visionner une chaîne en direct pour valider le bon fonctionnement :

Configurer un routeur UniFi et une Freebox pour disposer d'un réseau IPv6

C'est bon, on peut confirmer que ça fonctionne correctement !


Conclusion

Merci d'avoir lu cet article jusqu'au bout, j'espère qu'il vous aura servi pour configurer votre réseau local en IPv6, et potentiellement pour ceux qui pourraient être concernés, à vous permettre de regarder les chaînes de télévision avec l'application OQEE de Free.

Si vous avez des questions ou simplement souhaitez échanger avec nous, n'hésitez pas à laisser des commentaires ou à venir sur notre groupe Telegram.

✇ITProMentor

Alternatives to OneDrive and SharePoint (and when to consider them)

One of the things I often get asked about is how to deal with various limitations in OneDrive and SharePoint Online. For those who don’t know, SharePoint Online is the file storage & sharing solution underpinning the Microsoft 365 universe of applications, including the popular Teams application, while OneDrive for Business provides for personal file storage (i.e., modern replacement for “My Documents”) as well as a client application for keeping all your cloud-based documents synchronized to your local device.

Our SquareOne peer group recently had an informal, ad-hoc meeting about this problem: Where do you turn when OneDrive and SharePoint are (seemingly) unable to meet the needs of the business?

This can happen for a few different reasons. So, before we talk about solutions, let’s examine the most common limitations that organizations can run into when using SharePoint and OneDrive.

Not enough (shared) file storage

Every single user in Microsoft 365 gets a minimum of 1 TB of personal data storage (OneDrive space). This is not usually a bottleneck for most organizations. However, SharePoint Online (where you would put any of your “shared” Company data), is limited to 1 TB + 10 GB per licensed user.

For an Enterprise organization with thousands of users, those seats add up quickly, and you will easily have several terabytes of storage available. For example, 10,000 employees x 10 GB each = ~100 TB. Small business subscriptions unfortunately share the same limitation as Enterprise, so that means a 30-person organization only gets a measly ~1.3 TB of storage total for all shared documents in SharePoint Online.

This is a problem. Particularly if there are very many files, or very large files such as architectural or engineering drawings, or high-density images, or anything like that. That meager storage will be consumed very quickly indeed. Yes, it is possible to buy additional SharePoint storage, but at USD $0.20/ GB/month, it is some of the most expensive storage space in the cloud.

My personal wish here is that Microsoft would just change the storage limitations for “Business” plans so that instead of 10 GB/user, we get something better like 100 GB/ user (at least). Or, better yet, just give us like a “Business Ultimate” plan that includes unlimited email and file storage and charge a premium price like USD $35 or $40/user/month.

Too many files to sync, or other limitations

OneDrive includes a client app that will automatically synchronize your personal files to the local desktop (we have a similar app to make them available on personal mobile devices, as well).  You can optionally choose to sync shared locations in SharePoint Online in addition to your OneDrive files. However, when you attempt to sync too many files, you can cause problems for the sync application, and then your employees fall into the Pit of End User Despair™.

How many files is too many? Well, that’s a complicated question. Microsoft recommends syncing no more than 300,000 files and folders total to your computer. But that is somewhat misleading, because I have seen the client sustain more files than that (especially since the release of the 64-bit client), but I have also seen the client bomb out under even less stress (more like 90-100K files). If memory serves right, this limitation actually comes from a .DAT file stored somewhere in your local app data folder.

As well, larger files such as architectural and engineering drawings will sync (and support for large files has improved in the last year since the release of the 64-bit client), but it still is not the same experience as working with general Office files. For example, co-authoring is not a thing here, and syncing large files is more demanding; upload times can be very slow, especially over budget links such as DSL.

Therefore, certain SMB organizations that regularly use larger file types (e.g., construction, engineering, architecture, attorneys who deal with patents which include engineering drawings, etc.) may still find the sync experience is less than ideal for their requirements, especially if they are used to having SMB shares available on their LAN.

There are a few other limitations on file structure (such as depth of folders/length of file path), and number of files per folder or view (5,000), but these are not run into quite as frequently as the other problems I just now touched on. Plus, they are generally more “correctable” than running up against storage quotas or sync issues, which are less in your power to control. Nevertheless, several other limitations do exist, and you should be aware of them.

What do we do about these limitations?

Historically the way we dealt with these problems was to tell the customer, “Well of course it isn’t working, because you aren’t doing it right!

We would scold them for needing access to so many objects on every client device, all the time. “Don’t you know that it is impossible to work with that many files in any reasonable timeframe? Imagine trying to contribute to more than 300K files in a month, or even in a year! Nobody actually does that, so why sync all the data to begin with?!

Or, “Look, you can’t expect every third-party file type to be supported equally: if you work with some larger file types, do not expect co-authoring on them, instead plan to download/upload your changes like you would have for all types of files 10 or 15 years ago.

While these statements may be true, and difficult to argue with, the simple fact is that back in the olden days when customers just had a primitive NTFS file server with SMB file shares, users could keep whatever they wanted, for however long they wanted, and have access to it any day of the week. They didn’t have to obey the seemingly arbitrary laws of the Microsoft Cloud.

In an ideal world, we could just easily migrate all files and folders, as they exist today, from point A (usually an on-premises file server) to point B (the cloud), and have the experience be pretty much the same for end users. The problem is that file servers and SharePoint sites are apples and oranges. So, it’s not realistic yet to put those expectations out there (those who have, have paid dearly for it).

Yes, it is true that SharePoint does a bunch of cool stuff that your local file server cannot (e.g., metadata, search and indexing, retention labels, sensitivity for sites, etc.), but the reverse is also true: your old file server did some pretty basic things really well, some of which are still impossible for SharePoint and OneDrive.

Alternative #1: Use another popular cloud storage provider

I can’t speak for the Enterprise, but at least in the SMB market, the most popular alternatives to Microsoft’s “built-in” ecosystem for file sharing remain Dropbox, Box, and Citrix Sharefile (roughly in that order). Maybe Google Drive ranks in there as well, however, I know a lot of folks on Google’s platform also supplement with one of these other providers for file sharing, too. My personal favorite of these options is Box, but that’s just based on my own familiarity with it (others may feel strongly about one of these others—and that’s fine).

If you are going to supplement your Microsoft 365 subscription with one of these other solutions, I would recommend ensuring you get a real business plan, not a personal or “basic” plan. Generally speaking, this means you will be spending something like $25/user/month or more for a complete feature set, usually including unlimited storage space and Enterprise-grade security options. At the time of this writing, in the Dropbox world, this means aiming for at least the “Advanced” offering (for Teams). If you choose a Box subscription, this could mean the Business Plus or even Enterprise tier, and for Sharefile, you should be evaluating their Advanced or Premium options.

Why we do not have an “unlimited storage” plan in the Microsoft cloud is beyond me. If it were up to yours truly, Microsoft would have an unlimited offering that can compete with these other big hitters. The option for limitless capacity is probably the number one driver that pushes people into a third-party cloud when it comes to file storage. Note: You should not expect a switch into one of these other ecosystems to be a panacea: to eliminate all downsides, fix or prevent all sync issues, etc. However, when it comes to overall storage capacity, every other provider out there has Microsoft beat.

Anyway, if you decide third-party is the way to go, always set up Single Sign-On with Azure AD so that you can apply the same identity-based protections, such as Conditional Access, that you already enjoy with Microsoft 365. Also you should know that Box and Dropbox have integrations available with Microsoft Defender for Cloud Apps, so that you can monitor activity and create alerts and rules around these applications, just as you do for Microsoft 365, using the Activity log.

Alternative #2: Check out Azure File Sync

If you would rather not leave the Microsoft cloud, and especially if you want to maintain an experience as close as possible to your current Windows-based file server, then Azure Files is another solution worth taking a closer look at. This is basically SMB file shares in the cloud. However, the best implementation of it to replace existing file servers, in my opinion, would be Azure File Sync. This premium solution allows you to seamlessly extend your existing on-premises file server into the cloud, and the users generally cannot even tell the difference.

Basically, your existing file server gets an agent installed on it, which then synchronizes your shares into Azure Files. Client computers continue to connect to the local file servers, but the data can be migrated on the back end into Azure. Eventually the server just serves up cached copies of the most frequently accessed datasets. Better yet, you can choose to take the most infrequently accessed data (think: archives, etc.) and move those to “cooler temperature” storage in the cloud. This is cheap storage, which is slower to access, but less expensive to maintain. Active files can remain on “hot” storage so that access stays quick and reliable. This feature is known as “cloud tiering” and it is one of those things that makes the solution extra attractive. For backup, you simply deploy Azure Backup and configure a backup of Azure file shares on a schedule that works for your organization.

Now, let’s say that you need to replace your existing physical server, either because it is just time for a refresh, or because you had a sudden crash or hardware failure in your datacenter. No problem. In the short term, your end users can connect to Azure via VPN and get access to the cloud-based shares quickly. In the long-term, you would replace your physical server with something cheap and affordable: just install the agent to present the shares locally out to the network, and away you go.

Thus, Azure File Sync turns your local server into something resembling “Branch Cache” (if you were familiar with that Windows Server feature, it’s a very similar idea). It is not unreasonable to assume your current server capacity could be scaled back to maybe 20% of the storage requirements (most data lives in the cloud, with only the most frequently accessed items available on the local disks).

The big benefits to this service are that legacy applications generally still work with it (since it is still just SMB shares), and it tends to be more affordable per-user or “per-gigabyte” especially with cloud tiering enabled. Note also that both domain and workgroup environments are supported with this solution.

Alternative #3: Split the difference

The last option is to forge ahead (mostly) with Microsoft solutions: usually in a “hybrid” configuration where the on-premises server is going to be around for at least one more refresh cycle while your organization figures out the rest of the puzzle on its own.  Note: you can still start to relocate certain Office documents into OneDrive, Teams, and SharePoint as well, but you don’t have to go “all in” either. Take the time to learn how your organization can work around the current limitations in various ways. This makes for an easier end-user transition while still taking advantage of the elasticity and flexibility of the cloud where it makes sense.

For example, we direct people to use the SharePoint web interface and/or the Teams client for most shared repositories, and only sync very few data locations that contain smaller numbers of files (like a specific project folder), or other areas where the users work daily. We generally also recommend enabling the groups expiration policy and retention policies to keep content fresh and current (removing old, dead data regularly).

In a big migration project, we may even recommend migrating only those datasets which are considered “active” working data, versus all the “archival” stuff which may not need to exist in the cloud, at all. This helps cut down on clutter and overall storage demand. Some of these legacy items might end up on a separate network segment somewhere, on a legacy file server, SAN, or NAS device (where they go to die a slow death). Or maybe this is where we find a separate cloud storage account and place it under the care of a specific individual or individuals with access to those particular locations.

I should perhaps mention, there is also an alternative OneDrive/SharePoint sync client out there called Zee Drive, which some people have reportedly found success with (I cannot say much about it other than what others have told me—in other words, this is not an endorsement by any means).

Conclusion

Keep in mind that many organizations fit nicely within the existing limitations and have no problem moving 100% into the Microsoft 365 cloud ecosystem. Especially “Microsoft Office-centric” professional services that work primarily in the Office apps, perhaps with a splash of Adobe on the side, etc.

At the same time, there are many, many companies who run into these barriers due to legacy apps, large file types, larger file sets, etc., and therefore, these folks often wander down a different path. Sometimes, this means going to a third-party cloud, or it means remaining in a hybrid situation, or patching together some other alternative. This is not a new problem, either. Honestly it is a bit surprising that even now, in the year 2022, we are still left wanting in certain areas, and there isn’t always just one satisfying “right” answer. But, that’s where your consulting comes in, isn’t it?

What else have you been deploying for your customers when Microsoft doesn’t quite fit the bill? Let us know in the comments, below!

The post Alternatives to OneDrive and SharePoint (and when to consider them) appeared first on ITProMentor.

❌