Merci à vous de suivre le flux Rss de www.sospc.name. ;o)<
EEK, pour Emsisoft Emergency Kit, est un logiciel gratuit et en français qui peut vous tirer de la panade. Il est simple d'utilisation, sa particularité est la possibilité de le décompresser sur une clé USB, et de l’exécuter à partir de cette dernière. Ainsi, si l'un de vos ordinateurs était paralysé par un virus empêchant […]
Merci à vous de suivre le flux Rss de www.sospc.name. ;o)<
Les badges d'ouverture de portes sont désormais partout et indispensables. Le problème est que les Syndics vous les facturent en moyenne entre 15 et 20 € pièce. Ce qui peut faire un gros budget s'il y a du monde à la maison ou si l'on a besoin de badges supplémentaires pour la famille ou les […]
Virtual tables enable integrating data from external data sources by seamlessly representing that data as tables in Microsoft Dataverse, without data replication
Virtual Connector Providers currently available are:
SQL Server
Sharepoint
Excel
In this article I will go step by step on how to connect your excel sheet to Dataverse:
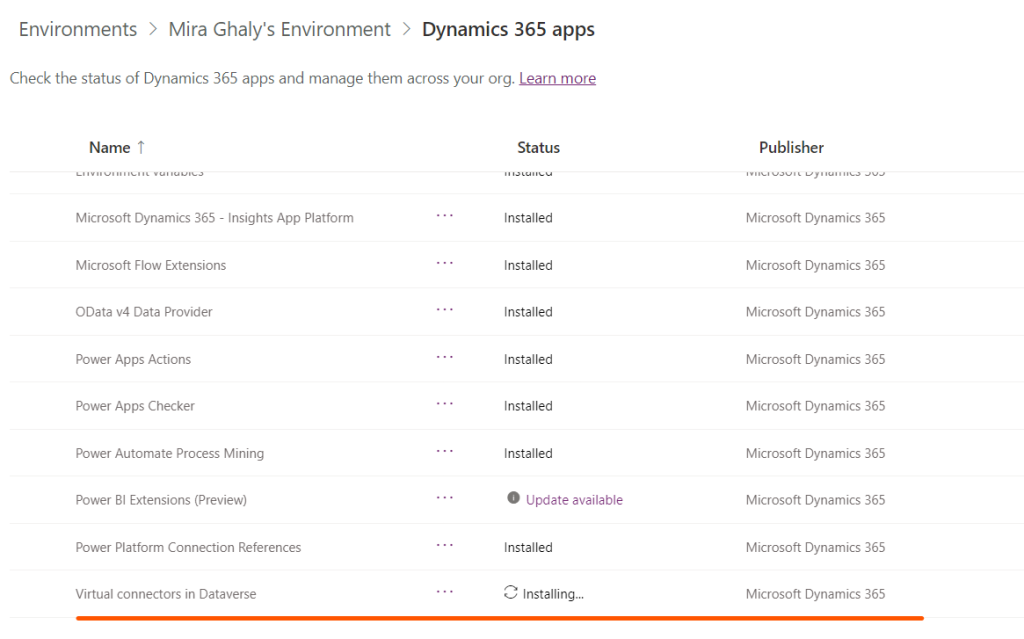
Download and Install the virtual connector from this URL
Click on Get Free , Sign in to your account and choose your environment, you can check the progress of installation and once it is installed you can proceed to step3.
3. Go to Power Apps (make.powerapps.com), and select the environment in which you would like to set up the virtual table.
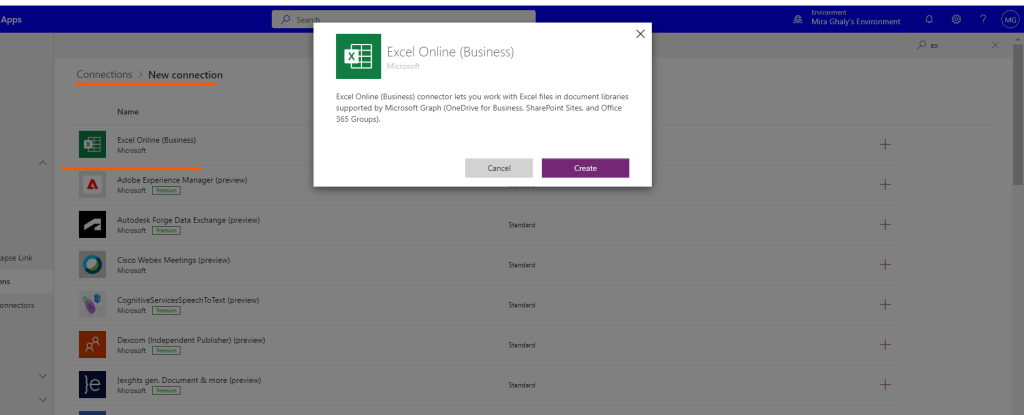
4. In the left navigation pane, select Dataverse > Connections, and then select New connection.
5. Select the Microsoft Excel Online (Business) from the list of connections and create new connection
6. You’ll be asked to provide additional details to connect to the data source.
Note: Your excel file should be saved in OneDrive of the person whose the connection belongs to and the table should be formatted as table.
7. Select Create, your current signed-in credentials will be used.
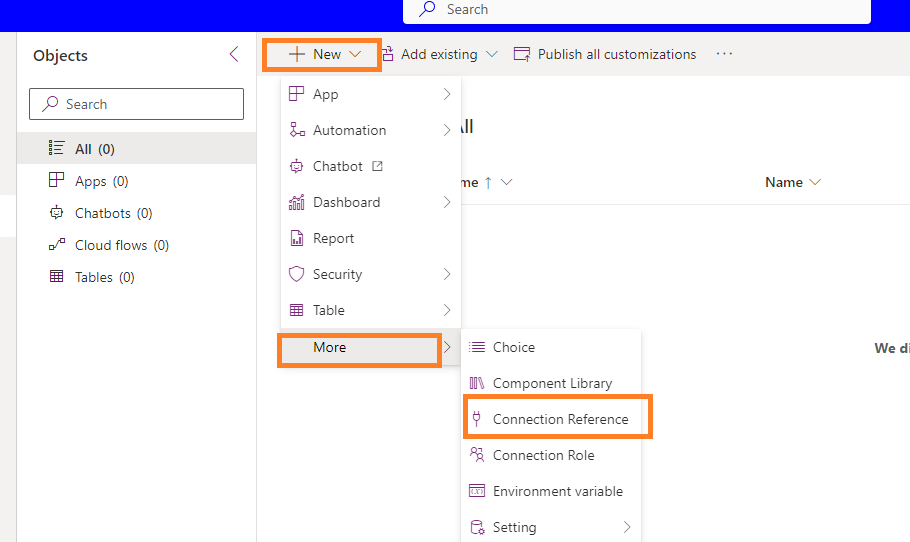
8. Go to solutions -> Create new Solution and Select New Connection reference.
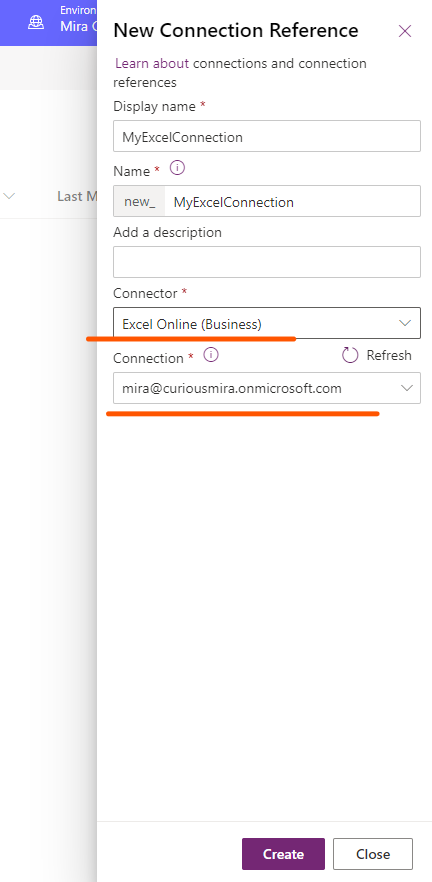
9. Choose the Connector and the connection and click Create
10. Go to Advanced setting by selecting the Gear Icon
11. Navigate to settings – > Administration and select virtual entity data sources
12. Click on New
13. Select Virtual Connector Data Provider and Click OK.
14. Set the Name of your Data Source, Select the connection we have created in step 9 and the file name in your onedrive:
15. Once you save an entity catalogue will be created, Entity Catalogue will be used to help you create your virtual tables
16. Go to Tables -> Filter by Virtual and then you can see your entity catalogue
17. Next you need to proceed to creating your virtual table based on your entity Catalogue so you need to create a new app and add the entity catalogue to it.
18. Navigate to Apps and Click New App and add the Entity Catalogue to it.
19. Click Add Page from the left navigation and select the entity catalouge
20. Save and Publish, then Play to open the app
21. Select Table 1 or any table from the tables defined in your datasource.
22. Select the Name , the primary key and the primary name and set Create or Refresh Entity to yes and save and now you can see your virtual table in the list of Dataverse Tables.
Moving Solution to other Environment:
Make sure you have installed the Dataverse Virtual Connector on your target environment before importing your solution.
Make sure you have created the required connection step No. 5 on the target environment.
You will need to add the Virtual table Data Source through the solution components -> Developer
Virtual tables enable integrating data from external data sources by seamlessly representing that data as tables in Microsoft Dataverse, without data replication
Virtual Connector Providers currently available are:
SQL Server
Sharepoint
Excel
In this article I will go step by step on how to connect your excel sheet to Dataverse:
Download and Install the virtual connector from this URL
Click on Get Free , Sign in to your account and choose your environment, you can check the progress of installation and once it is installed you can proceed to step3.
3. Go to Power Apps (make.powerapps.com), and select the environment in which you would like to set up the virtual table.
4. In the left navigation pane, select Dataverse > Connections, and then select New connection.
5. Select the Microsoft Excel Online (Business) from the list of connections and create new connection
6. You’ll be asked to provide additional details to connect to the data source.
Note: Your excel file should be saved in OneDrive of the person whose the connection belongs to and the table should be formatted as table.
7. Select Create, your current signed-in credentials will be used.
8. Go to solutions -> Create new Solution and Select New Connection reference.
9. Choose the Connector and the connection and click Create
10. Go to Advanced setting by selecting the Gear Icon
11. Navigate to settings – > Administration and select virtual entity data sources
12. Click on New
13. Select Virtual Connector Data Provider and Click OK.
14. Set the Name of your Data Source, Select the connection we have created in step 9 and the file name in your onedrive:
15. Once you save an entity catalogue will be created, Entity Catalogue will be used to help you create your virtual tables
16. Go to Tables -> Filter by Virtual and then you can see your entity catalogue
17. Next you need to proceed to creating your virtual table based on your entity Catalogue so you need to create a new app and add the entity catalogue to it.
18. Navigate to Apps and Click New App and add the Entity Catalogue to it.
19. Click Add Page from the left navigation and select the entity catalouge
20. Save and Publish, then Play to open the app
21. Select Table 1 or any table from the tables defined in your datasource.
22. Select the Name , the primary key and the primary name and set Create or Refresh Entity to yes and save and now you can see your virtual table in the list of Dataverse Tables.
Moving Solution to other Environment:
Make sure you have installed the Dataverse Virtual Connector on your target environment before importing your solution.
Make sure you have created the required connection step No. 5 on the target environment.
You will need to add the Virtual table Data Source through the solution components -> Developer
With this post I would like to share with you another strange issue with SharePoint 2013 and restoring site collection. The scenario in my case was:
I have a site collection with missing files
Last available SQL backup - 3 months ago
So at the beginning restoring the missing files looks an easy task. I restored the content DB in SQL with different name and made a backup of the site collection (Central Admin -> Backup and Restore -> Recover data from an unattached content database). My goal was to restore the site collection under different URL, but when I tried to restore it the following error poped up:
ConfirmAre you sure you want to perform this action?Performing operation "Restore-SPSite" on Target"http://test.contoso.com/sites/scr".[Y]Yes[A]Yes to All[N]No[L]No to All[S]Suspend[?]Help(defaultis"Y"):
This error message means that the backup of the site collection has older schema version then the current SharePoint. Actually the all content DB needs to be updated to the current SharePoint version in order to be able to do something with the backup otwerwise the backup is useless. As a next step you need to mount the content DB to existing or new web application and upgrade the database. I strongly recomend you to use powershell for these two steps:
Mount the content DB with Mount-SPContentDatabase and AssignNewDatabaseId parameter, otherwise the cmdlet will trown error because there is already a DB with the same ID.
Upgrade the DB with Upgrade-SPContentDatabase -Identity <DB name>
I strongly recommend you to check the upgrade logs, placed in the ULS folder. You have to discover a lot of the errors like this:
12/14/2015 18:36:20.12 powershell (0x20550) 0x26A38 SharePoint Foundation Upgrade SPContentDatabaseSequence ajxk1 ERROR Database [RM_SP_Content_02] contains a site (Id = [50340533-6c00-4187-8d01-f9eabdc514ed], Url = [/sites/scr]) whose id is already associated with a different database (Id = [95823bf0-4fe2-462e-bdf9-bb37b35b4c26], name = [SP_Content_02]) in the site map. Consider deleting one of these sites which have conflicting ids. d642bc3b-5bf4-4783-82da-47030365bb9b
I would say that all these errors are OK, because most of the sites still exist in SharePoint. But even the upgrade was successful you won't be able to browse or backup the site collections inside the restored content DB. As a next step unmount the content DB from SharePoint (Dismount-SPContentDatabase or use Central Admin) and backup your site collection via Unattached Content Database Data Recovery in Central Admin. After you backup your site collection you will be able to restore it with Restore-SPSite.