Très souvent, on me demande quel est la marche à suivre pour retirer les accès d’un collaborateur qui quitte une société. Alors voici une checklist rapide des éléments à prendre en considération.
Bloquer la connexion : Désactivez le compte pour empêcher les nouvelles connexions. Utilisez la commande cmdlet Revoke-MgUserSignInSession pour forcer la déconnexion de toutes les sessions immédiatement.
Désactiver le compte AD local : Si votre entreprise utilise Active Directory, désactivez le compte dans l’AD local.
Réinitialiser le mot de passe de l’utilisateur : Mettez à jour le compte avec un mot de passe aléatoire pour empêcher l’employé de continuer à accéder au tenant.
Soumettre une demande d’effacement sélectif des applications/effacement des appareils : Si Intune est déployé, soumettez une demande d’effacement pour tous les appareils enregistrés.
Soumettre une demande d’effacement ActiveSync : Si Intune n’est pas déployé, soumettez une demande d’effacement pour les appareils utilisant ActiveSync.
Clear-MobileDevice -AccountOnly -Identity User -NotificationEmailAddresses "admin@domain.com"
Désactiver les appareils de l’utilisateur : Invalidez toute authentification basée sur un compte d’ordinateur en utilisant les cmdlets du Microsoft Graph PowerShell SDK.
Activer la délégation sur OneDrive for Business : Déléguez l’accès au OneDrive for Business de l’employé à un utilisateur autorisé.
Conserver la boîte aux lettres de l’utilisateur : Convertissez la boîte aux lettres de l’utilisateur en boîte aux lettres partagée ou utilisez des rétentions pour conserver la boîte aux lettres en tant que boîte aux lettres inactive.
L’impact sur les éléments chiffrés, tels que les emails ou les documents, peut être significatif lorsqu’un utilisateur est supprimé. Avec l’adoption croissante des étiquettes de sensibilité, des problèmes peuvent survenir pour les éléments stockés dans Microsoft 365. Les étiquettes de sensibilité appliquent des restrictions d’accès et/ou un chiffrement à ces éléments. Si les étiquettes restreignent l’accès de manière à ce qu’un seul utilisateur soit le propriétaire d’un document, et que cet utilisateur est celui qui est supprimé, il n’y a pas de moyen facile d’identifier quels documents ou éléments sont impactés par la suppression du compte utilisateur.
Pour résoudre ce problème, il existe une configuration appelée Super User dans Azure Rights Management Service (RMS), qui est la technologie utilisée par les étiquettes de sensibilité pour appliquer le chiffrement et/ou le contrôle d’accès. Le Super User est un compte administratif spécial qui a des droits de propriétaire sur tous les éléments protégés par Azure RMS
Supprimer la licence de l’utilisateur : Réduisez les coûts de licence en supprimant la licence de l’utilisateur.
Supprimer le compte utilisateur : Après une période de grâce, supprimez le compte utilisateur du système.
Services avancés : Cette liste couvre les étapes de base pour les tenants Microsoft 365. Si vous avez des services avancés comme Defender for Cloud Apps, des étapes supplémentaires peuvent être nécessaires.
Ajouter les utilisateurs aux politiques de Defender for Cloud Apps : Cela permet de surveiller les téléchargements massifs de fichiers inexpliqués depuis Teams/SharePoint.
Configurer les notifications de flux de travail : Configurez un flux de travail de notification dans votre tenant pour que votre équipe IT soit informée lorsque des actions sont nécessaires.
Utiliser PowerAutomate pour automatiser le processus : Envisagez d’automatiser le processus en utilisant PowerAutomate cloud flow pour minimiser les interventions manuelles.
Old Limit with SignInActivity was 999 – New Limit for Azure AD Accounts is 120
Because it retrieves details of Azure AD accounts, the List Users API is one of the most heavily used of the Microsoft Graph APIs. It also underpins the Get-MgUser cmdlet from the Microsoft Graph PowerShell SDK. Microsoft generates the cmdlet from the API using a process called AutoRest, which means that changes made to the API show up soon afterward in the cmdlet.
I’ve documented some of the issues that developers must deal with when coding with the cmdlets from the Microsoft Graph PowerShell SDK. The cmdlets have been stable recently, which is a relief because tenants are migrating scripts from the Azure AD and MSOL modules. However, last week an issue erupted in a GitHub discussion that caused a lot of disruption.
In a nutshell, if you use List Users to fetch Azure AD accounts and include the SignInActivity property, the API limits the page size for results to 120 items. Calls made without specifying SignInActivity can set the page size to be anything up to 999 items.
An Unannounced Change
To help manage demand on the service, all Graph API requests limit the number of items that they return. To retrieve all matching items for a request, developers must fetch pages of results until nothing remains. When a developer knows that large numbers of items must be fetched, they often increase the page size to reduce the number of requests.
Microsoft didn’t say anything about the new restriction on requests that fetch Azure AD account data with sign-in activity. Developers only discovered the problem when programs and scripts failed. I first learned of the issue when some of the users of the Office 365 for IT Pros GitHub repository reported that a Graph request which included a $top query parameter to increase the page size to 999 items failed. For example:
$uri = "https://graph.microsoft.com/beta/users?`$select=displayName,userPrincipalName,mail,id,CreatedDateTime,signInActivity,UserType&`$top=999"
[array]$Data = Invoke-RestMethod -Method GET -Uri $Uri -ContentType "application/json" -Headers $Headers
Invoke-RestMethod : The remote server returned an error: (400) Bad Request.
At line:1 char:16
+ ... ray]$Data = Invoke-RestMethod -Method GET -Uri $Uri -ContentType "app ...
+                 ~~~~~~~~~~~~~~~~~~~~~~~~~~~~~~~~~~~~~~~~~~~~~~~~~~~~~~~~~
    + CategoryInfo          : InvalidOperation: (System.Net.HttpWebRequest:HttpWebRequest)
   [Invoke-RestMethod], WebException
    + FullyQualifiedErrorId : WebCmdletWebResponseException,Microsoft.PowerShell.Commands.I
As shown in Figure 2, testing with the Get-MgUser cmdlet revealed some more information in the error (“Cannot query data for more than 120 users at a time”). This was the first time I learned about a query limit:
Figure 2: Get-MgUser reports more useful error information
According to a response reported in the GitHub discussion, Microsoft support reported
“The PG have confirmed that this endpoint will be transitioning from beta to General Availability (GA).
As part of this transition, changes to its behavior has been made, this includes not requesting more than 120 results per call. They recommend requesting less than 120 results per call, which can be done by setting the top parameter to, say 100.”
It’s likely that Microsoft made the change because retrieving sign-in activity data for Azure AD accounts is an expensive operation. Reducing the page size to 120 possibly makes it easier to process a request than if it asked for 999 items.
Beta Version of List Users Moving to Production
When the product group (PG) says that the endpoint is transitioning from beta to GA, it means that instead of needing to use https://graph.microsoft.com/beta/users to access sign-in activity, the data will be available through https://graph.microsoft.com/V1.0/users. If you use the Microsoft Graph PowerShell SDK, you won’t have to run the Select-MgProfile cmdlet to choose the beta endpoint. Moving the beta version of the API to the production endpoint is a good thing because there are many other account properties now only available through the beta endpoint (like license assignments).
If you use the Microsoft Graph PowerShell SDK, the Get-MgUser cmdlet is unaffected by the change if you specify the All parameter. This is because the cmdlet handles pagination internally and fetches all pages automatically without the need to specify a page size. For instance, this works:
Although it’s good that Microsoft is (slowly) moving the beta versions of the List Users API towards production, it’s a pity that they introduced a change that broke so many scripts and programs without any warning. At worse, this so exhibits a certain contempt for the developer community. At best, it’s a bad sign when communication with the developer community is not a priority. That’s just sad.
Insight like this doesn’t come easily. You’ve got to know the technology and understand how to look behind the scenes. Benefit from the knowledge and experience of the Office 365 for IT Pros team by subscribing to the best eBook covering Office 365 and the wider Microsoft 365 ecosystem.
Microsoft Teams est en constante évolution Le consentement explicite d'enregistrement pour les réunions sur Teams est désormais disponible. Teams prend désormais en charge une politique de réunion de consentement explicite d'enregistrement. Lorsque la politique est appliquée, la fenêtre de réunion Teams demandera un consentement explicite de tous les participants pour être enregistré. Avant qu'un utilisateur ne donne son consentement, l'audio, la vidéo et le partage d'écran/partage de consentement de l'utilisateur ne seront pas capturés dans l'enregistrement de la réunion. Feuille de route: https://www.microsoft.com/en-US/microsoft-365/roadmap?filters=&searchterms=107781 Disponibilité globale: Mars 2023 Le consentement explicite d'enregistrement est désactivé par défaut, il est nécessaire de mettre à jour les politiques de réunion Teams avec PowerShell, Set-CsTeamsMeetingPolicy -Identity Global -ExplicitRecordingConsent "Enabled" il sera prochainement possible de gérer ce paramètre de stratégie avec le centre d'administration Microsoft Teams. En date du blog, fonctionnalité de consentement pour activer l'enregistrement dépend du rapport de participation à la réunion pour suivre quand les utilisateurs donnent leur consentement, il est nécessaire de s'assurer que la fonctionnalité est activé pour les personnes concernées. Naviguer dans Réunions puis Stratégies de réunions , et activer Rapport de participation Après l'activation de la fonctionnalité dans une politique de réunion, toute réunion organisée par des comptes auxquels la politique est assignée nécessitera un consentement explicite pour l'enregistrement des réunions. Cette fonctionnalité est rétroactive et s'applique aux réunions organisées par les utilisateurs relevant de la portée de la politique. Pour les réunions organisées par des utilisateurs ayant le paramètre activé, les réunions Teams organisées par ces personnes demanderont le consentement explicite de tous les participants pour être enregistrées. Lorsque l'enregistrement commence, les utilisateurs voient que Teams a désactivé leur microphone et leur vidéo sur l'écran de connexion. Après avoir rejoint l'appel, Teams les informe qu'ils doivent donner leur consentement pour être enregistrés. Lorsque la politique de consentement explicite d'enregistrement est activée, la fenêtre de réunion Teams demandera à chaque participant une autorisation explicite pour enregistrer sa vidéo, sa voix, ses ressources partagées, etc. Les personnes qui n'ont pas donné leur consentement ne seront pas enregistrées. Cette fonctionnalité est une excellente amélioration pour Teams, car elle permet de répondre aux préoccupations de confidentialité liées aux enregistrements de réunions et donne aux participants un plus grand contrôle sur leurs données personnelles. L'utilisateur est notifié avoir accepté l'enregistrement. Le consentement des participants est consigné et peut être consulté dans le cadre du rapport de présence. Limitations actuelles avec l'utilisation de la fonctionnalité d'enregistrement explicite: La fonctionnalité repose sur le rapport de présence ; pour les clients qui ont désactivé le rapport de présence, les utilisateurs finaux ne pourront pas activer leur micro, leur caméra ou leur partage d’écran/partage de contenu lorsqu’un enregistrement est démarré. Si vous ne parvenez pas à activer le rapport de présence, nous vous recommandons d’attendre une mise à jour ultérieure. Pour éviter des interruptions pour les utilisateurs finaux, ils doivent utiliser la version la plus récente de Teams. Dans les réunions nécessitant un consentement explicite, les utilisateurs qui se joignent à partir de points de terminaison non pris en charge, tels que les anciennes versions client et CarPlay, ne pourront pas activer leur micro, leur caméra ou leur partage d’écran/partage de contenu pendant l’enregistrement. Les utilisateurs des salles de réunion Teams et les utilisateurs utilisant les ponts de conférences téléphoniques peuvent toujours recevoir des notifications d’enregistrement à partir d’aujourd’hui, mais ils ne peuvent pas fournir de consentement explicite à l’enregistrement et leurs données de consentement seront enregistrées comme « non applicable » ou « consentement automatique ».
Pour utiliser les réceptions automatiques et les files d'attente d'appels dans Microsoft Teams, il est nécessaire d'associer un compte de ressource à chacune de vos instances. Auparavant, une licence "Teams Phone Resource Account" devait être associé avec un compte de ressource uniquement dans le contexte dans lequel un numéro de téléphone est attribué avec cette identité. Cette licence "Teams Phone Resource Account" est anciennement connu sous le nom "Téléphonie Microsoft Teams Standard - Utilisateur virtuel". Ces licences sont gratuites, mais elles sont attribuées en fonction du nombre de licences Teams Phone Standard achetées. Les organisations disposant d'un abonnement Teams Phone reçoivent automatiquement un certain nombre de licences Teams Phone Resource Account sans frais supplémentaires. L'achat d'un plan d'appel Microsoft n'est requis que si vous souhaitez utiliser le compte de ressource pour passer des appels sortants. En fonction de la taille de votre organisation, celle-ci se voit attribuer un certain nombre de licences pour les comptes de ressources Teams Phone. Si votre organisation dispose d'un abonnement avec des fonctionnalités de système téléphonique telles que les licences Teams Phone Standard et Teams Phone avec un plan d'appel, elle bénéficie de 25 licences de compte de ressource Teams Phone sans frais supplémentaires. De plus, pour chaque tranche de 10 licences d'utilisateur de Teams Phone Standard ou de Teams Phone avec un plan d'appel dans votre organisation, une licence supplémentaire de compte de ressource Teams Phone est disponible. Il semblerait qu'il y ait eu un changement dans la licence des comptes de ressources, la licence Teams Phone Resource Account est désormais requise pour tous les comptes de ressources utilisés avec Microsoft Teams. Chacun de ces comptes de ressources doit être associés avec d'une licence Microsoft Teams Phone Resource Account pour que le système l'identifie correctement et que l'instance soit opérationnelle, qu'un numéro de téléphone y soit affecté ou non. Si vous utilisez actuellement des comptes de ressources qui ne sont pas affectés à une licence, il est important de les revoir pour vous assurer qu'ils disposent d'une licence Teams Phone Resource Account. Il ne faut pas support d'associer une licence Teams Phone Standard à un compte de ressource. L'annonce n'est pas disponible dans le centre de messagerie, mais "subtilement" partagée dans une note sur la page suivante: https://learn.microsoft.com/en-us/microsoftteams/teams-add-on-licensing/virtual-user Dans la même page, une nouvelle information précise que dans le cas où vous auriez besoin de davantage de licences de compte de ressource Teams Phone, vous pouvez en acheter au-delà de l'allocation standard des licences supplémentaires, je n'ai pas d'informations sur le prix à l'unité en date du blog.
I don’t normally write about a new version of the Microsoft Teams PowerShell module and confine myself to updating the post covering recent module updates. However, the release of a major version is worth comment, which is the case with V5.0 of the Teams module, now available from the PowerShell Gallery (Figure 1).
Figure 1: V5.0 of the Microsoft Teams PowerShell module
Over the past few releases, Microsoft concentrated on “modernizing” the policy management cmdlets that Teams inherited from the Skype for Business connector. Modernization is a term to describe updating the cmdlets to recent standards to make them more reliable and robust. The Get-CsOnlineUser cmdlet is the focus for the V5.0 release.
The Use of Get-CsOnlineUser
Get-CsOnlineUser fetches details of user accounts enabled for Teams. I only use this cmdlet when I need to view details of the Teams policies assigned to accounts as I prefer using the Get-MgUser cmdlet to retrieve information about user accounts. The Get-CsOnlineUser cmdlet can return details of the Teams service plans assigned to an account (like the MCO_VIRTUAL_APPT and TEAMS_WEBINAR service plans assigned to accounts with the Teams Premium license), but these are also retrievable with Get-MgUser.
In the past, Get-CsOnlineUser hasn’t been very performant or flexible when retrieving accounts. Microsoft says that they’ve improved performance, especially when using filters to find accounts. In addition, a set of new filterable properties are available (Alias, City, CompanyName, CompanyName, HostingProvider, UserValidationErrors, OnPremEnterpriseVoiceEnabled, OnPremHostingProvider, OnPremLineURI, OnPremSIPEnabled, SipAddress, SoftDeletionTimestamp, State, Street, TeamsOwnersPolicy, WhenChanged, WhenCreated, FeatureTypes, PreferredDataLocation, andLastName).
Changes to Filtering
Another improvement is in the support of filtering operators to bring the cmdlet in line with other cmdlets that fetch user information like Get-ExoMailbox. This is server-side filtering, meaning that the server only returns items that match the filter. It’s faster to retrieve data with a server-side filter than it is to fetch items and then apply a filter on the workstation (client-side filtering).
For instance, this use of the like operator now works:
Get-CsOnlineUser -Filter {City -like "*York*"} | Format-Table DisplayName, City

DisplayName   City
-----------   ----
Terry Hegarty New York
Previous versions of the module generate the error: Get-CsOnlineUser : The filter attribute ‘city’ is not supported.
Get-CsOnlineUser now supports use of the gt (greater than), lt (less than), and le (less than or equal to) operators to filter against string properties. For instance, this works:
Get-CsOnlineUser -Filter {DisplayName -gt "James"} | Sort-Object DisplayName | Format-Table DisplayName, City

DisplayName                             City
-----------                             ----
James Abrahams                          Foxrock
James Ryan                              Foxrock
Jane Sixsmith                           Dublin
The contains operator now supports properties that contain arrays. For instance, this command returns the set of accounts enabled for Teams:
My attempts to use the cmdlet to filter against the Teams Channel policy failed. I also saw inconsistent results when filtering against other policies. For instance, this returns no accounts:
Adding wildcards generates some results, but it’s hard to accept that a policy called “Advanced” has a name greater or equal to “B”:
Get-CsOnlineUser -Filter {TeamsMessagingPolicy -ge "*B*"} | Format-Table DisplayName, TeamsMessagingPolicy

DisplayName                 TeamsMessagingPolicy
-----------                 --------------------
Jane Sixsmith               Advanced
Marc Vigneau                Advanced
Interestingly, a client-side filter has problems too:
$Users = Get-CsOnlineUser | Where-Object {$_.TeamsMessagingPolicy -ge "B"} | Format-Table DisplayName
Where-Object : Cannot compare "Advanced" because it is not IComparable.
At line:1 char:29
I might be doing things in a way unanticipated by the Teams PowerShell developers, but I have been around PowerShell long enough to know when things don’t work quite the way they should. Some tweaks might still be necessary to make sure that filters work against all Teams policies in the same way.
Soft Deleted Users
Apart from the filtering changes, Get-CsOnlineUser now returns details of unlicensed users for 30 days after license removal and indicates soft-deleted users (accounts in the Azure AD recycle bin awaiting permanent removal) by showing the date and time of deletion in the SoftDeletionTimestamp property. You can find the soft-deleted users with:
Get-CsOnlineUser -Filter {SoftDeletionTimestamp -ne $Null} | Format-Table DisplayName, SoftDeletionTimestamp

DisplayName SoftDeletionTimestamp
----------- ---------------------
Ben James   04/03/2023 23:11:41
Work Still to Do
Get-CsOnlineUser is an important cmdlet used in many scripts to automate administrative processes. It’s good that Microsoft invested effort to make the Get-CsOnlineUser cmdlet work better, even if some issues still exist. Crack out the update procedure you use to refresh Microsoft 365 modules (or use my script, which handles Exchange Online, SharePoint Online, and the Microsoft Graph PowerShell SDK too) and upgrade to V5.0 of the Microsoft Teams module.
Support the work of the Office 365 for IT Pros team by subscribing to the Office 365 for IT Pros eBook. Your support pays for the time we need to track, analyze, and document the changing world of Microsoft 365 and Office 365.
During an online discussion following publication of my article about how to purge guest accounts with unredeemed invitations from Azure AD, Microsoft’s Jef Kazimer said that he sees many Microsoft 365 organizations using guest accounts instead of mail contacts because guest accounts have better lifecycle management, even if the guests never sign in.
That idea got me thinking. Exchange Online is the largest Microsoft 365 workload and some organizations create many thousands of mail contacts for different reasons. For instance, they might have contacts for people in partner organizations so that users can easily find those contacts in the Global Address List (GAL). Mail contacts also exist in Exchange Server and many of the contacts now in Exchange Online originated. Hybrid organizations can synchronize on-premises contacts to Azure AD, but the management of those objects must be done on-premises.
Understanding Mail Contacts
Before comparing mail contacts with Azure AD guest accounts, we need to understand what a mail contact is. Mail contact objects exist in both the Exchange directory (EXODS) and Azure AD. For example, to create a mail contact, you run the New-MailContact cmdlet:
This action creates a contact object in both Exchange Online and Azure AD. The Exchange object is what people think of when they think about a mail contact. The Azure AD object exists to hold properties unrelated to email processing. Because it uses mail contacts as addressable email recipients, all Exchange Online really cares about is the email address. Once an object has an email address, Exchange can route messages to it and allow the object to participate in distribution lists. The Get-MailContact cmdlet confirms the details of the new contact object:
The external directory object identifier stored in the mail contact points to the Azure AD object, which we can retrieve using the Get-MgContact cmdlet from the Microsoft Graph PowerShell SDK:
The mail contact is a sparse object so far. To populate the other properties that you might want users to see in the GAL (Figure 1), you must run the Set-Contact cmdlet to update the Azure AD object:
Figure 1: A fully-populated mail contact as seen by Outlook for Windows
The Get-MgContact cmdlet reports the newly-populated properties as does the Get-ExoRecipient cmdlet. There are some exceptions and caveats:
Remember to include the PropertySet All parameter to force Get-ExoRecipient to retrieve the full set of properties.
Get-ExoRecipient doesn’t retrieve the street address because it’s not included in the GAL.
Get-MgContact uses compound properties to hold some information. For instance, to see the elements of a contact’s address, you must expand the properties stored in the Addresses property:
Get-MgContact -OrgContactId (Get-MailContact -Identity Jef.Kazimer).ExternalDirectoryObjectId | Select-Object -ExpandProperty Addresses


City     CountryOrRegion OfficeLocation PostalCode State      Street
----     --------------- -------------- ---------- -----      ------
Bellevue United States   Liberty Square 98004      Washington 14, Preston Villas
Managing Mail Contacts
A Set-MailContact cmdlet is available to update properties of the Exchange objects, including the set of custom attributes available for all mail-enabled objects. The Set-Contact cmdlet updates the information held in Azure AD contact objects such as the address data shown above.
When administrators manage mail contacts through the Microsoft 365 admin center or Exchange admin center, they can work with both Exchange Online and Azure AD object properties. The GUI hides the fact that the settings presented to the administrator come from two directories, much like it disguises the interaction between Azure AD and Exchange when managing mailbox-enabled user accounts.
Guest Accounts and Guest Mail Users
Now that we understand mail contacts, let’s discuss the relationship between Exchange Online and Azure AD guest accounts. Following the creation of a guest account, a background process creates a special type of mail user object with a RecipientTypeDetails setting of GuestMailUser based on the properties of the guest account. The mail user object allows:
Guest members of Outlook groups to participate in group conversations via email.
Mail routing to guest accounts.
Guest accounts to appear in the GAL and other Exchange address lists.
Guest mail user objects exist in the Exchange directory until the removal of their linked guest accounts from Azure AD. Although you can view guest mail user objects through the Exchange admin center, the GUI won’t allow you to update their properties.Changes must be made to the guest account using the Azure AD admin center or with a Graph API (including the Microsoft Graph PowerShell SDK cmdlets). You can update the Exchange-specific properties with the Set-MailUser cmdlet.
To see the set of guest mail user objects, run the Get-ExoRecipient cmdlet:
The last property is True (the default) if the guest account isn’t visible to Exchange address lists. Run the Set-MailUser cmdlet to update HiddenFromAddressListsEnabled to True to expose the object. Here’s an example:
Note that it takes at least a day before newly exposed objects show up in the offline address look (OAB).
Adding Guest Mail Users to Distribution Lists
Because the guest mail users are routable objects, they can be added to distribution lists. This example spells things out, but it’s possible to add a guest mail user to a distribution list by passing its display name or email address without going to the bother of fetching the object with Get-MailUser.
Getting back to the original point, Jef says that guest accounts have better lifecycle management. In other words, if an organization invests in creating guest accounts instead of mail contacts, they’ll benefit from the work Microsoft does to improve how Azure AD manages external identities.
There’s some truth here. An Azure AD guest account supports more properties, including custom security attributes and support dynamic Azure AD Groups and dynamic Azure AD administrative units. They’re a Microsoft 365 entity rather than being restricted to just Exchange Online. Azure AD development for external identities, including guest accounts, is active whereas I suspect the development effort for Exchange mail contacts entered an “only fix bugs” maintenance stage years ago. On the other hand, mail contacts are simple and effective and work across hybrid Exchange organizations.
If you’re a cloud-only organization, the choice exists to use either. If you decide to use Azure AD guest accounts, the existence of guest mail user objects smoothen the transition and make sure that address lists, distribution lists, an email routing continue working. Azure AD guest accounts are a better long-term bet, but that doesn’t mean that anyone should switch anytime soon.
Learn more about how the Microsoft 365 applications like Exchange Online and Azure AD really work on an ongoing basis by subscribing to the Office 365 for IT Pros eBook. Our monthly updates keep subscribers informed about what’s important across the Office 365 ecosystem.
He looks happy, but he hasn’t hit some of the SDK foibles yet…
Translating Graph API Requests to PowerShell Cmdlets Sometimes Doesn’t Go So Well
The longer you work with a technology, the more you come to know about its strengths and weaknesses. I’ve been working with the Microsoft Graph PowerShell SDK for about two years now. I like the way that the SDK makes Graph APIs more accessible to people accustomed to developing PowerShell scripts, but I hate some of the SDK’s foibles.
Sometimes you just don’t want to write something into a property and that’s what PowerShell’s $Null variable is for. But the Microsoft Graph PowerShell SDK cmdlets don’t like it when you use $Null. For example, let’s assume you want to create a new Azure AD user account. This code creates a hash table with the properties of the new account and then runs the New-MgUser cmdlet.
New-MgUser fails because of an invalid value for the department property, even though $Null is a valid PowerShell value.
New-MgUser : Invalid value specified for property 'department' of resource 'User'.
At line:1 char:2
+  $NewGuestAccount = New-MgUser @NewUserProperties
+  ~~~~~~~~~~~~~~~~~~~~~~~~~~~~~~~~~~~~~~~~~~~~~~~~
    + CategoryInfo          : InvalidOperation: ({ body = Micros...oftGraphUser1 }:<>f__AnonymousType64`1) [New-MgUser
   _CreateExpanded], RestException`1
    + FullyQualifiedErrorId : Request_BadRequest,Microsoft.Graph.PowerShell.Cmdlets.NewMgUser_CreateExpanded
One solution is to use a variable that holds a single space. Another is to pass $Null by running the equivalent Graph request using the Invoke-MgGraphRequest cmdlet. Neither are good answers to what should not happen (and we haven’t even mentioned the inability to filter on null values).
Ignoring the Pipeline
The pipeline is a fundamental building block of PowerShell. It allows objects retrieve by a cmdlet to pass to another cmdlet for processing. But despite the usefulness of the pipeline, the SDK cmdlets don’t support it and the pipeline stops stone dead whenever an SDK cmdlet is asked to process incoming objects. For example:
Get-MgUser -Filter "userType eq 'Guest'" -All | Update-MgUser -Department "Guest Accounts"
Update-MgUser : The pipeline has been stopped
Why does this happen? The cmdlet that receives objects must be able to distinguish between the different objects before it can work on them. In this instance, Get-MgUser delivers a set of guest accounts, but the Update-MgUser cmdlet does not know how to process each object because it identifies an object is through the UserId parameter whereas the inbound objects offer an identity in the Id property.
The workaround is to store the set of objects in an array and then process the objects with a ForEach loop.
Property Casing and Fetching Data
I’ve used DisplayName to refer to the display name of objects since I started to use PowerShell with Exchange Server 2007. I never had a problem with uppercasing the D and N in the property name until the Microsoft Graph PowerShell SDK came along only to find that sometimes SDK cmdlets insist on a specific form of casing for property names. Fail to comply, and you don’t get your data.
What’s irritating is that the restriction is inconsistent. For instance, both these commands work:
This works, but I end up with a set of identifiers pointing to individual group members. Then I remember from experience gained from building scripts to report group membership that Get-MgGroupMember (like other cmdlets dealing with membership like Get-MgAdministrationUnitMember) returns a property called AdditionalProperties holding extra information about members. So I try:
$GroupMembers.AdditionalProperties.DisplayName
Nope! But if I change the formatting to displayName, I get the member names:
$GroupMembers.AdditionalProperties.displayName
Tony Redmond
Kim Akers
James Ryan
Ben James
John C. Adams
Chris Bishop
Talk about frustrating confusion! It’s not just display names. Reference to any property in AdditionalProperties must use the same casing as used the output, like userPrincipalName and assignedLicenses.
Another example is when looking for sign-in logs. This command works because the format of the user principal name is the same way as stored in the sign-in log data:
Two SDK foibles are on show here. First, the way that cmdlets return sets of identifiers and stuff information into AdditionalProperties (something often overlooked by developers who don’t expect this to be the case). Second, the inconsistent insistence by cmdlets on exact matching for property casing.
I’m told that this is all due to the way Graph APIs work. My response is that it’s not beyond the ability of software engineering to hide complexities from end users by ironing out these kinds of issues.
GUIDs and User Principal Names
Object identification for Graph requests depends on globally unique identifiers (GUIDs). Everything has a GUID. Both Graph requests and SDK cmdlets use GUIDs to find information. But some SDK cmdlets can pass user principal names instead of GUIDs when looking for user accounts. For instance, this works:
Unless you want to include the latest sign-in activity date for the account.
Get-MgUser -UserId Tony.Redmond@office365itpros.com -Property signInActivity
Get-MgUser :
{"@odata.context":"http://reportingservice.activedirectory.windowsazure.com/$metadata#Edm.String","value":"Get By Key
only supports UserId and the key has to be a valid Guid"}
The reason is that the sign-in data comes from a different source which requires a GUID to lookup the sign-in activity for the account, so we must pass the object identifier for the account for the command to work:
It’s safer to use GUIDs everywhere. Don’t depend on user principal names because a cmdlet might object – and user principal names can change.
No Fix for Problems in V2 of the Microsoft Graph PowerShell SDK
V2.0 of the Microsoft Graph PowerShell SDK is now in preview. The good news is that V2.0 delivers some nice advances. The bad news is that it does nothing to cure the weaknesses outlined here. I’ve expressed a strong opinion that Microsoft should fix the fundamental problems in the SDK before doing anything else.
I’m told that the root cause of many of the issues is the AutoRest process Microsoft uses to generate the Microsoft Graph PowerShell SDK cmdlets from Graph API metadata. It looks like we’re stuck between a rock and a hard place. We benefit enormously by having the SDK cmdlets but the process that makes the cmdlets available introduces its own issues. Let’s hope that Microsoft gets to fix (or replace) AutoRest and deliver an SDK that’s better aligned with PowerShell standards before our remaining hair falls out due to the frustration of dealing with unpredictable cmdlet behavior.
Insight like this doesn’t come easily. You’ve got to know the technology and understand how to look behind the scenes. Benefit from the knowledge and experience of the Office 365 for IT Pros team by subscribing to the best eBook covering Office 365 and the wider Microsoft 365 ecosystem.
Finding Azure AD Guest Accounts in Microsoft 365 Groups
The article explaining how to report old guest accounts and their membership of Microsoft 365 Groups (and teams) in a tenant is very popular and many people use its accompanying script. The idea is to find guest accounts above a certain age (365 days – configurable in the script) and report the groups these guests are members of. Any old guest accounts that aren’t in any groups are candidates for removal.
The script uses an old technique featuring the distinguished name of guest accounts to scan for group memberships using the Get-Recipient cmdlet. The approach works, but the variation of values that can exist in distinguished names due to the inclusion of characters like apostrophes and vertical lines means that some special processing is needed to make sure that lookups work. Achieving consistency in distinguished names might be one of the reasons for Microsoft’s plan to make Exchange Online mailbox identification more effective.
In any case, time moves on and code degrades. I wanted to investigate how to use the Microsoft Graph PowerShell SDK to replace Get-Recipient. The script already uses the SDK to find Azure AD guest accounts with the Get-MgUser cmdlet.
The Graph Foundation
Graph APIs provide the foundation for all SDK cmdlets. Graph APIs provide the foundation for all SDK cmdlets. The first thing to find is an appropriate API to find group membership. I started off with getMemberGroups. The PowerShell example for the API suggests that the Get-MgDirectoryObjectMemberGroup cmdlet is the one to use. For example:
The cmdlet works and returns a list of group identifiers that can be used to retrieve information about the groups that the user belongs to. For example:
Get-MgGroup -GroupId $Groups[0] | Format-Table DisplayName, Id, GroupTypes

DisplayName                     Id                                   GroupTypes
-----------                     --                                   ----------
All Tenant Member User Accounts 05ecf033-b39a-422c-8d30-0605965e29da {DynamicMembership, Unified}
However, because Get-MgDirectoryObjectMemberGroup returns a simple list of group identifiers, the developer must do extra work to call Get-MgGroup for each group to retrieve group properties. Not only is this extra work, calling Get-MgGroup repeatedly becomes very inefficient as the number of guests and their membership in groups increase.
Looking Behind the Scenes with Graph X-Ray
The Azure AD admin center (and the Entra admin center) both list the groups that user accounts (tenant and guests) belong to. Performance is snappy and it seemed unlikely that the code used was making multiple calls to retrieve the properties for each group. Many of the sections in these admin centers use Graph API requests to fetch information, and the Graph X-Ray tool reveals those requests. Looking at the output, it’s interesting to see that the admin center uses the beta Graph endpoint with the groups memberOf API (Figure 1).
Figure 1: Using the Graph X-Ray tool to find the Graph API for group membership
We can reuse the call used by the Azure AD center to create the query (containing the object identifier for the user account) and run the query using the SDK Invoke-MgGraphRequest cmdlet. One change made to the command is to include a filter to select only Microsoft 365 groups. If you omit the filter, the Graph returns all the groups a user belongs to, including security groups and distribution lists. The group information is in an array that’s in the Value property returned by the Graph request. For convenience, we put the data into a separate array.
The format of returned data marks a big difference between the SDK cmdlet and the Graph API request. The cmdlet returns group information in a hash table in the AdditionalProperties array while the Graph API request returns a simple array called Value. To retrieve group properties from the hash table, we must enumerate through its values. For instance, to return the names of the Microsoft 365 groups in the hash table, we do something like this:
SDK cmdlets can be inconsistent in how they return data. It’s just one of the charms of working with cmdlets that are automatically generated from code. Hopefully, Microsoft will do a better job of ironing out inconsistencies when they release V2.0 of the SDK sometime later in 2023.
A Get-MgUserTransitiveMemberOf cmdlet is also available to return the membership of nested groups. We don’t need to do this because we’re only interested in Microsoft 365 groups, which don’t support nesting. The cmdlet works in much the same way:
Because of the extra complexity in accessing group properties, I decided to use a modified version of the Graph API request from the Azure AD admin center. It’s executed using the Invoke-MgGraphRequest cmdlet, so I think the decision is justified.
When revising the script, I made some other improvements, including adding a basic assessment of whether a guest account is stale or very stale. The assessment is intended to highlight if I should consider removing these accounts because they’re obviously not being used. Figure 2 shows the output of the report.
Figure 2: Report highlighting potentially obsolete Azure AD guest accounts
Reporting obsolete Azure AD guest accounts is nice. Cleaning up old junk from Azure AD is even better. The script generates a PowerShell list with details of all guests over a certain age and the groups they belong to. To generate a list of the very stale guest accounts, filter the list:
To complete the job and remove the obsolete guest accounts, a simple loop to call Remove-MgUser to process each account:
ForEach ($Account in $DeleteAccounts) {
   Write-Host ("Removing guest account for {0} with UPN {1}" -f $Account.Name, $Account.UPN)
   Remove-MgUser -UserId $Account.Id }
Obsolete or stale guest accounts are not harmful, but their presence slows down processing like PowerShell scripts. For that reason, it’s a good idea to clean out unwanted guests periodically.
Learn about mastering the Microsoft Graph PowerShell SDK and the Microsoft 365 PowerShell modules by subscribing to the Office 365 for IT Pros eBook. Use our experience to understand what’s important and how best to protect your tenant.
By default, uncustomized list forms display the fields in a single column. This is generally fine, but sometimes you may want to use more horizontal space and have your fields wrap. This is not technically a format but rather a body layout. No columns or sections are specified meaning that this can be applied to any form and it won’t change the order of display or what columns are visible it simply adds the wrapping.
This sample shows a customized header and footer for a form with a Status column with possible values ‘Thinking about it’, ‘Working on it’, ‘Done’, and ‘Nevermind’.
This format is intended for the Header Format and Footer Format of the form body in the Configure Layout panel. Depending on the value of the Status column, a corresponding icon and colour scheme are used.
This sample shows a customized header for the item form used in the “Event itinerary” list template.
This format is intended for the Header Format of the form body in the Configure Layout panel. The body layout shown in the screenshot can be obtained by configuring sections within the Body panel (not included in this format).
This sample displays the Title and Description values in the heading and decorates them with dashed lines. If the Description value is empty, it will be hidden.
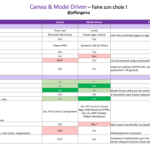
Suite à la conférence Modern Workplace Conference 2021 à Paris, voici le support de présentation de ma session où je vous éclaire sur le choix des Canvas Apps ou Model Driven Apps.
Tout d’abord regardons les licences nécessaires puis les usages / fonctionnalités de chaque application
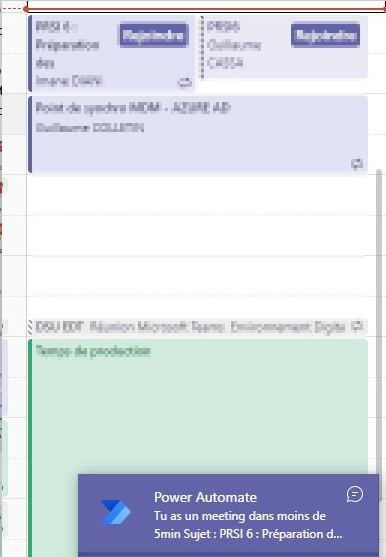
Je rate parfois les rappels d’une réunion Teams. Notification perdue parmi toutes les notifications Windows.
Solution :
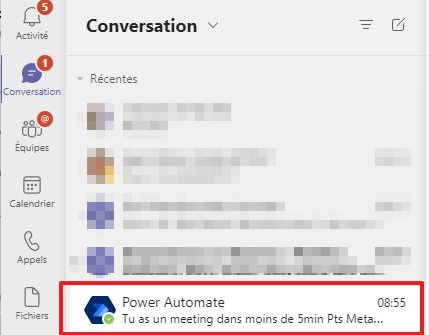
Un automatisme Power Automate qui m’envoie un message dans Teams 5min avant une réunion. Cela permet, de mon téléphone ou PC, de voir le rappel sans avoir Outlook ouvert.
Je suis notifié avant une réunion
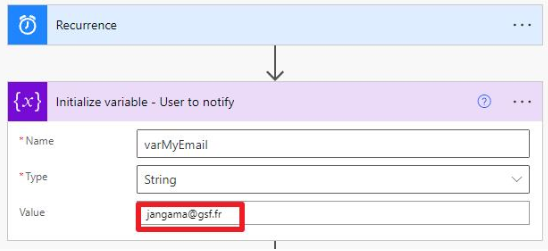
Recette :
Un Power Automate qui se déclenche toutes les 5 minutes
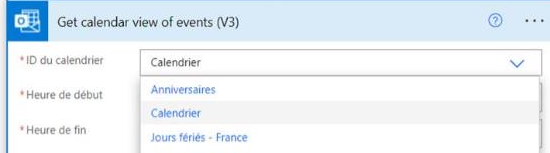
Il récupère les meeting de ma journée
Compare l’heure actuelle à l’heure de début de chaque réunion
Si l’heure de début est dans moins de 5min, alors envoie de message via Teams à l’utilisateur
My customer was a school, each year they need to recreate the Teams classroom, to reset the content and canal
The solution was to remove every Teams except the permanent one (workgroup Teams)
Below is the PowerShell Script. I use an xml file to connect easily to the Microsoft 365, avoiding re entering login / password
#By Jeff ANGAMA
#02.09.2020

#************GOAL************#
#This script remove every TEAMS except the one specified in variable $keepThoseTeams
#Write the list of TEAMS without ACCENT !!!

#************PRE REQUISITE - Run those commands to save your creds************#
#$pathToCred = "C:\credTenant.xml"
# $credential = Get-Credential
# $credential | Export-CliXml -Path $pathToCred

#************CONFIG************#
$keepThoseTeams = (
    'IT Team',
    'Support Informatique',
    'Training',
    'Administration',
    'College',
    'Coordinateurs lycee',
    'Documents de suivi lycee',
    'Budget',
    'Demande de creation de classe'
    )

#LOGS
$currentFolder = Get-Location
$timeStamp = $(((get-date).ToUniversalTime()).ToString("yyyyMMddThhmmssZ"))
$logFileName = "$currentFolder\logs\logDeleteTeams_" + $timeStamp + ".txt"
Start-Transcript -path $logFileName -append

#Connect
$pathToCred = "C:\credTenant.xml"
$credential = Import-CliXml -Path $pathToCred
Connect-MicrosoftTeams -Credential $credential

#remove accent from text, to avoid issue with contains or eq function containing accents
function get-sanitizedUTF8Input{
    Param(
        [String]$inputString
    )
    #replace diacritics
    $sb = [Text.Encoding]::ASCII.GetString([Text.Encoding]::GetEncoding("Cyrillic").GetBytes($inputString))

    #remove spaces and anything the above function may have missed
    return $sb
}

Get-Team | ForEach-Object {
    $valueToCheck = get-sanitizedUTF8Input -inputString $_.DisplayName

    if($keepThoseTeams -contains $valueToCheck){
        Write-Host -ForeGroundColor Green "Do not delete this Team " $_.DisplayName $_.GroupId
    }else {
        Write-Host "Deleting Team " $_.DisplayName $_.GroupId
        #Remove-Team -GroupId $_.GroupId
    }
}

Stop-Transcript

Write-Host -ForeGroundColor Green "END OF SCRIPT"
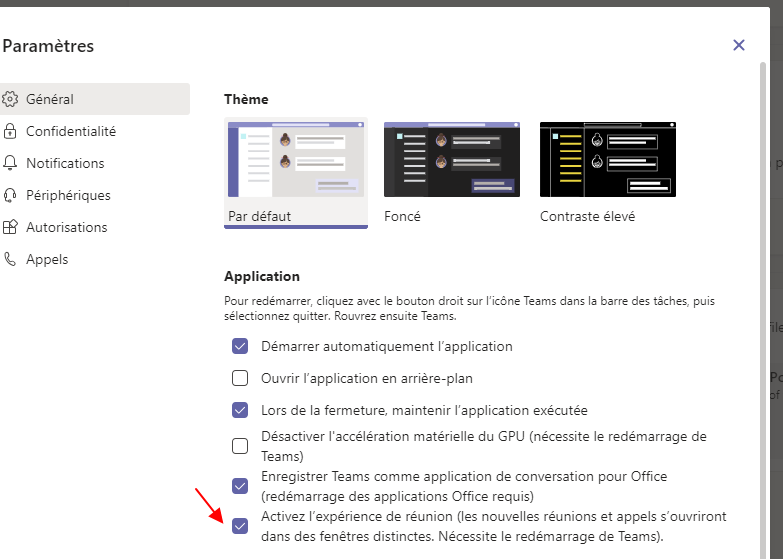
D’ici quelques mois ce “Together Mode” BETA des réunions sera actifs pour tous, en attendant vous pouvez l’activer dans vos paramètres. Relancer Teams après l’avoir changé.
Aperçu du mode Together (Ensemble)
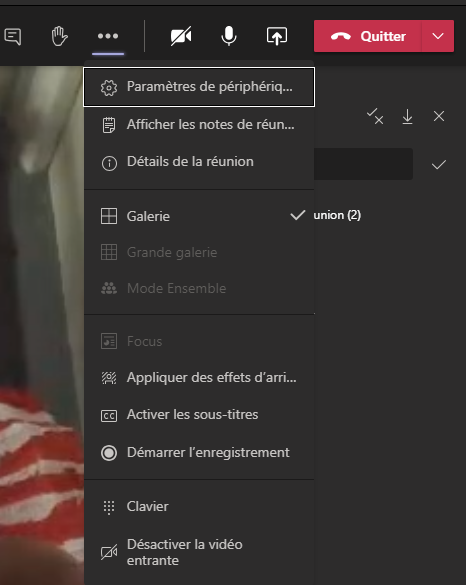
L’interface de la nouvelle expérience de réunion
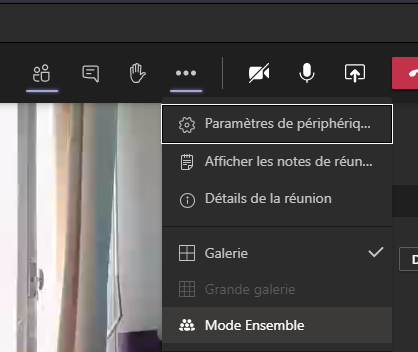
La barre de contrôle passe en haut
Les réunions se lancent dans une fenêtre séparée
Dans les options vous pouvez désormais activer le mode grande galerie (4 à 49 participants max) ou le mode Ensemble (Minimum 5 participants)
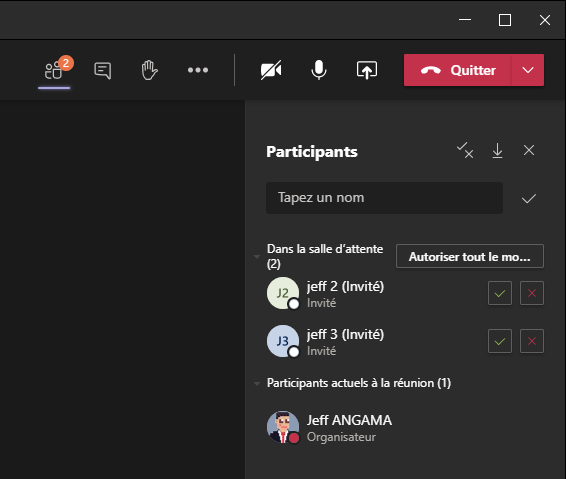
Nouveauté : Vous pouvez accepter plusieurs participants dans la salle d’attente
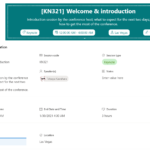
Microsoft List a été annoncé durant la conférence Build (19-20 Mai), est en cours de déploiement sur votre environnement Microsoft 365. Pour les environnements en Target Release, vous pouvez déjà y accéder en suivant l’astuce ci dessous
Aperçu de Microsoft List
Comment y accéder sur mon environnement (Astuce !)
Allez sur votre One Drive, changez l’adresse OneDrive.aspx
Les listes SharePoint existent depuis les toutes premières versions de SharePoint, cependant elles étaient réservées à une population de néophytes SharePoint, demandant une formation de 2h pour comprendre comment les créer etc.
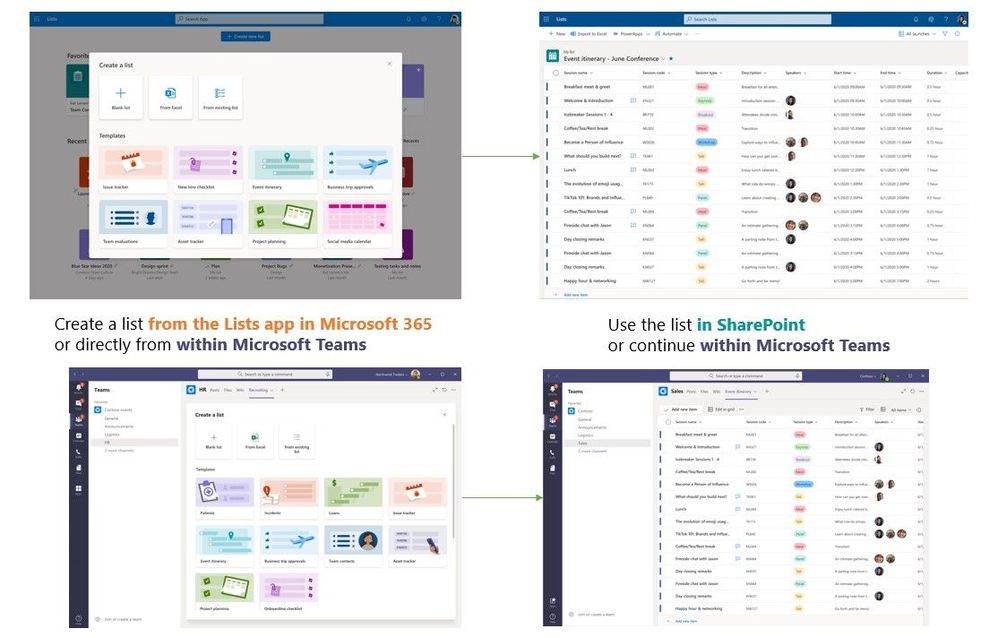
Utilisable dans Teams ou en mode web depuis www.office.com
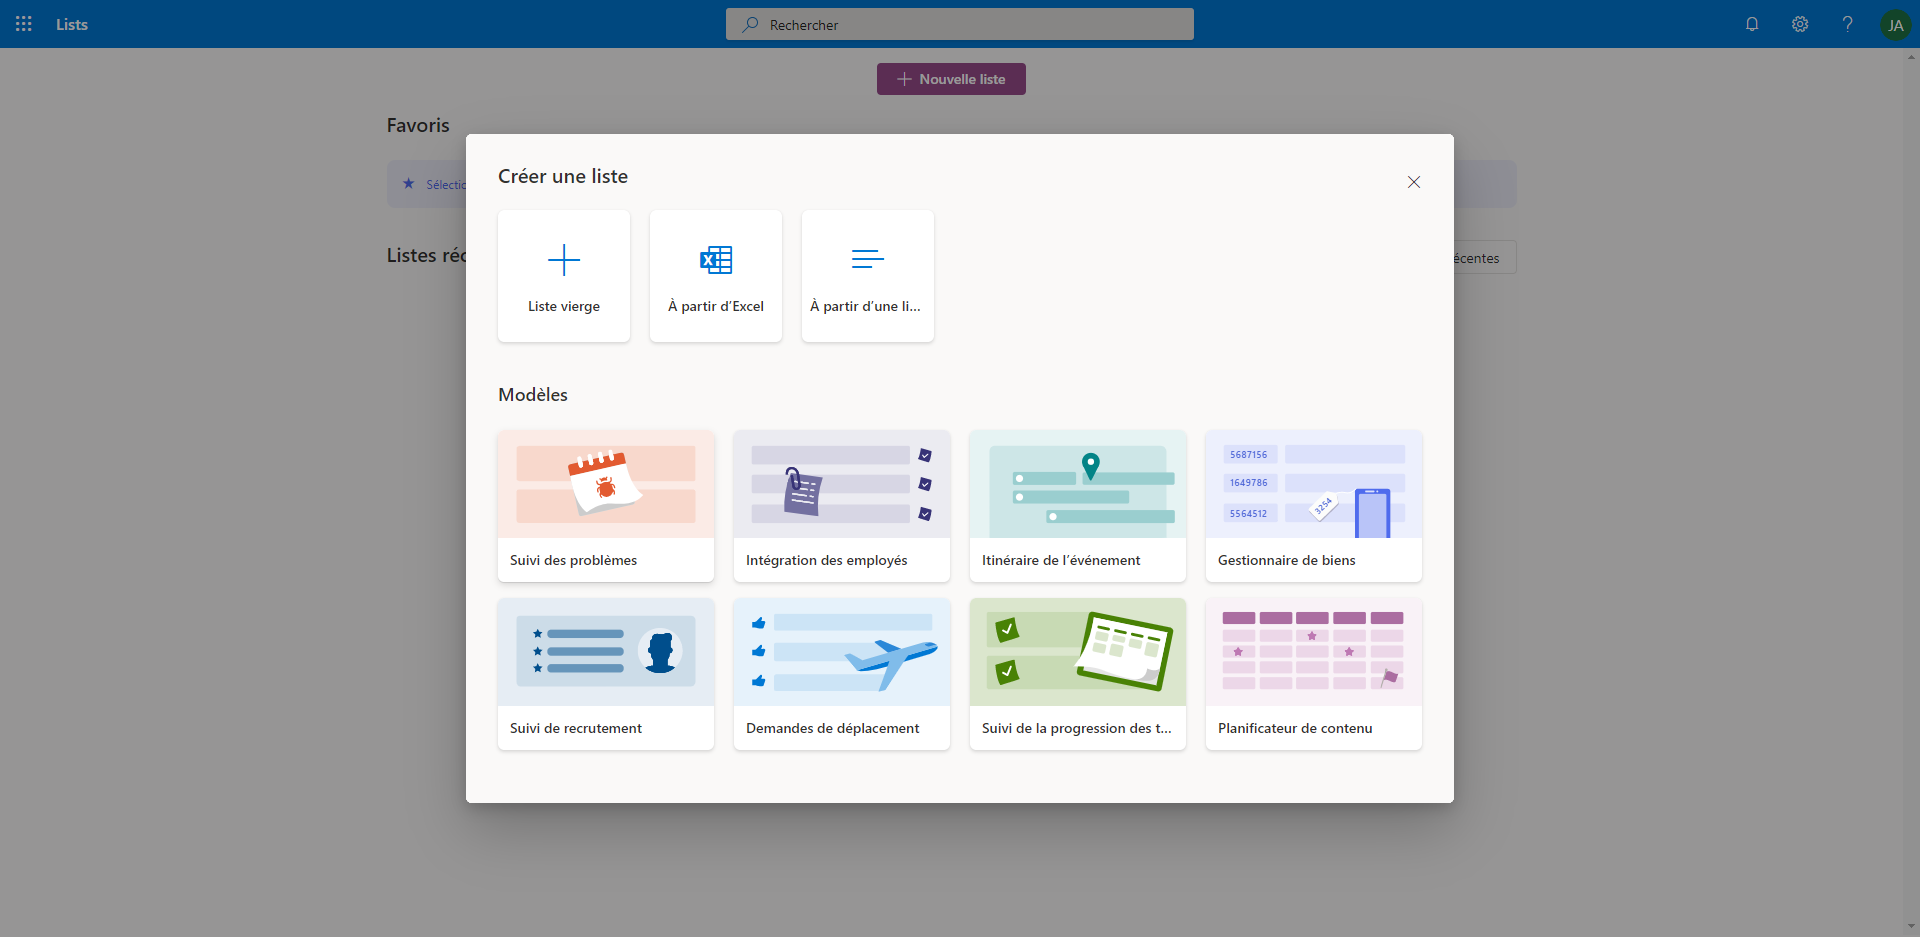
Avec Microsoft List, l’utilisateur crée sa liste depuis un modèle, d’une liste existante ou de zéro puis la publie pour soi (dans son One Drive) ou bien dans un groupe Office 365 Group (Teams, SharePoint etc) pour la mettre à disposition de son équipe.
La liste est partageable en interne et en externe !!!
Quoi ? Je peux partager la liste en externe ?
Tout à fait !
Oui mais la personne externe doit se créer un compte chez Microsoft ou si vous avez utilisé son compte M365, elle y accède avec ses identifiants M365.
Email reçu par la personne externe
Quel intérêt d’utiliser une liste plutôt qu’un fichier Excel partagé ou Planner ?
Vous pouvez importer une liste depuis un fichier Excel, reconfigurer les colonnes disponibles en allant dans paramètres de la liste, et la partager.
Quel intérêt par rapport à un Excel ?
La collaboration est sécurisée, on peut restaurer une ligne supprimée
Un utilisateur peut s’abonner et etre notifié des modifications, suppressions, ajouts
Comme dans Excel on peut mettre en forme les cellules selon des valeurs (ok c’est plus complexe ici)
Vous pouvez paramétrer le formulaire avec PowerApps
PowerAutomate permet de rajouter des automatismes à votre liste : alimenter un rapport, prévenir quelqu’un via Teams
La gestion des tâches peut être plus poussée, ce qui manquait à Planner
Comment ça marche ?
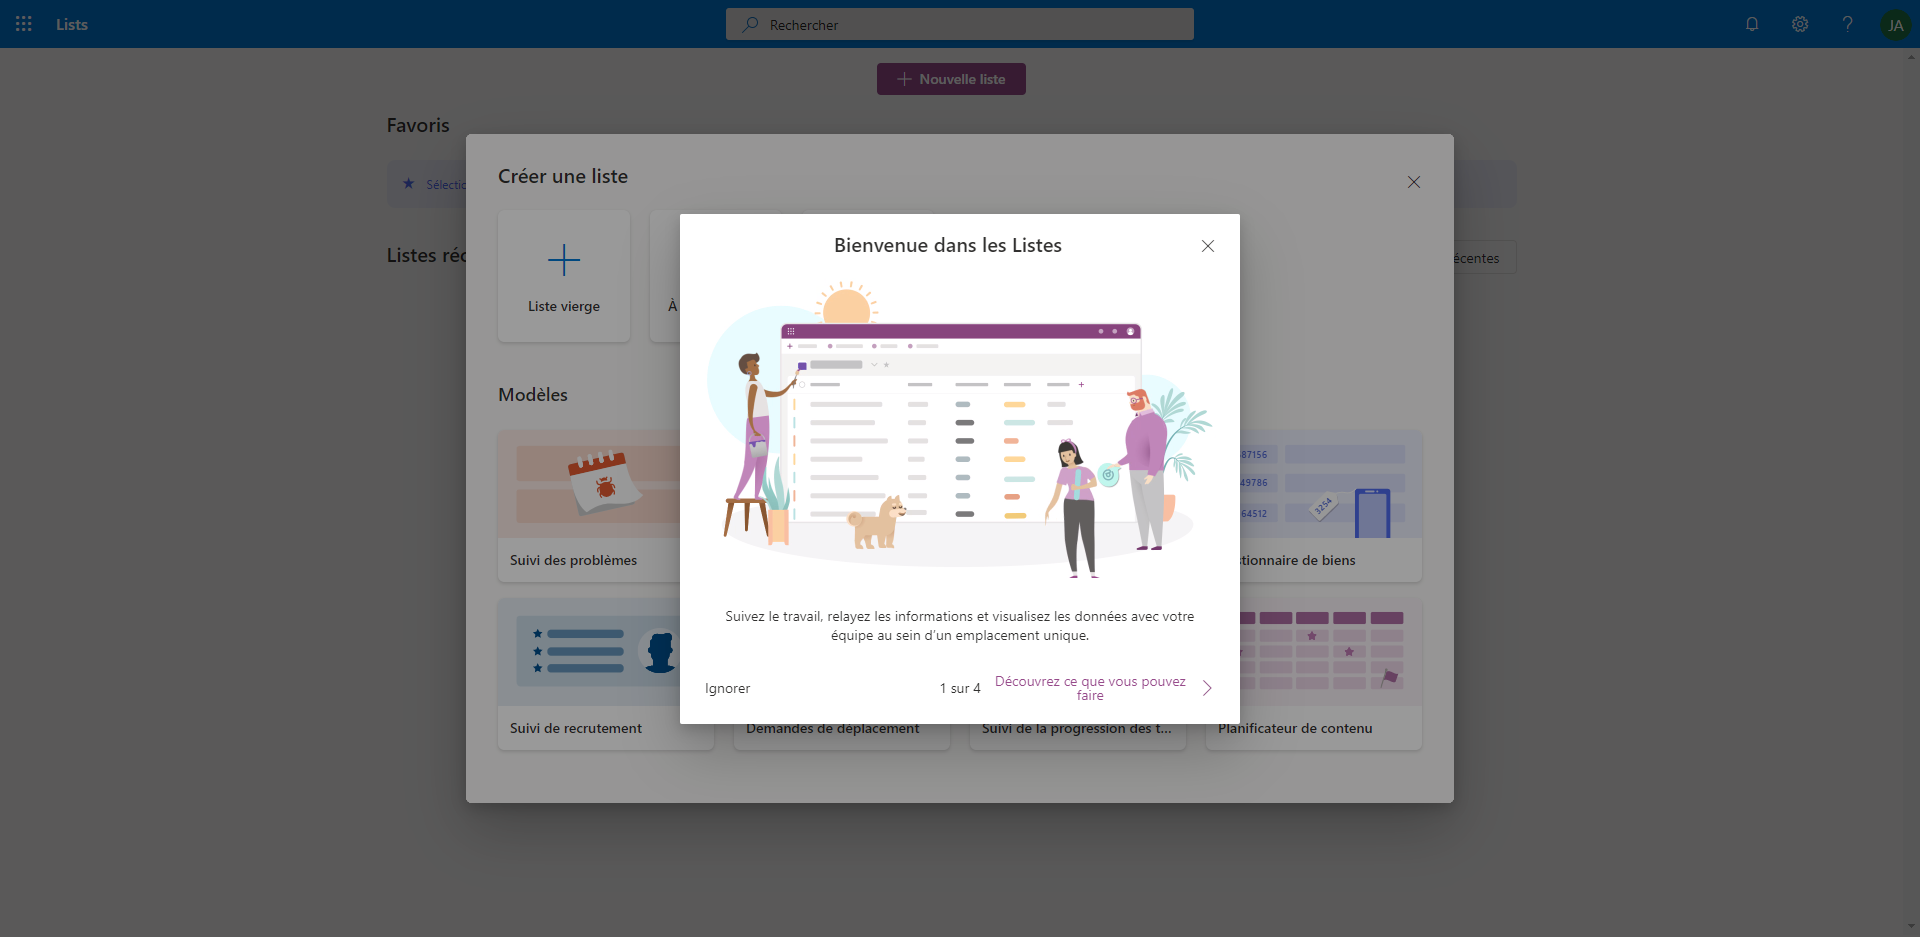
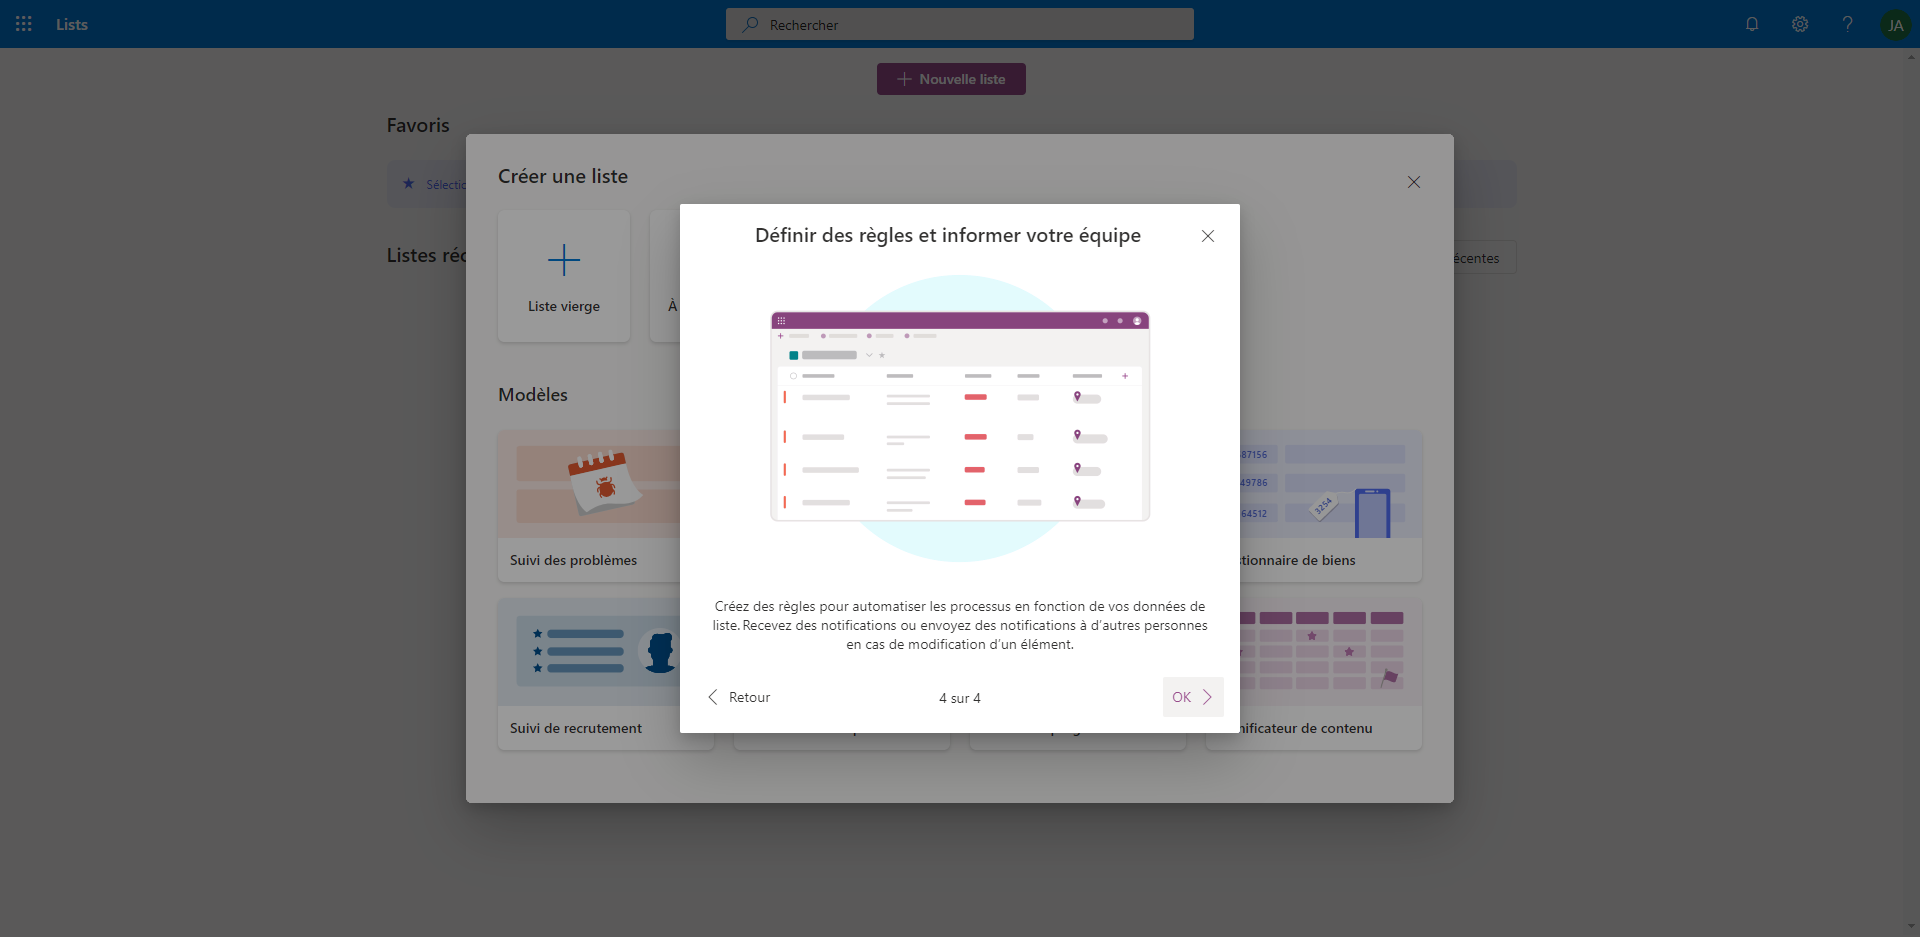
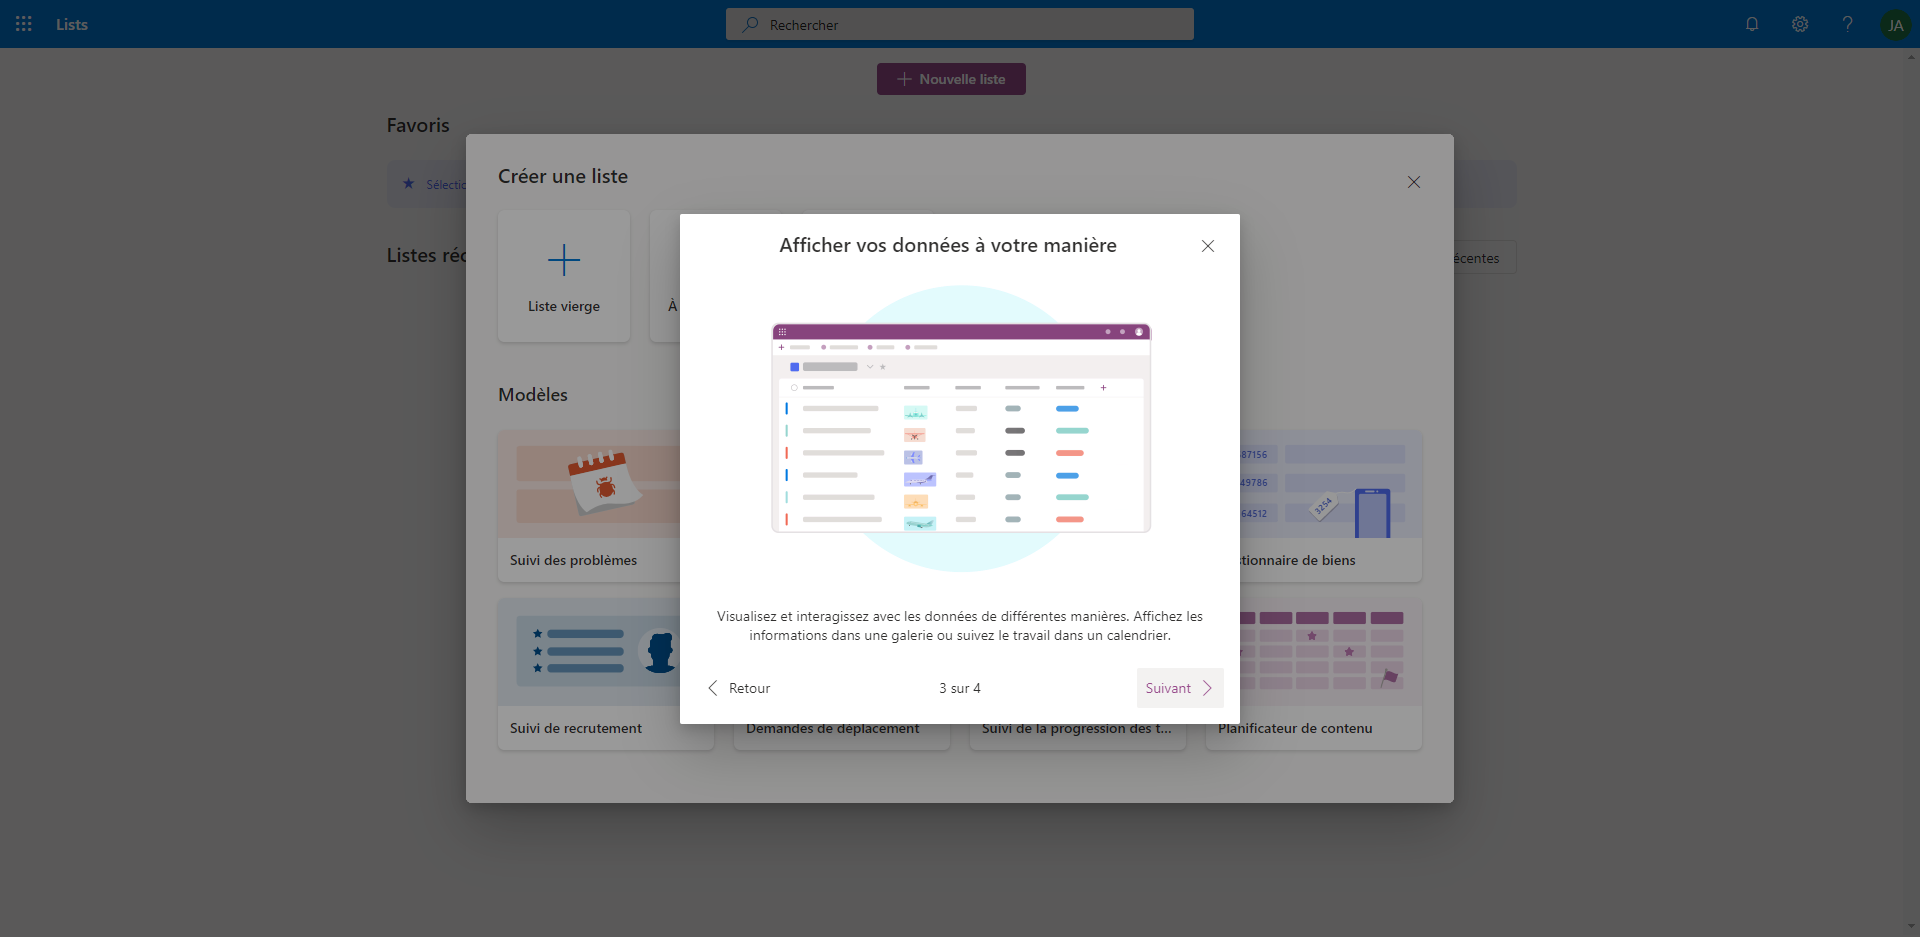
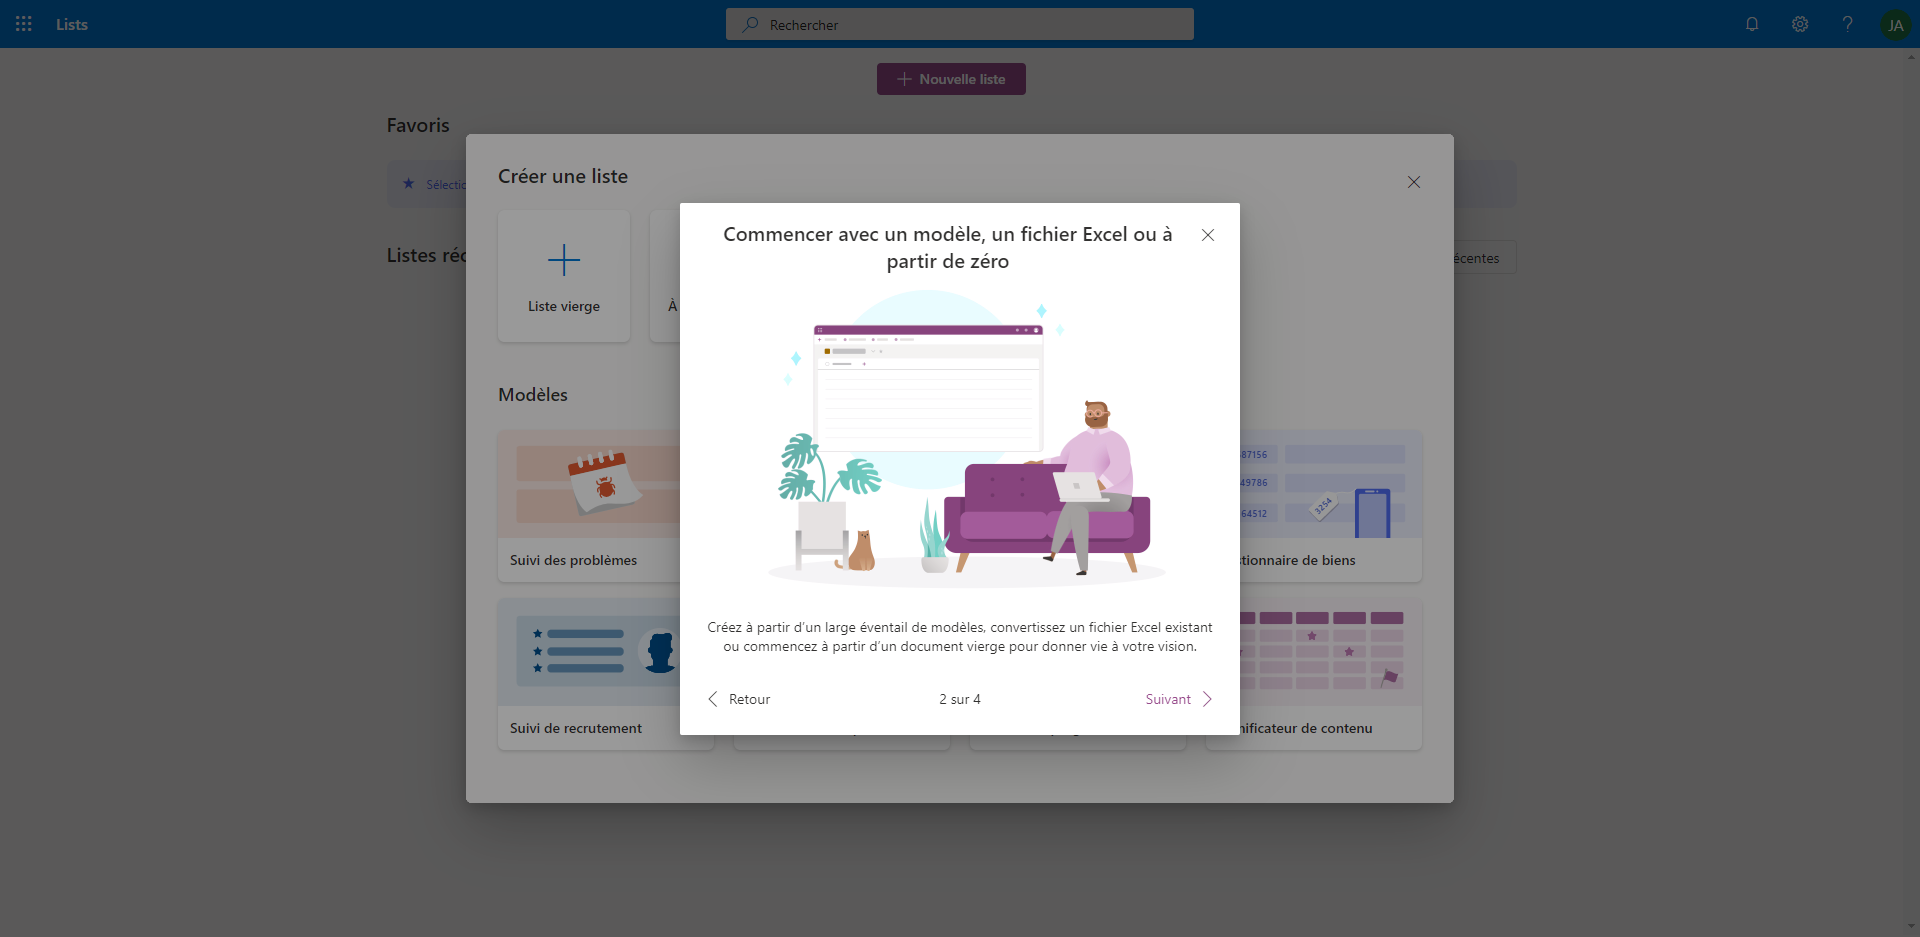
Une fois que vous arrivez sur la page adéquate (via office.com > Lists) ou via l’astuce que j’ai partagé plus haut, vous arrivez sur le guide de démarrage
Puis vous créez une liste depuis un modèle pour commencer à tester les fonctionnalités !
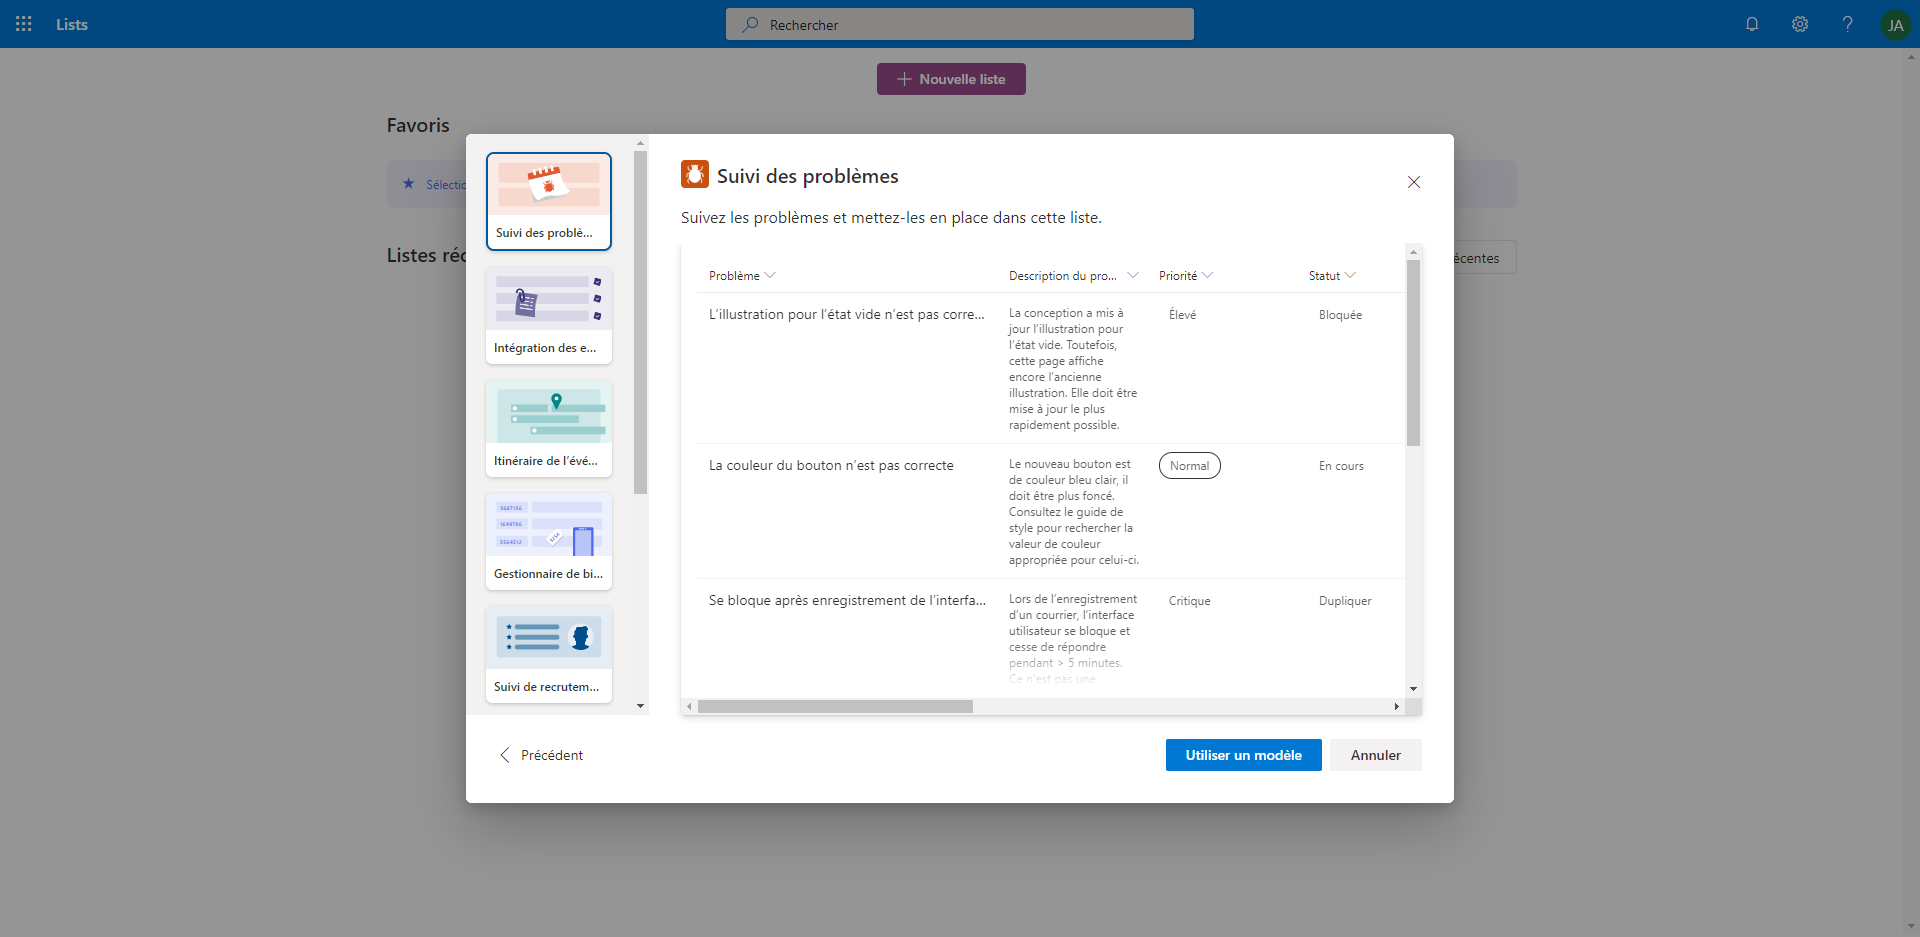
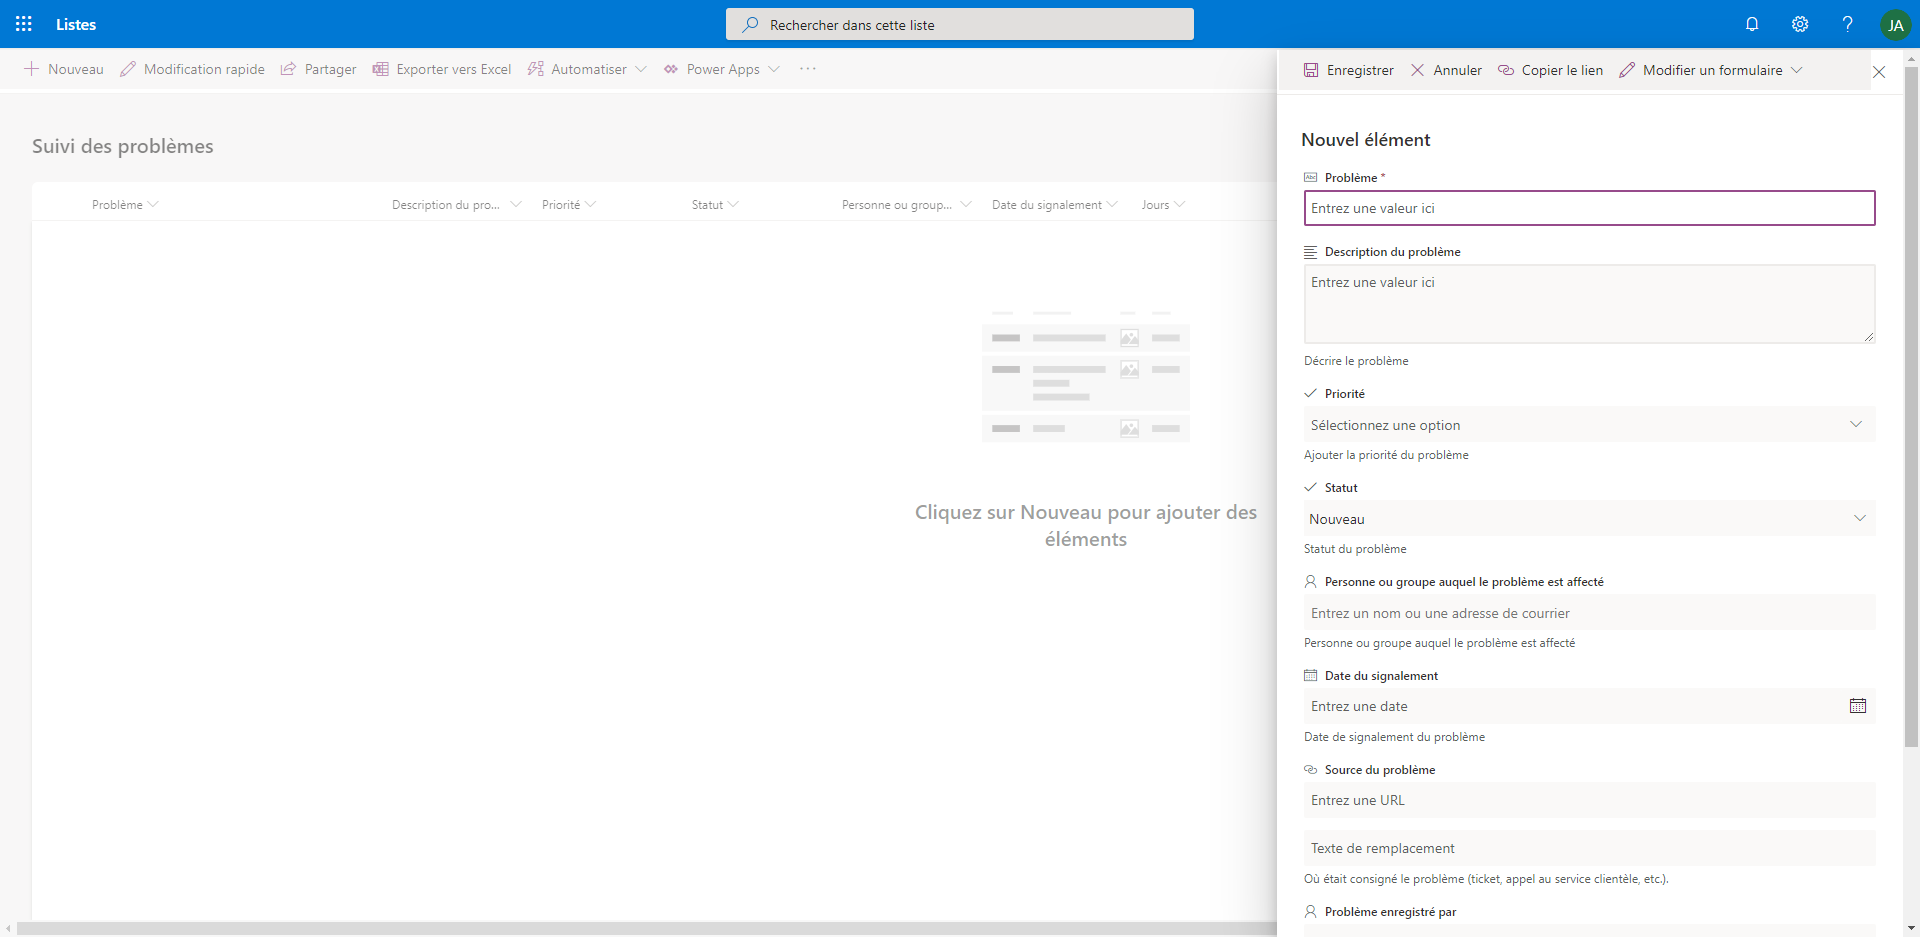
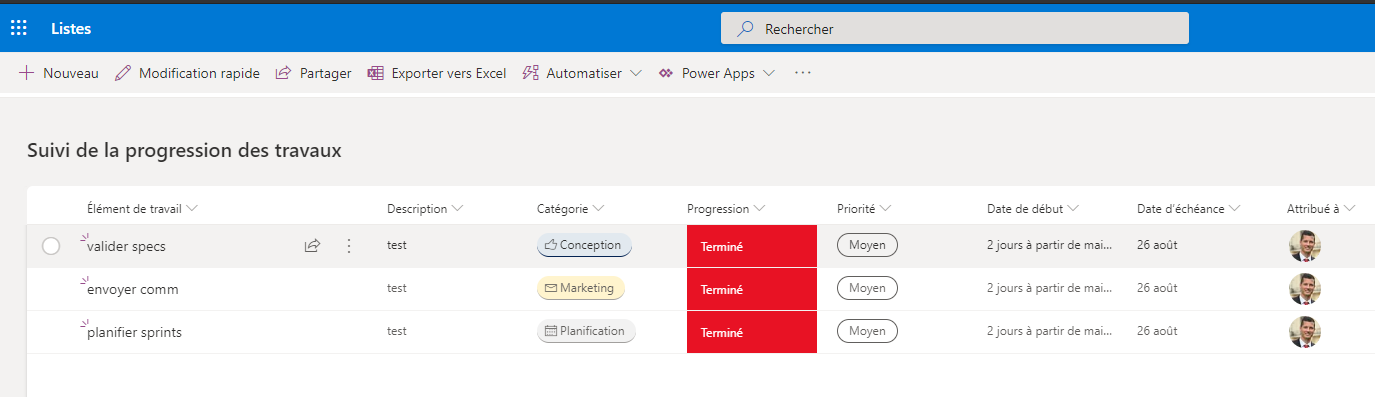
Je choisis ici “Suivi des problèmes” pour suivre le développement d’un projet informatique
Aperçu d’un ajout d’un problème
C’est le même fonctionnement que les listes SharePoint
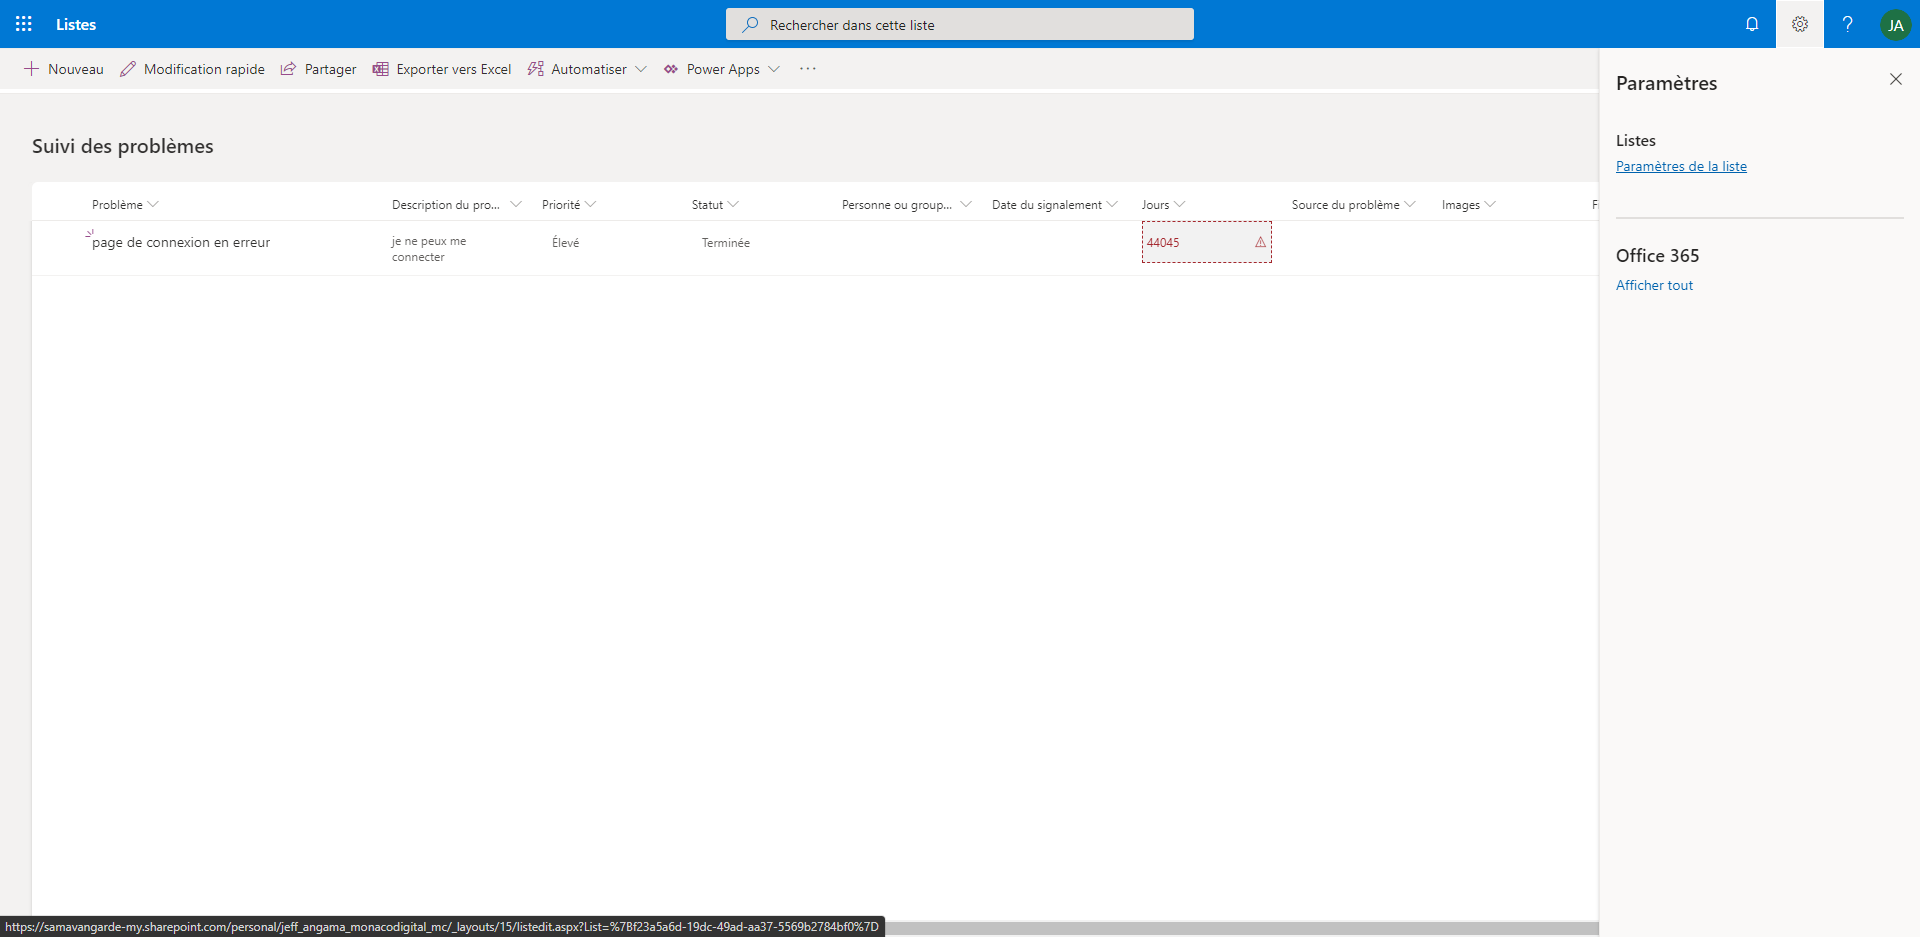
Les listes sont configurables comme toute liste SharePoint en cliquant sur paramètres de la liste :
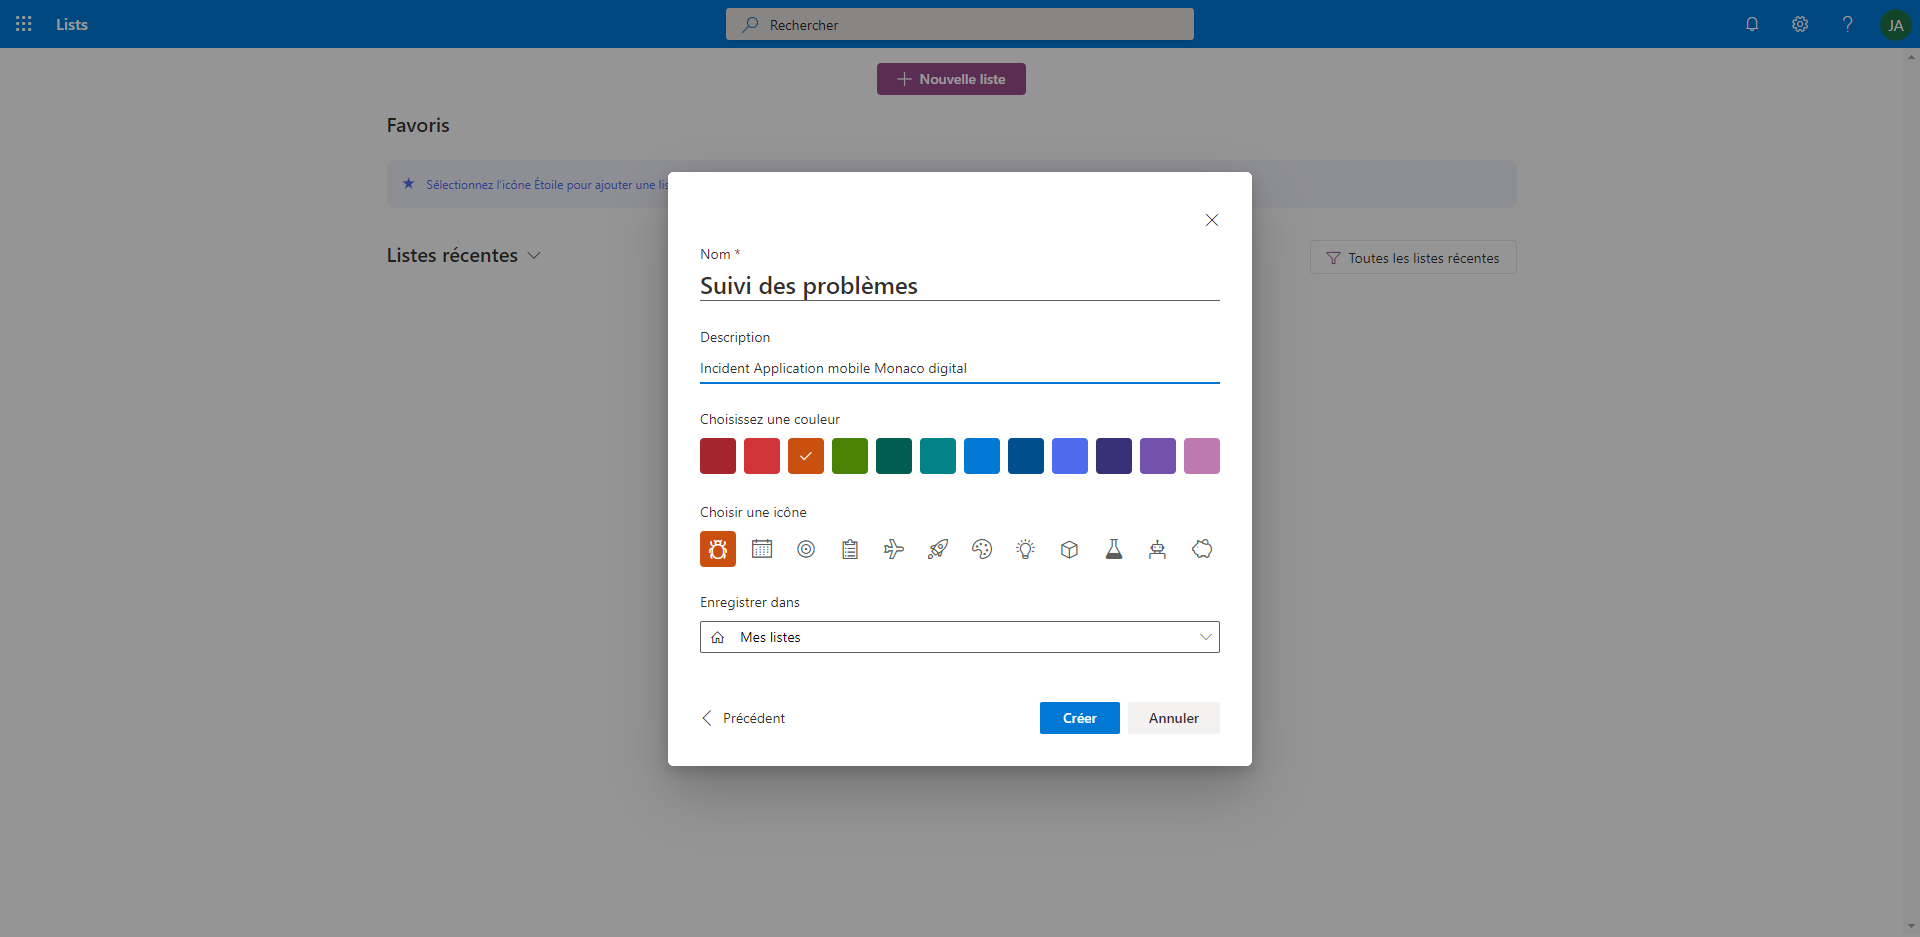
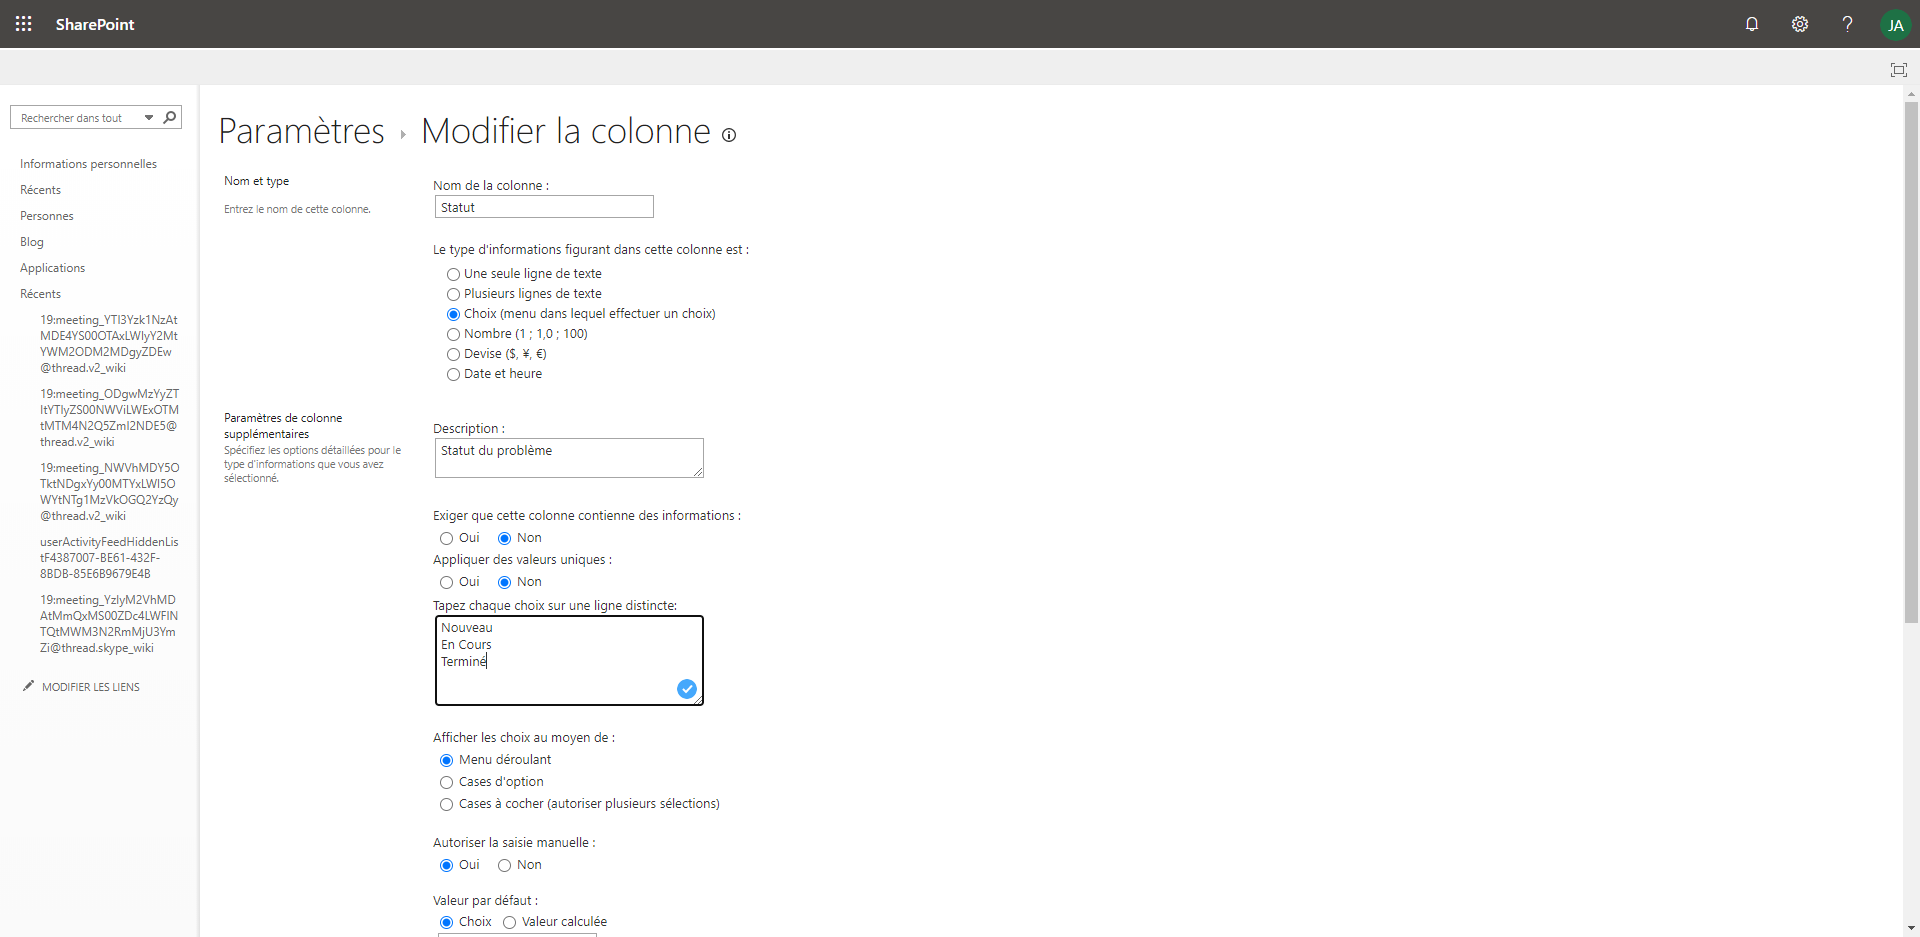
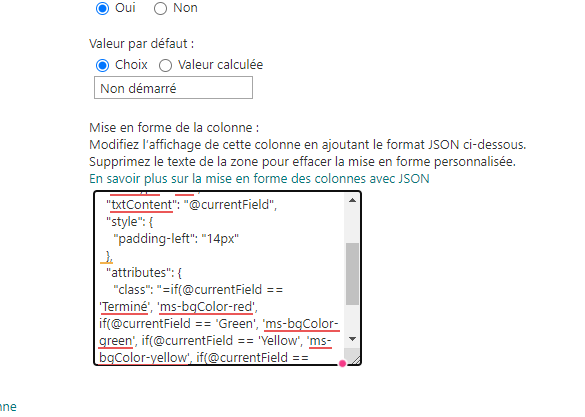
On peut par exemple, changer les valeurs des statuts du modèle de liste Problème que nous avons créé précédemment :
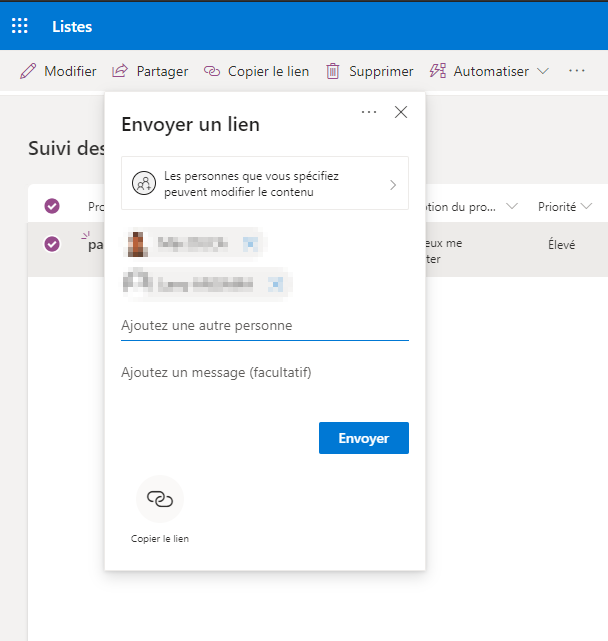
Les options de partage de la liste :
À vos collègues ou à l’extérieur ! La liste étant stockée dans votre One Drive, Microsoft permet ainsi le partage vers une personne externe à votre entreprise :
Partage de la liste à un employé ou un externe
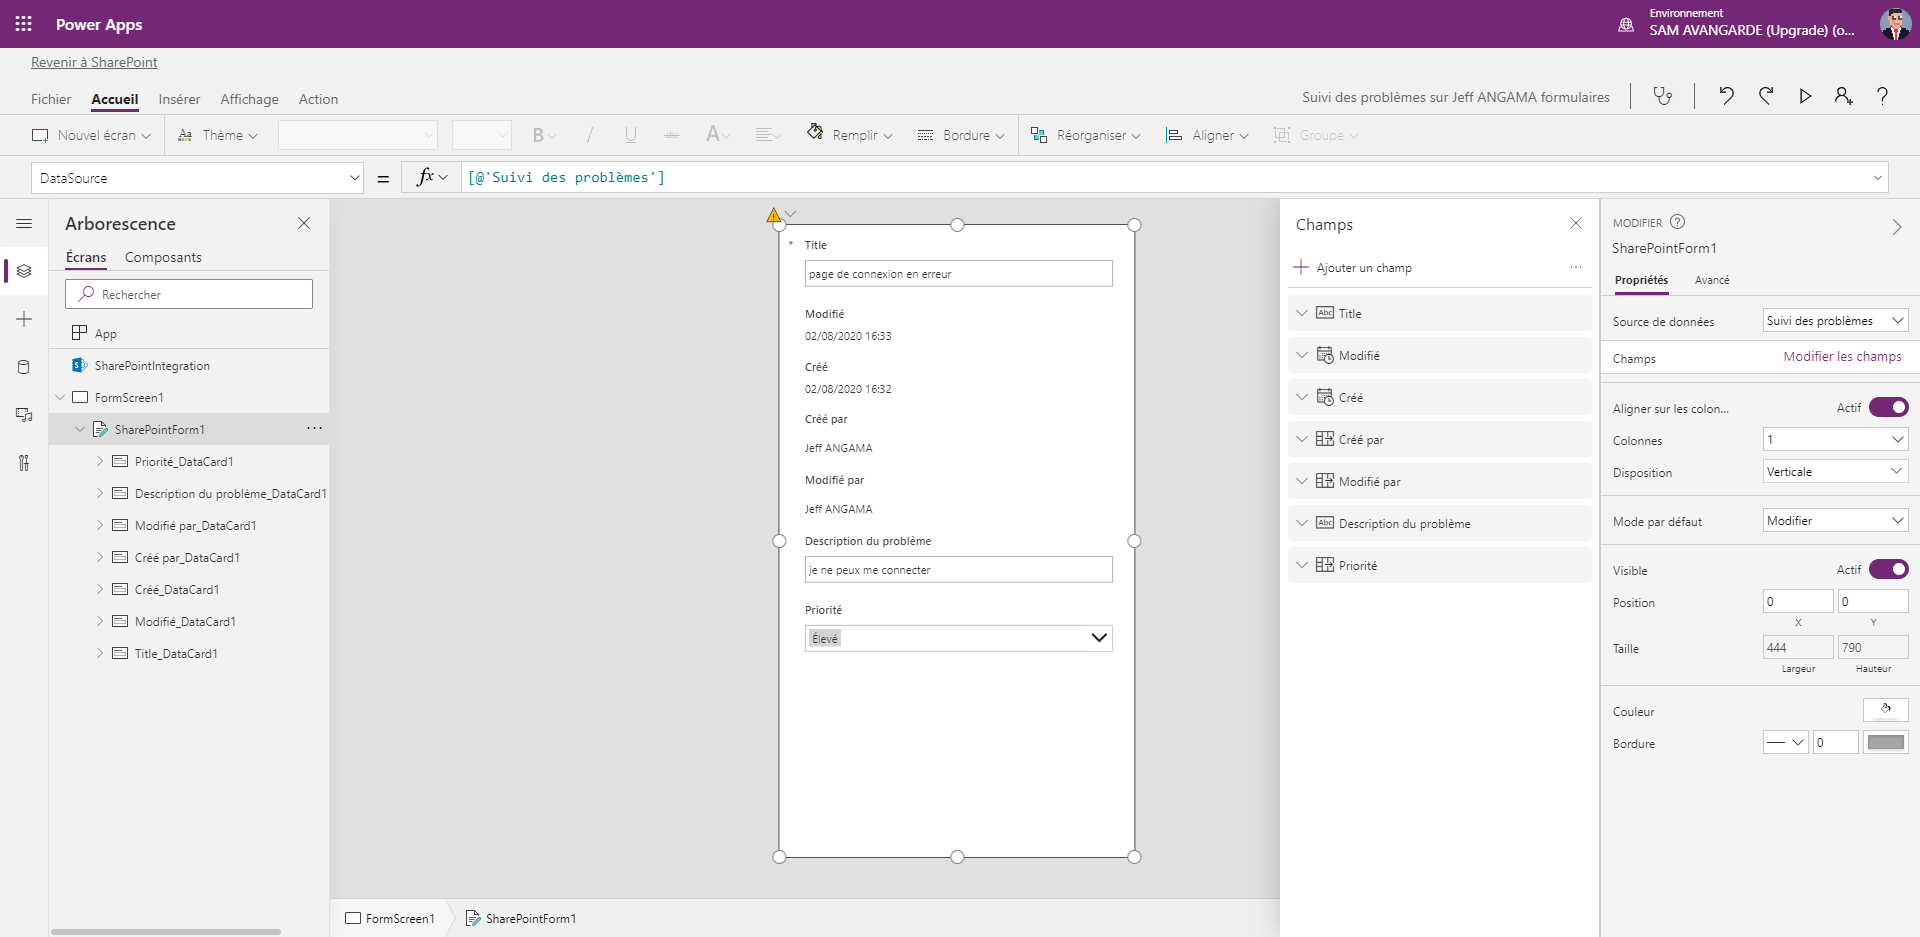
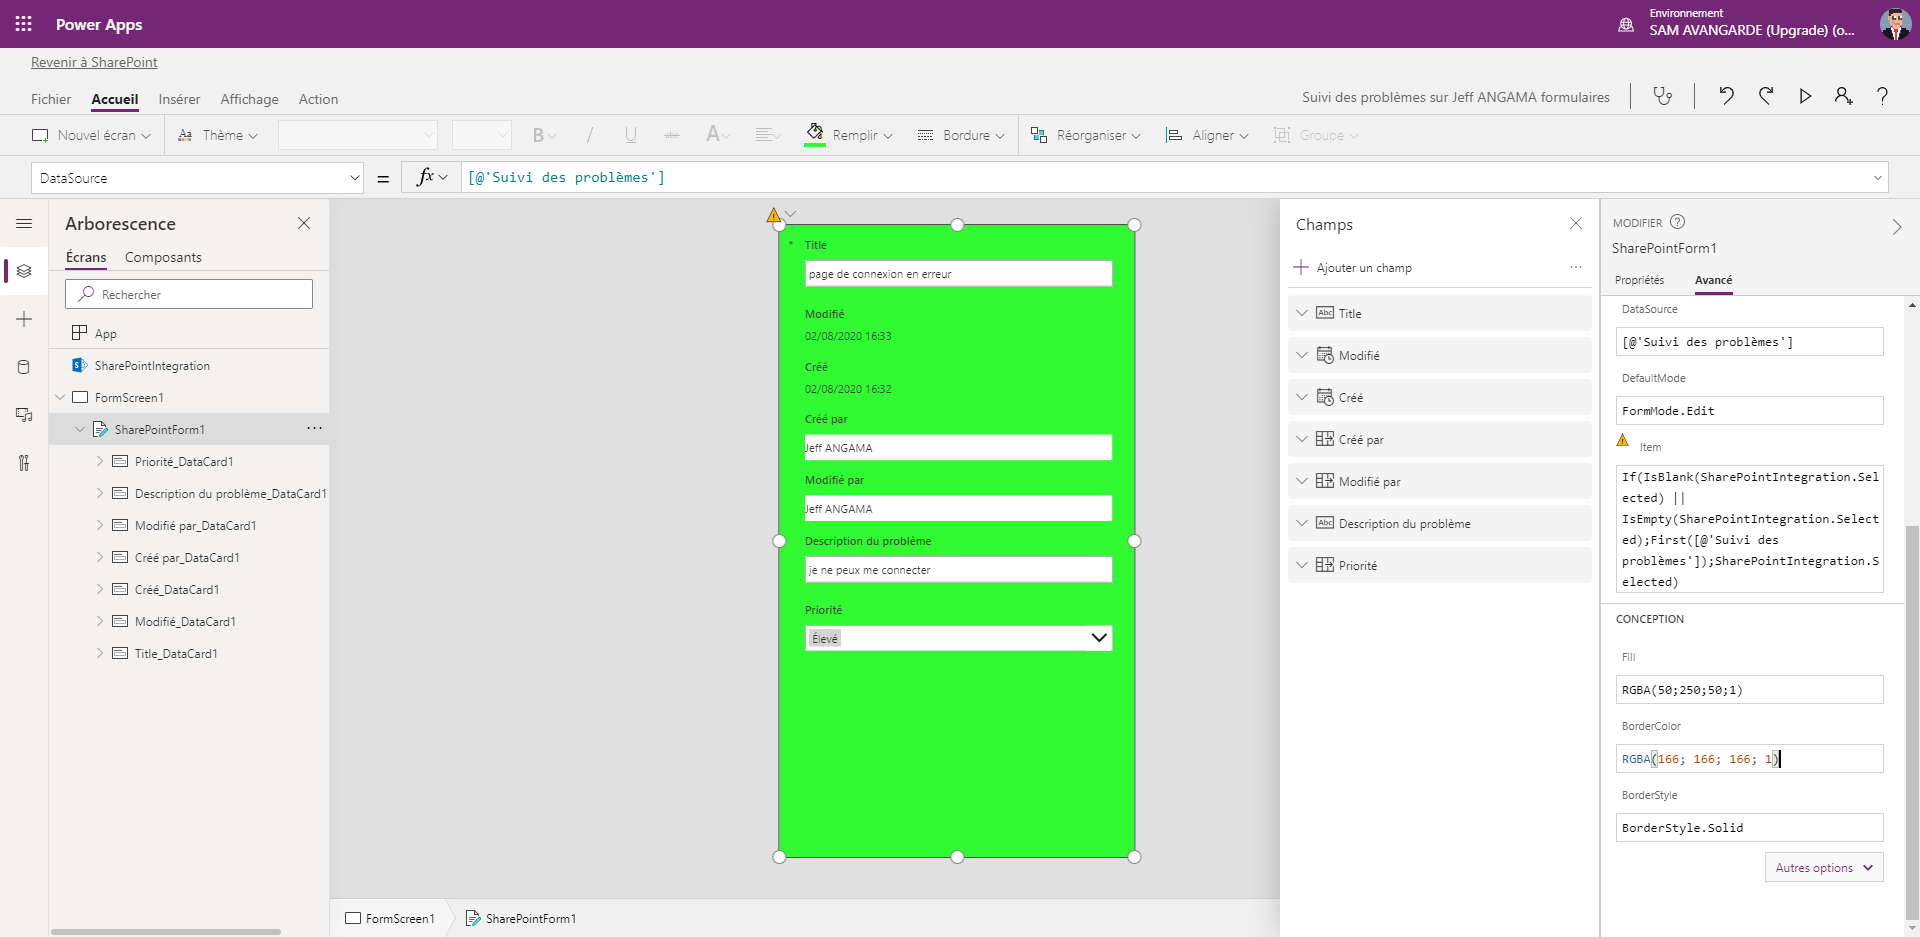
Pour aller plus loin : Editer le formulaire de la liste dans PowerApps !
Pour aller plus loin : Déclencher une action avec Power Automate selon un événement
Par exemple pour configurer un rappel quand la tâche arrive à échéance ou envoyer un email lorsqu’un problème est urgent ?
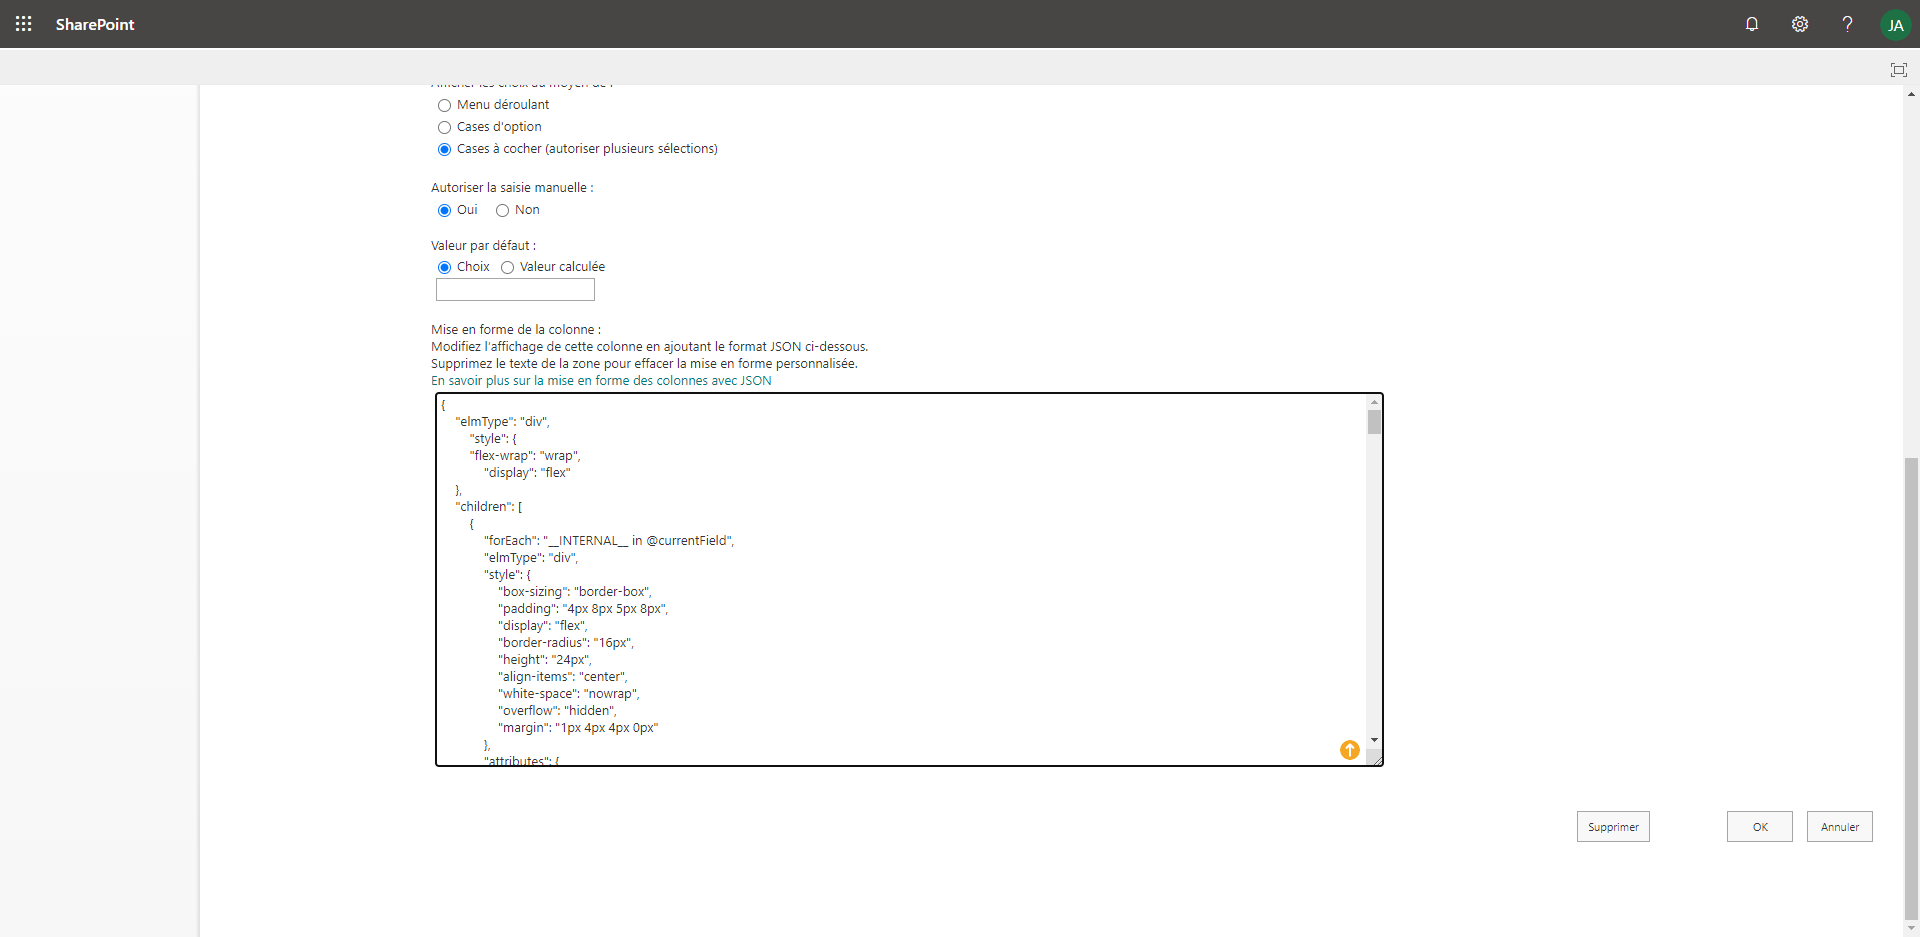
Pour aller encore plus loin (formattage de colonnes)
On peut pour chaque colonne configurer l’affichage. Les développeurs de la communauté mettent à disposition des code JSON à appliquer aux colonnes, ainsi on peut appliquer tout type de mise en forme, voir cet article pour des exemples que j’ai référencés.
Une fonctionnalité qui simplifie l’essence de SharePoint
Les listes et les bibliothèques de documents sont les fondamentaux de Microsoft SharePoint.
En rendant la création des listes en quelques clics, Microsoft espère pousser l’adoption de ces listes qui permettent plus d’interactions qu’un simple Excel, via la Power Platform. Aussi l’historique des version et la corbeille sécurise l’information (qui n’a jamais perdu des infos d’un excel ? )
Votre avis ?
Pensez vous remplacer certains de vos fichiers excel ou autres type de listes que vous partagez avec vos collègues ?
Que pensez vous de cette nouvelle fonctionnalité, quelles sont vos attentes ?
Lets use Power Automate inside Power Virtual Agents to get all the users details who is interacting with the bot. We can customize our greetings, or simply use any information that Office365 returns
Vous avez sans doute mis en place Teams pour pouvoir continuer de travailler à distance, la réservation des salles de réunion étant devenu des salles virtuelles Teams pour la plupart des sociétés qui ont déployée la solution rapidement face à cette pandémie, voir peut-être trop rapidement pour diverses questions techniques, financières, voire organisationelles. Et vous souhaitez aujourd’hui pouvoir rapprocher les deux monde (OnPremise / Legacy et celui du Cloud)
Dans cet article je vais m’attacher au fait de pouvoir rapprocher une identité Online avec une identité Cloud, et y rattacher la boite mail.
Vous avez / allez créer des comptes directement dans le cloud, et porter vos applications soit via Azure soit via 365 ou encore du PowerPlateform en low code. Mais attention, car si vous aviez des comptes existant OnPremise, vous vous retrouverez à devoir gérer alors deux environnements (un en local avec une identité, et un en online avec une autre identité, avec ou pas le même UPN) C’est ici que les choses deviennent plus complexes.
Dans ce cas de figure vous avez le besoin de rapprocher vos identités onpremise avec celle online, cela reste possible via une mécanique de « Hard Matching » – What ?
Le concept est le suivant, une fois votre système de synchronisation d’identité en place, il vous faudra faire « matcher » les identités cloud avec celle online.
Partons donc du principe suivant :
Vous disposez d’un AD non synchronisé
Vous disposez d’un Office365 avec des comptes créés à la main ou pas directement dans le Cloud
Donc ici vous avez 2 systèmes différents qu’il va falloir rapprocher (tant au niveau identité, que messagerie – tant qu’à faire autant profiter )
En d’autres termes, comment passer d’un compte full cloud à un compte synchronisé ? Voyons cela ensemble
Création d’une OU non synchronisée
Ajout du compte utilisateur avec le même UPN que dans 365 (s’il n’existe pas, s’il existe passer cette étape)
Exporter ensuite le GUID de l’utilisateur AD pour le transformer en ImmutableID (C’est ici que la magie opère)
Déplacer votre utilisateurs dans une OU synchronisée, ou bien modifier Azure AD Connect afin de synchroniser l’OU qui contient vos utilisateurs
Votre utilisateur full cloud, est maintenant synchronisé avec votre AD local.
Oké, mais les boites aux lettres sont toujours séparées … effectivement, donc pour les migrer en cloud il y a plusieurs options, et nous allons nous attacher ici sur la synchronisation via une hybridation ce qui pourrait vous poser le plus de soucis.
Mais pourquoi est-il nécessaire de faire un reset de la BAL Online ?
Je prends comme hypothèse que l’hybridation de votre Exchange est conforme aux recommandations de l’éditeur, c’est à dire, que les connecteurs sont publiés (entrant et sortant), que les proxyaddress sont bien positionnées pour chaque utilisateur (attention à la différence entre SMTP et smtp) et que les mécanismes de coexistence sont bien en place et bien appliqués
Car rappelons le, vous avez une BAL OnPremise et une BAL Online et vous ne pourrez pas les synchroniser car la BAL Online est déjà existante. C’est la différence entre un UserMailbox et un MailUser. Ici nous recherchons à avoir cela dans 365 :
Pour avoir cela, il est nécessaire que votre utilisateur synchronisé ne soit pas de ce type :
BAL Online et non synchronisable
Mais plutôt de ce type là :
Utilisateur qui peut-être migré
Une fois que vous êtes de nouveau dans ce cas de figure, la victoire est proche
Vous aurez deux cas de figures :
Conserver la BAL Online
via export PST et le centre de protection 365 (c’est long et lourd)
via l’utilisateur (well pourquoi pas)
via un outil de backup / restore (type Cloud Backup de AvePoint, Veeam, ou autres)
Ne pas conserver la BAL Online
Plus rapide (mais perte des infos de la BALs)
Ici je vais choisir de conserver les infos de la BAL 365 pour les restorer par la suite, puis faire un reset de la BAL Online, la synchroniser (ce qui deviendra alors possible), puis restorer le contenu de la BAL Online avec le backup dont je dispose, pour ne pas avoir de perte d’information.
Voici donc la timeline des actions, pour mieux situer
Il est possible que les actions de Clear ne fonctionne pas, si tel est le cas, je vous invite à vérifier que vous ne disposez d’aucunes adhérences au niveau conformité des boites aux lettres, notamment au niveau de la rétention des données. Si ces dernières sont actives, vous ne pourrez alors pas faire de clear de la BAL et d’autres alternatives seront alors à considérer.


 )
)


