Vue normale

Il y a de nouveaux articles disponibles, cliquez pour rafraîchir la page.
À partir d’avant-hierFlux principal

Add Multiple control in SPFX Web Part Property Pane

Developing custom components require technical skills but to make it reusable, one need to add configurations to it and this might require a few lines of extra code but will make the component leverage to do customizations on the fly instead of redeploying the component again and again and can be used as a reusable component

Today I will share the scripts to add different type of controls in an SPFx web part which could help to perform different actions and configurations in your web part. I will be using SPFX and PnP property pane controls. For PnP controls, you need to install PnP control module to your solution.

Today I will be sharing Below components to the Property Control

  • Text Field – PropertyPaneTextField
  • SharePoint List Picker Control – PropertyFieldListPicker
  • Date Field – PropertyFieldDateTimePicker
  • Number Field – PropertyFieldNumber
  • Dropdown – PropertyPaneDropdown
  • Checkbox – PropertyPaneCheckbox
  • Color picker – PropertyFieldSwatchColorPicker

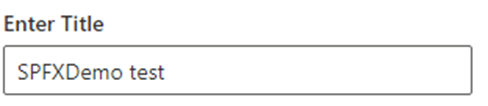
Text Field – PropertyPaneTextField Control

This is the most simple control which you can see when you create a new spfx web part, a default Text field control is added to the property Pane.

Import Section

import {
  IPropertyPaneConfiguration,
  PropertyPaneTextField
} from '@microsoft/sp-property-pane';

Declare property in Export interface

export interface ISpfxDemoWebPartProps {
  title: string;  
}

Code Snippet

 PropertyPaneTextField('title', {
                  label: "Enter Title"
                
})

SharePoint List Picker Control – PropertyFieldListPicker Control

This control shows all the SharePoint list and libraries under current SharePoint site

Import Section

import { PropertyFieldListPicker, PropertyFieldListPickerOrderBy } from '@pnp/spfx-property-controls/lib/PropertyFieldListPicker';

Declare property in Export interface

export interface ISpfxDemoWebPartProps {
  listId?: string;
}

Code Snippet

PropertyFieldListPicker('listId', {
                  label: 'Select List',
                  selectedList: this.properties.listId,
                  orderBy: PropertyFieldListPickerOrderBy.Title,
                  includeHidden: false,
                  onPropertyChange: this.onPropertyPaneFieldChanged.bind(this),
                  properties: this.properties,
                  context: this.context,
                  deferredValidationTime: 0,
                  key: 'listId'
                })

Date Field – PropertyFieldDateTimePicker Control

This control will help you to select the Date and time.

Import Section

import { PropertyFieldDateTimePicker, DateConvention, TimeConvention, IDateTimeFieldValue } from '@pnp/spfx-property-controls/lib/PropertyFieldDateTimePicker';

Declare property in Export interface

export interface ISpfxDemoWebPartProps {
   defaultDate?: IDateTimeFieldValue;
 }

Code Snippet

PropertyFieldDateTimePicker('defaultDate', {
                  label: 'Default Date',
                  initialDate: this.properties.defaultDate,
                  dateConvention: DateConvention.Date,
                  onPropertyChange: this.onPropertyPaneFieldChanged,
                  properties: this.properties,
                  deferredValidationTime: 0,
                  key: 'defaultDate'
                })

Number Field – PropertyFieldNumber Control

This control allows you to select a numeric value from property pane. You can also set min and max value for the control.

Import Section

import { PropertyFieldNumber } from '@pnp/spfx-property-controls/lib/PropertyFieldNumber';

Declare property in Export interface

export interface ISpfxDemoWebPartProps {
  repeatValue?: number;
}

Code Snippet

PropertyFieldNumber("repeatValue", {
                  key: "repeatValue",
                  label: "Select Repeat Value",
                  description: "Number field ",
                  value: this.properties.repeatValue,
                  maxValue: 10,
                  minValue: 1,
                  disabled: false                  
                })

Dropdown – PropertyPaneDropdown Control

The control is used to select a value from a choice of list, you can add custom values to it as I am using it for language selection.

Import Section

import { PropertyPaneDropdown } from '@microsoft/sp-property-pane';

Declare property in Export interface

export interface ISpfxDemoWebPartProps {
  language?: string;
}

Code Snippet

PropertyPaneDropdown('language', {
                  label: "Select Language",
                  options: [
                    { key: 'Eng', text:'English'},
                    { key: 'Ur', text:'Urdu'},
                    { key: 'Ar', text:'Arabic'}
                  ]
                })

Checkbox – PropertyPaneCheckbox Control

This control is available with sp-property-pane module. It is used to show a checkbox on the control which could be use for multiple reasons. I used it for enabling logs in my solution.

Import Section

import { PropertyPaneCheckbox } from '@microsoft/sp-property-pane';

Declare property in Export interface

export interface ISpfxDemoWebPartProps {
  showlogs?: string;
}

Code Snippet

PropertyPaneCheckbox('showlogs',{  
                  checked:false,  
                  disabled:false,  
                  text: 'Show log'  
                })

Color picker – PropertyFieldSwatchColorPicker Control

This control allows you to pick a color and you can define a list of color to be available for selection.

Import Section

import { PropertyFieldSwatchColorPicker, PropertyFieldSwatchColorPickerStyle } from '@pnp/spfx-property-controls/lib/PropertyFieldSwatchColorPicker';

Declare property in Export interface

export interface ISpfxDemoWebPartProps {
  bgColor: string;
}

Code Snippet

PropertyFieldSwatchColorPicker('bgColor', {
                  label: 'Select Background Color',
                  selectedColor: this.properties.bgColor,
                  onPropertyChange: this.onPropertyPaneFieldChanged,
                  properties: this.properties,
                  colors: [
                    { color: '#ffb900', label: 'Default Yellow' },
                    { color: '#fff100', label: 'Light Yellow' },
                    { color: '#d83b01', label: 'Orange'},
                    { color: '#e81123', label: 'Red' },
                    { color: '#a80000', label: 'Dark Red'},
                    { color: '#5c005c', label: 'Dark Magenta' },
                    { color: '#e3008c', label: 'Light Magenta'},
                    { color: '#5c2d91', label: 'Purple'},
                    { color: '#0078d4', label: 'Blue'},
                    { color: '#00bcf2', label: 'Light Blue' },
                    { color: '#008272', label: 'Teal'},
                    { color: '#107c10', label: 'Green'},
                    { color: '#bad80a', label: 'Light Green' },
                    { color: '#eaeaea'},
                    { color: 'black', label: 'Black'},
                    { color: '#333333', label: 'Neutral'},
                    { color: 'rgba(102, 102, 102, 0.5)', label: 'Half Gray' }
                  ],
                  key: 'bgColor'
                })

The post Add Multiple control in SPFX Web Part Property Pane appeared first on MS Technology Talk.

An Unfortunate `API access` UI in the SharePoint Admin Center

Orchestry is a partner of ours at Sympraxis. (Ask us about them anytime!) We love their toolset and recommend them frequently to our clients to improve their governance and provisioning activities. The stuff they build is incredibly powerful – and reliable.

That’s why I was really surprised when I added the Orchestry People List Web Part to a site home page and I didn’t see the actual people, just what looked like placeholders for them. The counts were right, but no details. (This Web Part is better than the out of the box People Web Part because you can set it to show Site Owners and/or Site Members automagically.)

As I am wont to do, I asked my friends at Orchestry what the scoop was. Turns out, it wasn’t an Orchestry problem. The issue was rooted in a really bad user interface in the SharePoint Admin Center.

Here’s what happened. Way back in March, I installed the PnP Modern Search Web Parts. They are just about my favorite tools to use with SharePoint, and I install them as soon as I start working in a tenant. In many cases, I don’t bother the Global Admin to approve the Microsoft Graph permissions for PnP Modern Search, because we can accomplish what we need just using SharePoint Search.

In the screenshot below, you can see the pending request for PnP Modern Search (red box) as well as the Approved requests which Orchestry needed (green box).

The unfortunate part of his UI is because PnP Modern Search “asked” for User.Read.All first, it still “owns” that request.

What we should have seen in the UI was four requests for Orchestry, like so:

Because PnP Modern Search had already asked for User.Read.All, there were only three. The Global Admin approved the three and we called it a day.

Note what happens in that UI after the requests are approved. We lose all the info about which app needed the permissions and when they were granted. No bueno.

Leaving the security implications of all this aside (but keeping in mind this UI exists only for security purposes!), there’s no way for us to see what solution requested the API access, when it was requested, or who approved it after the fact.

Believe it or not, the solution to fix the Orchestry Web Part issues was to approve the User.Read.All permission for PnP Moden Search. That makes sense, right? (No, no it doesn’t at all.)

Final Score:

  • Orchestry 1
  • Microsoft 0

Updating User Profile Properties with the `Date no year` Format

When you set a User Profile property with PowerShell, and it has a format of Date no year, how should you pass in the values? In other words, do you pass in the year, and it just gets lopped off or do you just pass in the day, like “November 10”?

In many cases you won’t actually care that much. But you should want to know how the values are stored so it doesn’t bite you later.

Out of the box, SPS-Birthday is the only User Profile property which uses the Date no year format. But you may decide to add others.

When you run a line of PowerShell like this, the value stored in the SPS-Birthday field is “11/15/2001 12:00:00 AM”

Set-PnPUserProfileProperty `
  -Account "me@sympmarc.com" `
  -PropertyName "SPS-Birthday" `
  -Value "11/15/2001"

When you run this next line (today), the value stored is “11/15/2022 12:00:00 AM”

Set-PnPUserProfileProperty `
  -Account "me@sympmarc.com" `
  -PropertyName "SPS-Birthday" `
  -Value "November 15"

Note that the year stored is different in each case: 2001 vs. 2022.

We can prove that by checking the values afterward with this line:

Export-PnPUserProfile -LoginName "me@sympmarc.com"

In the user interface (UI), in both the cases above, the result is:

What this proves in the Date no year format stores the value as a full date/time, but it is displayed without the year.

The reason this mattered to me was I was trying to use the PnP Modern Search Web Parts to display people with birthdays today. To do that, I needed to filter on a Managed Property mapped to the People:SPS-Birthday Crawled Property.

Once the RefinableDate02 Managed Property was set up, I could add a query like this:

RefinableDate02:"2022-{CurrentMonth}-{CurrentDate}T00:00:00Z"

Note that the year needs to be a constant in order for the filter to work. We might have two people with birthdays on November 15, but in the years 1954 and 2001. If we store the actual year with in the SPS-Birthday property, then our filter can’t work: there’s no wildcard-type mechanism in KQL we can use to say “ignore the year”. In the old DOS days, we could do something like: ????-{CurrentMonth}-{CurrentDate}T00:00:00Z to say “any four characters”, but KQL doesn’t support that.

So, the key here is to choose a year and set all the birthdays to have that constant year. In this case, we chose 2000. This also ensures data privacy, as someone with a little PowerShell knowledge could retrieve people’s “real” birthdays.

If we didn’t choose a constant year, but instead passed in “November 15” and expected that the year wasn’t stored, our filter would break when 2023 rolls around.

The filter ended up looking like this:

RefinableDate02:"2000-{CurrentMonth}-{CurrentDate}T00:00:00Z"

Now we’ve got a working solution which is robust enough to last over the years. A little detective work was well worth the effort.

Resources

Grant Permissions to All Communication Sites Associated with a Hub Site

This isn’t rocket science, but it’s something I do often enough that I want to lodge the PowerShell in a post instead of continuing to rewrite it.

When we are building an Intranet, we often want to grant permissions for all the Communication Sites to a small set of people during the testing process. This script will do that for one user.

Here is a quick overview of what is happening:

  • Everything before line 12 is just set up. I define a few variables pointing to the Admin Site and Hub Site. I connect to the Admin Site in line 9, and then I have a token which is reusable for all the other connections.
  • In line 12, I get all the sites which are associated with the Hub Site. In this case, it is the root site in the tenant and also a Home Site. This is the most common setup for an Intranet.
  • Next I loop through all the associated sites. The first step is to connect to each site.
  • I’m finding both the Owners and Members groups in lines 16-17. We may want to make some people Owners and other People Members, and we can use the appropriate group in line 18.
  • Communication Sites don’t have backing Microsoft 365 Groups, so I can use the Add-PnPGroupMember cmdlet, which just adds the user(s) to the correct SharePoint group.
  • You could duplicate line 18 to grant permissions to more than one person.
# Import modules
Import-Module PnP.PowerShell

# Base variables
$adminUrl = "https://tenant-admin.sharepoint.com/"
$HubSiteURL = "https://tenant.sharepoint.com/"

# Connect to the tenant
Connect-PnPOnline -Url $adminUrl -Interactive

# Get the sites associated with the Intranet Hub Site
$associatedSites = Get-PnPHubSiteChild -Identity $HubSiteURL | Sort-Object 

foreach ($site in $associatedSites) {
    Connect-PnPOnline -Url $site -Interactive
    $ownerGroup = (Get-PnPSiteGroup | Where-Object { $_.LoginName -like "*Owner*" })[0]
    $memberGroup = (Get-PnPSiteGroup | Where-Object { $_.LoginName -like "*Member*" })[0]
    Add-PnPGroupMember -LoginName "lester.frogbottom@tenant.com" -Group $ownerGroup.LoginName

}

I know the best way to do this is by using a Microsoft 365 Group, but this down and dirty approach makes sense in a limited way. When we launch the Intranet, we’ll clean out all the Members and Visitors to start fresh, so it doesn’t matter that much if we are a bit messy for now. Plus, we may be granting temporary Member permissions to someone just during the build phase.


Eagle-eyed reader Brian McCullough (@bpmccullough) pointed out I was working too hard to get the Member and Owner groups.

Get-PnPGroup -AssociatedOwnerGroup -AssociatedMemberGroup -AssociatedVisitorGroup would these work instead?

— Brian McCullough (@bpmccullough) September 30, 2021

Rather than these two lines:

$ownerGroup = (Get-PnPSiteGroup | Where-Object { $_.LoginName -like "*Owner*" })[0]
$memberGroup = (Get-PnPSiteGroup | Where-Object { $_.LoginName -like "*Member*" })[0]

We can do this:

$ownerGroup = Get-PnPGroup -AssociatedOwnerGroup
$memberGroup = Get-PnPGroup -AssociatedMemberGroup

Customize list forms with SharePoint Framework form customizers

Customize list forms with SharePoint Framework form customizers

Last week at the Viva Connections & SharePoint Framework Community Call I had the pleasure of presenting how to use the SharePoint Framework to customize list forms. Here's a quick overview of the topics we covered.

Form customizers - a new type of SPFx extension

In SharePoint Framework (SPFx) v1.15, which was released in July '22, Microsoft introduced form customizers - a new type of extension that allows you to extend list forms. Using form customizers, you can build a custom experience for New, Edit, and View forms of a list.

Anatomy of an SPFx form customizer

Form customizers are in essence SPFx extensions: they have the onInit method, to initialize data, and the render method to build the UI. Additionally, form customizers have two methods that you need to call, to notify the SPFx page runtime of how the user interacts with the form: this.formSaved(), when the data has been changed and saved, and this.formClosed() when the user closed the form without modifying the data.

export default class HelloWorldFormCustomizer
  extends BaseFormCustomizer<IHelloWorldFormCustomizerProperties> {

  public onInit(): Promise<void> {
    // Add your custom initialization to this method. The framework will wait
    // for the returned promise to resolve before rendering the form.
    Log.info(LOG_SOURCE, 'Activated HelloWorldFormCustomizer with properties:');
    Log.info(LOG_SOURCE, JSON.stringify(this.properties, undefined, 2));
    return Promise.resolve();
  }

  public render(): void {
    // Use this method to perform your custom rendering.
    this.domElement.innerHTML = `<div class="${ styles.helloWorld }"></div>`;
  }

  public onDispose(): void {
    // This method should be used to free any resources that were allocated during rendering.
    super.onDispose();
  }

  private _onSave = (): void => {
    // You MUST call this.formSaved() after you save the form.
    this.formSaved();
  }

  private _onClose = (): void => {
    // You MUST call this.formClosed() after you close the form.
    this.formClosed();
  }
}

To allow you to optimize the performance of your solution, form customizers don't load the data for the underlying list item. Instead, you need to load the item yourself and choose which information you want to load in the onInit method. When building an Edit form, you also need to load information about the ETag, to ensure that you're not overwriting data that has been changed by another user.

export default class BasicsFormCustomizer extends BaseFormCustomizer<IBasicsFormCustomizerProperties> {
  // item to show in the form; use with edit and view form
  private _item: {
    Title?: string;
  };
  // item's etag to ensure the integrity of the update; used with the edit form
  private _etag?: string;

  public onInit(): Promise<void> {
    if (this.displayMode === FormDisplayMode.New) {
      // we're creating a new item so nothing to load
      return Promise.resolve();
    }

    // load item to display on the form
    return this.context.spHttpClient
      .get(this.context.pageContext.web.absoluteUrl + `/_api/web/lists/getbytitle('${this.context.list.title}')/items(${this.context.itemId})`, SPHttpClient.configurations.v1, {
        headers: {
          accept: 'application/json;odata.metadata=none'
        }
      })
      .then(res => {
        if (res.ok) {
          // store etag in case we'll need to update the item
          this._etag = res.headers.get('ETag');
          return res.json();
        }
        else {
          return Promise.reject(res.statusText);
        }
      })
      .then(item => {
        this._item = item;
        return Promise.resolve();
      });
  }

  // trimmed for brevity
}

Previewing a Form Customizer

When you scaffold a Form Customizer, the SharePoint Framework Yeoman generator adds 3 configurations to your serve.json file, that allow you to quickly preview your Form Customizer with the New, Edit, and View form.

To preview your Form Customizer, run in the command line:

gulp serve --config helloWorld_NewForm

where helloWorld is the alias of your Form Customizer and NewForm is the form display mode that you want to preview. For the list of available serve configurations, check the config/serve.json file in your project.

Separate- vs. one form customizer

When building form customizers, you can choose to build a separate Form Customizer for each form display mode, or you can build one Form Customizer that supports all display modes. You can also choose to override only a specific display mode and use the default behaviors for other display modes. This gives you flexibility about how you organize your code and what kind of experience you want to build for your users.

Deploy your Form Customizer

After you built your Form Customizer, you need to deploy it by associating it with a content type. You can associate it with an instance of a content type in a specific list or a site content type. If you want the Form Customizer to be used with all instances of the content type in your tenant, associate it with the content type in the content type hub site from which it will be synced to other sites in your tenant.

To register a Form Customizer with a content type, set the ID of the Form Customizer component (the value of the id property from the Form Customizer's manifest) in the ContentType.DisplayFormClientSideComponentId property of the content type. If your Form Customizer is configurable, you can pass its configuration as a JSON string in the ContentType.DisplayFormClientSideComponentProperties property. This set of properties is also available for the New- (NewFormClientSideComponentId, NewFormClientSideComponentProperties) and Edit (EditFormClientSideComponentId, EditFormClientSideComponentProperties) form.

You can set these properties declaratively using the Feature framework in the SPFx solution, but the preferable way is to do it programmatically using the REST or CSOM APIs, through remote provisioning solutions.

What can you build with form customizers?

Form customizers are a great way to extend the user experience on top of lists. By combining them with list formatting, you can build applications that are hosted on SharePoint and don't require any additional resources.

Because you own the full canvas of the list form, you've got a lot of flexibility when it comes to rendering the form. And since form customizers are powered by SPFx, you've got access to Microsoft Graph and line of business APIs to bring in additional data.

Sample application for approving travel requests, showing trip information and a map with the departure and destination, built using a SharePoint Framework Form Customizer

Here's the full recording of the community call starting with the form customizers section.

Once again, thanks to everyone for joining us, and don't hesitate to reach out if you have any questions.

What are you going to build with form customizers?

Crawled Properties Not Created From Site Columns in Modern Team Sites

You know that feeling where you’ve done something so many times and it’s worked and then one day it just doesn’t? Yeah, I just had one of those.

I’m still a big fan of the PnP Modern Search Web Parts, just like I was last week or last year. To really make them sing in your solutions, you’ll end up creating Site Columns and using Content Types. I love those things, too, but this post isn’t about why.

Over the last few weeks, when I have created Site Columns, made sure they are included in Content Types, and added content using those Content Types, the Site Columns have not shown up as Crawled Properties in the SharePoint Admin Center (More features / Search [Open] / Manage Search Schema). They simply never show up. I’ve given it overnight, then a week, then two weeks.

The sequence here is important, so to reiterate:

  • Create your Site Columns
  • Add the Site Columns to Content Types
  • Add content using those Content Types – This is the one that bites many people, including me. No content, nothing to crawl!
  • The Site Columns show up as Crawled Properties

I swear this has been a reliable way to go from Site Columns to Managed Properties (after mapping to Refinable[Type]NN Managed Properties) for years. The ultimate goal in my case is to use those Managed Properties in search-driven solutions using the PnP Modern Search Web Parts. But of course, Managed Properties have other benefits as well.

I’ve been doing this for years, and I sorta feel like I know what I’m doing. I’m not proud, so I headed over to my MVP channels, and tagged people like Agnes Molnar (@molnaragnes) and Mikael Svenson (@mikaelsvenson) in a post asking whether something had changed.

Agnes pointed out an old post from Joanne Klein (@JoanneCKlein) entitled Crawled & Managed Properties in Modern Team Sites. Turns out there’s a kooky hole in things. I have no idea why this hasn’t gotten in my way before.

If you are creating your IA (my shorthand from Site Columns and Content Types, among other things) in a modern Team Site, it’s not good enough to be an Owner. As Joanne wrote, you also need to add yourself as a Site Collection Administrator directly. (Site Permissions / Advanced permissions settings / Site Collection Administrators)

Event though you’re in the Owners group, and the Owners group is in the Site Collection Administrators, you still need to add yourself directly.

Do that, kick off a re-index of the site in question, and within moments practically, your Crawled Properties will be ready to use. None of us are quite sure why this is, but it worked in two tenants for me today, one right after the other.


In case you’re wondering, once you have the Crawled Properties in place (below, ows_SiteName, ows_ExaminerName, and ows_Jurisdiction are Crawled Properties), you can map them to Managed Properties (RefinableString00, RefinableString01, and RefinableString02 below). Those Managed Properties can then be used as filters (nee refiners) in the PnP Modern Search Web Parts or elsewhere.


Mikael also pointed me to his post Tech and me: Mapping or clearing crawled property to managed property mappings using PowerShell (or code). This looks like it might help with this problem, but more likely is most useful when the Crawled Properties are not showing due to a different bug.

Thank you Joanne, Agnes, and Mikael!

Useful file handling commands in the SharePoint PnP PowerShell module

Last week I got a request from one of our customers to help them to move some of the files from one SharePoint library to another in different web. Sounds an easy and quick task, but the catch was that the library had ~ 12000 documents and 1500 folders and the customer also wanted to keep the Created, Created by, Modified and Modified by column values. The number of items that had to be moved was ~ 3500. Pointless to say that with such number of items the Explorer view is not working, the new OneDrive client does not support sync from SharePoint libraries yet and I still had to figure out how to effectively copy the metadata. The way to accomplish this is with PowerShell or with 3rd party migration tool. Since the customer had only this requirements and not migration of the version history for example, my weapon of choice was powershell.
In this post I wont to share a couple of SharePoint PnP PowerShell cmdlets that greatly helped me in writing my migration script. Bluesource is also a contributor to the PnP project, thanks to my colleague Pieter Veenstra.
The first thing I want to share is a new feature that came with the June 2016 release. It is the option to map SharePoint site as PSDrive. This is done at the begging using Connect-SPOnline with CreateDrive parameter. You will then get a PSDrive called SPO and a PSProvider also called SPO. See how it looks below.

As mentioned above you will connect to the site and you will be looking at the root web. The sub webs will be shown as folders. You can do many standard things in this PSDrive like listing items, copy, move and more. One thing I was unable to do is listing the items in lists with 5000+ items, it seems that the view threshold limitation is kicking in. The other thing is copy items from SPO drive to the local file system, this is because you cannot copy items from one drive to another if the PSProviders are different. Also it would have been nice if this SPO drive is persistent and you can access it in Windows Explorer, this is not available and I am not sure if it is possible. 
I did not used this in my script, but I think that it is nice to have and you can learn more about this and other improvements in the June 2016 Community Call.

Get-SPOFile - This is one very useful command that will help you to download a file by supplying the server relative url to it. This was easy task after I retrieved all items and their FileLeafRef and FileDirRef fields using the technique from my previous post

Ensure-SPOFolder - With this command you can get a folder by giving a web relative url to the folder. If the folder does not exist it will create it even if the folder is nested in other non-existing folders, they will be created as well.

Add-SPOFile - With this command you can upload a file by supplying web relative url of the folder, the file will be uploaded with the same name. If the folder does not exist this command will create it before uploading the file. Really nice command!

I hope that this was helpful!
❌
❌