Vue normale

Il y a de nouveaux articles disponibles, cliquez pour rafraîchir la page.
À partir d’avant-hierFlux principal

Using SharePoint as a Document Repository for Teams

Microsoft Teams has quickly become one of the most popular collaboration tools for businesses around the world. However, when it comes to managing documents and files, Teams has its limitations. In this blog post, we’ll explore how to use SharePoint as a document repository for Teams and discuss best practices for managing files and documents.

Understanding SharePoint as a Document Repository:

SharePoint is a powerful document management system that can be used to store, manage, and share documents and files. It provides a range of features and capabilities, including version control, co-authoring, and security controls. By using SharePoint as a document repository for Teams, you can take advantage of these features and provide a centralized location for all of your files and documents.

Setting Up SharePoint for Teams

Before you can use SharePoint as a document repository for Teams, you need to set it up properly. Here are the steps:

Create a SharePoint Site:

First, you need to create a SharePoint site where you’ll store your documents. This site should be configured with the appropriate permissions and security controls.

Create Document Libraries:

Next, you need to create document libraries within your SharePoint site. These libraries should be organized in a logical manner and should reflect the way your team works.

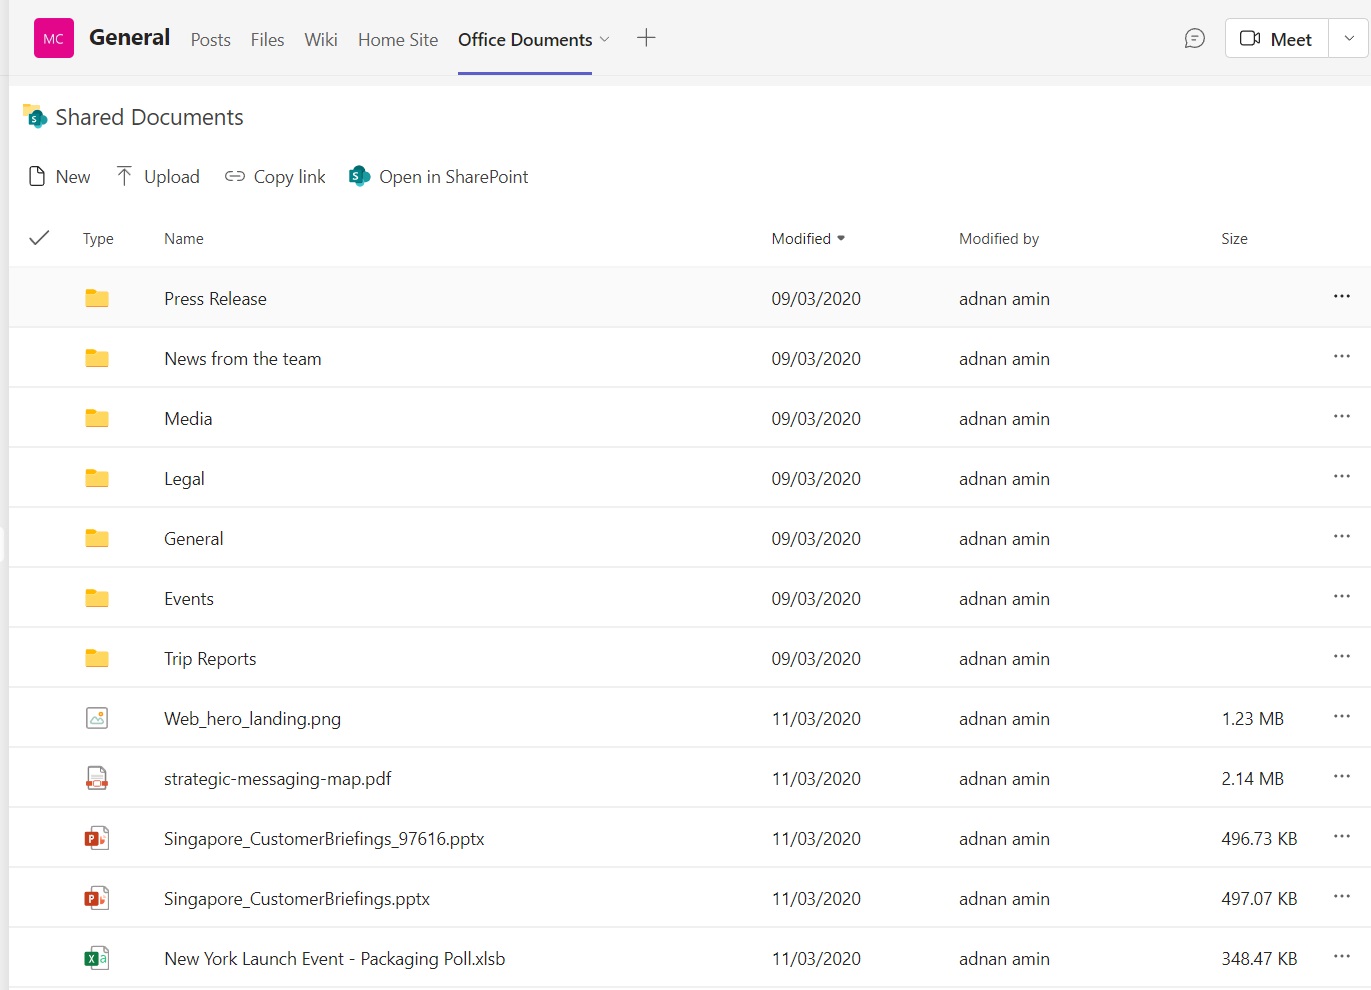
Connect SharePoint to Teams:

Once your SharePoint site and document libraries are set up, you can connect them to Teams. This can be done by adding the SharePoint site as a tab in a Teams channel.

Managing Documents in SharePoint

Now that your SharePoint site is set up and connected to Teams, you can start managing your documents. Here are some best practices for managing documents in SharePoint:

Use Version Control:

SharePoint provides version control, which allows you to keep track of changes made to a document over time. This is especially useful when multiple people are working on the same document.

Co-Author Documents:

SharePoint also provides co-authoring capabilities, which allow multiple people to work on a document at the same time. This is useful when collaborating on a document with your team.

Use Metadata:

Metadata can be used to categorize and organize documents within SharePoint. By using metadata, you can make it easier for team members to find the documents they need.

Set Permissions:

SharePoint provides a range of security controls that allow you to set permissions for your documents. By setting permissions, you can ensure that only the right people have access to sensitive documents.

By using SharePoint as a document repository for Teams, you can take advantage of its powerful document management capabilities and provide a centralized location for all of your files and documents. With proper setup and management, SharePoint can be a valuable tool for any team looking to collaborate on documents and files.

The post Using SharePoint as a Document Repository for Teams appeared first on MS Technology Talk.

Integrating SharePoint and Teams for Better Collaboration: Best Practices

SharePoint and Teams are two powerful collaboration tools in the Microsoft suite. SharePoint is a content management and collaboration platform that provides organizations with document libraries, lists, workflows, and other features that make it easy to share and manage content. Teams is a chat-based collaboration platform that brings together people, conversations, and content in a virtual workspace. By integrating these two platforms, you can unlock even greater collaboration capabilities. In this blog post, we’ll explore how to integrate SharePoint and Teams and discuss best practices for using them together.

Understanding the Benefits of Integrating SharePoint and Teams:

The integration of SharePoint and Teams provides a seamless collaboration experience, allowing users to work together in one unified environment. Here are some of the benefits of integrating SharePoint and Teams:

Access SharePoint Content in Teams:

With the integration of SharePoint and Teams, you can easily access SharePoint content within Teams. This means that you can collaborate on documents, lists, and other content without having to leave Teams.

Collaborate on SharePoint Content:

You can collaborate on SharePoint content with your team members in real-time within Teams. This enables team members to work together more efficiently, and it ensures that everyone is on the same page.

Improved Communication:

With the integration of SharePoint and Teams, you can communicate with team members using Teams chat, voice, and video features. This makes it easier to collaborate on content and discuss ideas in real-time.

Setting up the Integration Between SharePoint and Teams:

To integrate SharePoint and Teams, you need to set up a few things. Here’s a step-by-step guide:

Set up a SharePoint site:

The first step is to set up a SharePoint site that you want to integrate with Teams. You can do this by going to SharePoint Online and creating a new site.

Create a Team:

Next, you need to create a new Team in Teams. This will be the virtual workspace where you and your team members will collaborate.

Add the SharePoint site to Teams:

Once you have created the Team, you need to add the SharePoint site to it. You can do this by selecting the “Add cloud storage” option within the Files tab of the Team.

Collaborate on SharePoint content in Teams:

Now that you have set up the integration between SharePoint and Teams, you can collaborate on SharePoint content within Teams. You can access SharePoint files and lists from the Files and Lists tabs of the Team. You can also create new documents and lists directly from within Teams.

Exploring the Capabilities of the SharePoint and Teams Integration

The integration of SharePoint and Teams provides a wide range of capabilities that can enhance collaboration in your organization. Here are some of the key capabilities of the integration:

Co-authoring:

With the integration of SharePoint and Teams, you can co-author documents in real-time with your team members. This means that multiple people can work on the same document at the same time, making collaboration more efficient.

Access control:

SharePoint provides powerful access control features that allow you to control who can access and edit content. With the integration of SharePoint and Teams, you can apply these access control features to the content that you collaborate on in Teams.

Mobile access:

With the integration of SharePoint and Teams, you can access SharePoint content from anywhere using the Teams mobile app. This means that you can collaborate on content with your team members even when you’re on the go.

Integrating SharePoint and Teams provides a powerful collaboration experience that can enhance productivity and improve communication in your organization. By following these best practices for integrating SharePoint and Teams, you can collaborate on content in real-time, improve communication, and achieve better results.

The post Integrating SharePoint and Teams for Better Collaboration: Best Practices appeared first on MS Technology Talk.

Mastering SharePoint Modern Lists: Tips and Tricks for Efficient Usage and Formatting

SharePoint modern lists are one of the most powerful tools that allow you to create, manage, and share information with your team in a highly customizable manner. With the latest updates, it has become even easier to use SharePoint modern lists and customize them to suit your needs. In this blog post, we will take a look at some tips and tricks for using SharePoint modern lists efficiently and formatting them to your liking.

Tips for Using SharePoint Modern Lists Efficiently

Use Custom Views

One of the most efficient ways to use SharePoint modern lists is to create custom views. Custom views allow you to filter, sort, and group your data to suit your needs. For example, if you have a large list of sales data, you can create a custom view that only shows sales from a particular region or salesperson. This makes it easier for you to analyze your data and identify trends.

Use Quick Edit Mode

SharePoint modern lists come with a built-in Quick Edit mode that allows you to edit data directly in the list. This is a faster and more efficient way to update your data, especially if you need to make multiple changes at once. To use Quick Edit mode, simply click on the Quick Edit button on the toolbar.

Use Column Formatting

Column formatting allows you to customize the appearance of your list columns. You can use column formatting to change the font size, color, and background color of your data, as well as add icons and images. This makes it easier for you to visualize your data and identify important information at a glance.

Formatting SharePoint Modern Lists

Use the Column Settings Menu

To format your SharePoint modern list, you can use the Column Settings menu. The Column Settings menu allows you to modify the display settings of your list columns, such as the column name, data type, and default value. You can also use the Column Settings menu to create custom validation rules and set up calculated columns.

Use JSON Customization

JSON customization allows you to create highly customized SharePoint modern lists. With JSON customization, you can modify the appearance and behavior of your list, such as changing the background color, font size, and alignment of your data. To use JSON customization, you will need to have some programming knowledge, but there are many resources available online that can help you get started.

Use Power Apps

Power Apps is a powerful tool that allows you to create custom apps and forms for your SharePoint modern lists. With Power Apps, you can customize the appearance and behavior of your list to suit your needs. For example, you can create a custom form that only shows certain fields based on the user’s role, or create a custom app that allows users to view and edit data on their mobile devices.

SharePoint modern lists are a powerful tool that can help you manage and share information with your team. By using custom views, Quick Edit mode, and column formatting, you can use SharePoint modern lists more efficiently. And by using the Column Settings menu, JSON customization, and Power Apps, you can customize the appearance and behavior of your list to suit your needs. With these tips and tricks, you can become a master of SharePoint modern lists and take your team’s productivity to the next level.

The post Mastering SharePoint Modern Lists: Tips and Tricks for Efficient Usage and Formatting appeared first on MS Technology Talk.

How to optimize SharePoint online Search for better for better results

SharePoint Online provides a powerful search engine that enables users to quickly find the information they need. However, the quality of search results depends largely on how well the site is optimized for search. In this blog post, we’ll explore some best practices for optimizing your SharePoint Online site for better search results and also discuss PowerShell scripts that can help you achieve this.

Use Managed Metadata:

Managed metadata is a hierarchical collection of centrally managed terms that can be used to tag content in SharePoint Online. By using managed metadata, you can ensure that your content is consistently labeled, which can improve the accuracy of search results. PowerShell script can be used to create and manage term sets and terms.

Customize Search Refiners:

Search refiners are used to filter search results based on specific criteria such as file type, author, or date. By customizing search refiners, you can make it easier for users to find the information they need. PowerShell script can be used to create custom refiners based on managed metadata.

Optimize Page Titles and Descriptions:

The page titles and descriptions are used by the search engine to index the content of the page. By optimizing these elements with relevant keywords, you can improve the visibility of your pages in search results. PowerShell script can be used to update page titles and descriptions.

Use Friendly URLs:

Friendly URLs are human-readable web addresses that are easy to remember and type. By using friendly URLs, you can make it easier for users to find your content and improve the visibility of your site in search results. PowerShell script can be used to set friendly URLs for pages and sites.

Enable Searchable PDFs:

PDF files are a common format for documents, but they are not always searchable by default. By enabling the searchability of PDF files, you can ensure that their content is included in search results. PowerShell script can be used to enable PDF search in SharePoint Online.

By following these best practices and using PowerShell scripts, you can optimize your SharePoint Online site for better search results. PowerShell scripts can help you automate the process of managing and optimizing your site for search, making it easier and more efficient to achieve your search optimization goals.

The post How to optimize SharePoint online Search for better for better results appeared first on MS Technology Talk.

Building Custom SharePoint Solutions to Meet Your Business Needs

SharePoint is a powerful platform for building custom solutions that meet the unique needs of your business. One way to extend SharePoint’s functionality is by creating custom web parts. A web part is a modular component that can be added to a SharePoint page to display information or perform a specific function. In this blog post, we’ll explore how to create custom web parts in SharePoint to build custom solutions for your business needs.

Planning Your Custom Web Part

Before you begin building your custom web part, it’s important to plan out the requirements and functionality you need. This includes identifying the data sources, user interface, and any other features that you want your web part to include. Some questions you may want to consider during the planning phase include:

  • What data sources will your web part use?
  • How will users interact with your web part?
  • Will your web part require any custom logic or functionality?

Creating Your Custom Web Part Using Out-of-the-Box Features

SharePoint provides several out-of-the-box web parts that you can use as a starting point for your custom web part. These web parts include the Content Editor, Image Viewer, and Script Editor web parts, among others. You can customize these web parts by modifying their properties or adding your own code. To create your custom web part using out-of-the-box features, follow these steps:

  • Navigate to the page where you want to add your web part and click the Edit button.
  • Click the Insert tab on the ribbon and select the web part you want to modify.
  • Modify the properties of the web part or add your own code using the Script Editor web part.

Creating Your Custom Web Part Using PowerApps

PowerApps is a low-code platform that allows you to create custom web parts without writing code. With PowerApps, you can create custom forms, dashboards, and other components that can be added to a SharePoint page. To create your custom web part using PowerApps, follow these steps:

  • Navigate to the PowerApps portal and create a new canvas app.
  • Design your app by adding screens, forms, and other components.
  • Publish your app to SharePoint by selecting the PowerApps option on the Insert tab in the SharePoint ribbon.

Creating Your Custom Web Part Using SPFx

The SharePoint Framework (SPFx) is a modern development framework that allows you to build custom web parts using modern web technologies such as React, Angular, and TypeScript. With SPFx, you can create powerful, dynamic web parts that can be added to any SharePoint page. To create your custom web part using SPFx, follow these steps:

  1. Install the necessary tools and dependencies for SPFx development.
  2. Create a new SPFx web part project using the Yeoman generator.
  3. Develop your web part by adding components, styling, and logic.
  4. Deploy your web part to SharePoint by packaging it as a SharePoint solution and uploading it to the SharePoint app catalog.

Creating custom web parts in SharePoint can be a powerful way to extend SharePoint’s functionality and build custom solutions for your business needs. Whether you use out-of-the-box features, PowerApps, or SPFx, you have the flexibility and power to create web parts that are tailored to your organization’s unique requirements. By planning out your requirements and following best practices for development, you can create web parts that deliver real value to your organization.

The post Building Custom SharePoint Solutions to Meet Your Business Needs appeared first on MS Technology Talk.

❌
❌